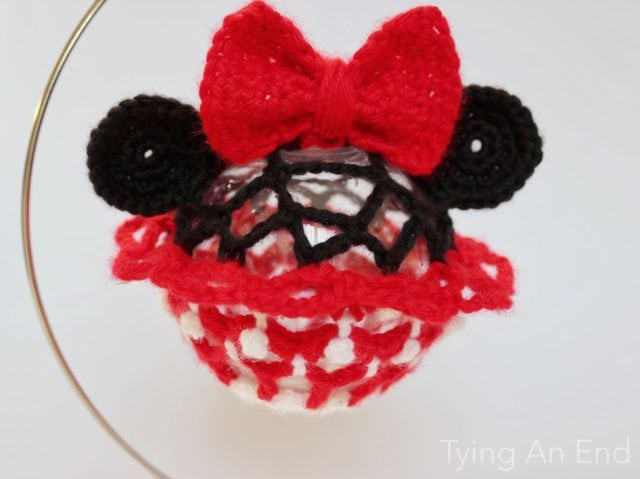
Minnie Christmas Ornament
Happy holidays, everyone!
Christmas is about a month away! I love seeing Christmas decorations and hearing Christmas music everywhere you go!
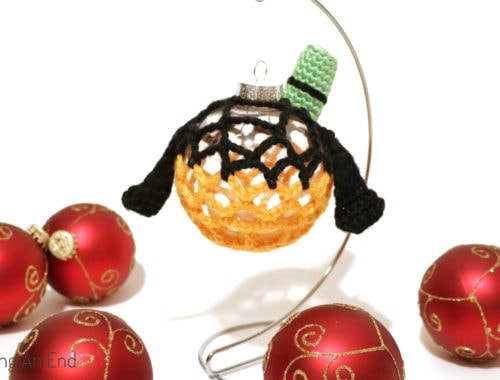
Last year, I made Mickey Christmas Ornament because one of my Christmas tree dream is to decorate it with Disney theme. I was able to make only Mickey last year so this year’s goal for the ornaments to make at least 3 characters! I love Disney, and I wish I live right by the park so I can go there anytime I want! That’s how much I love it!
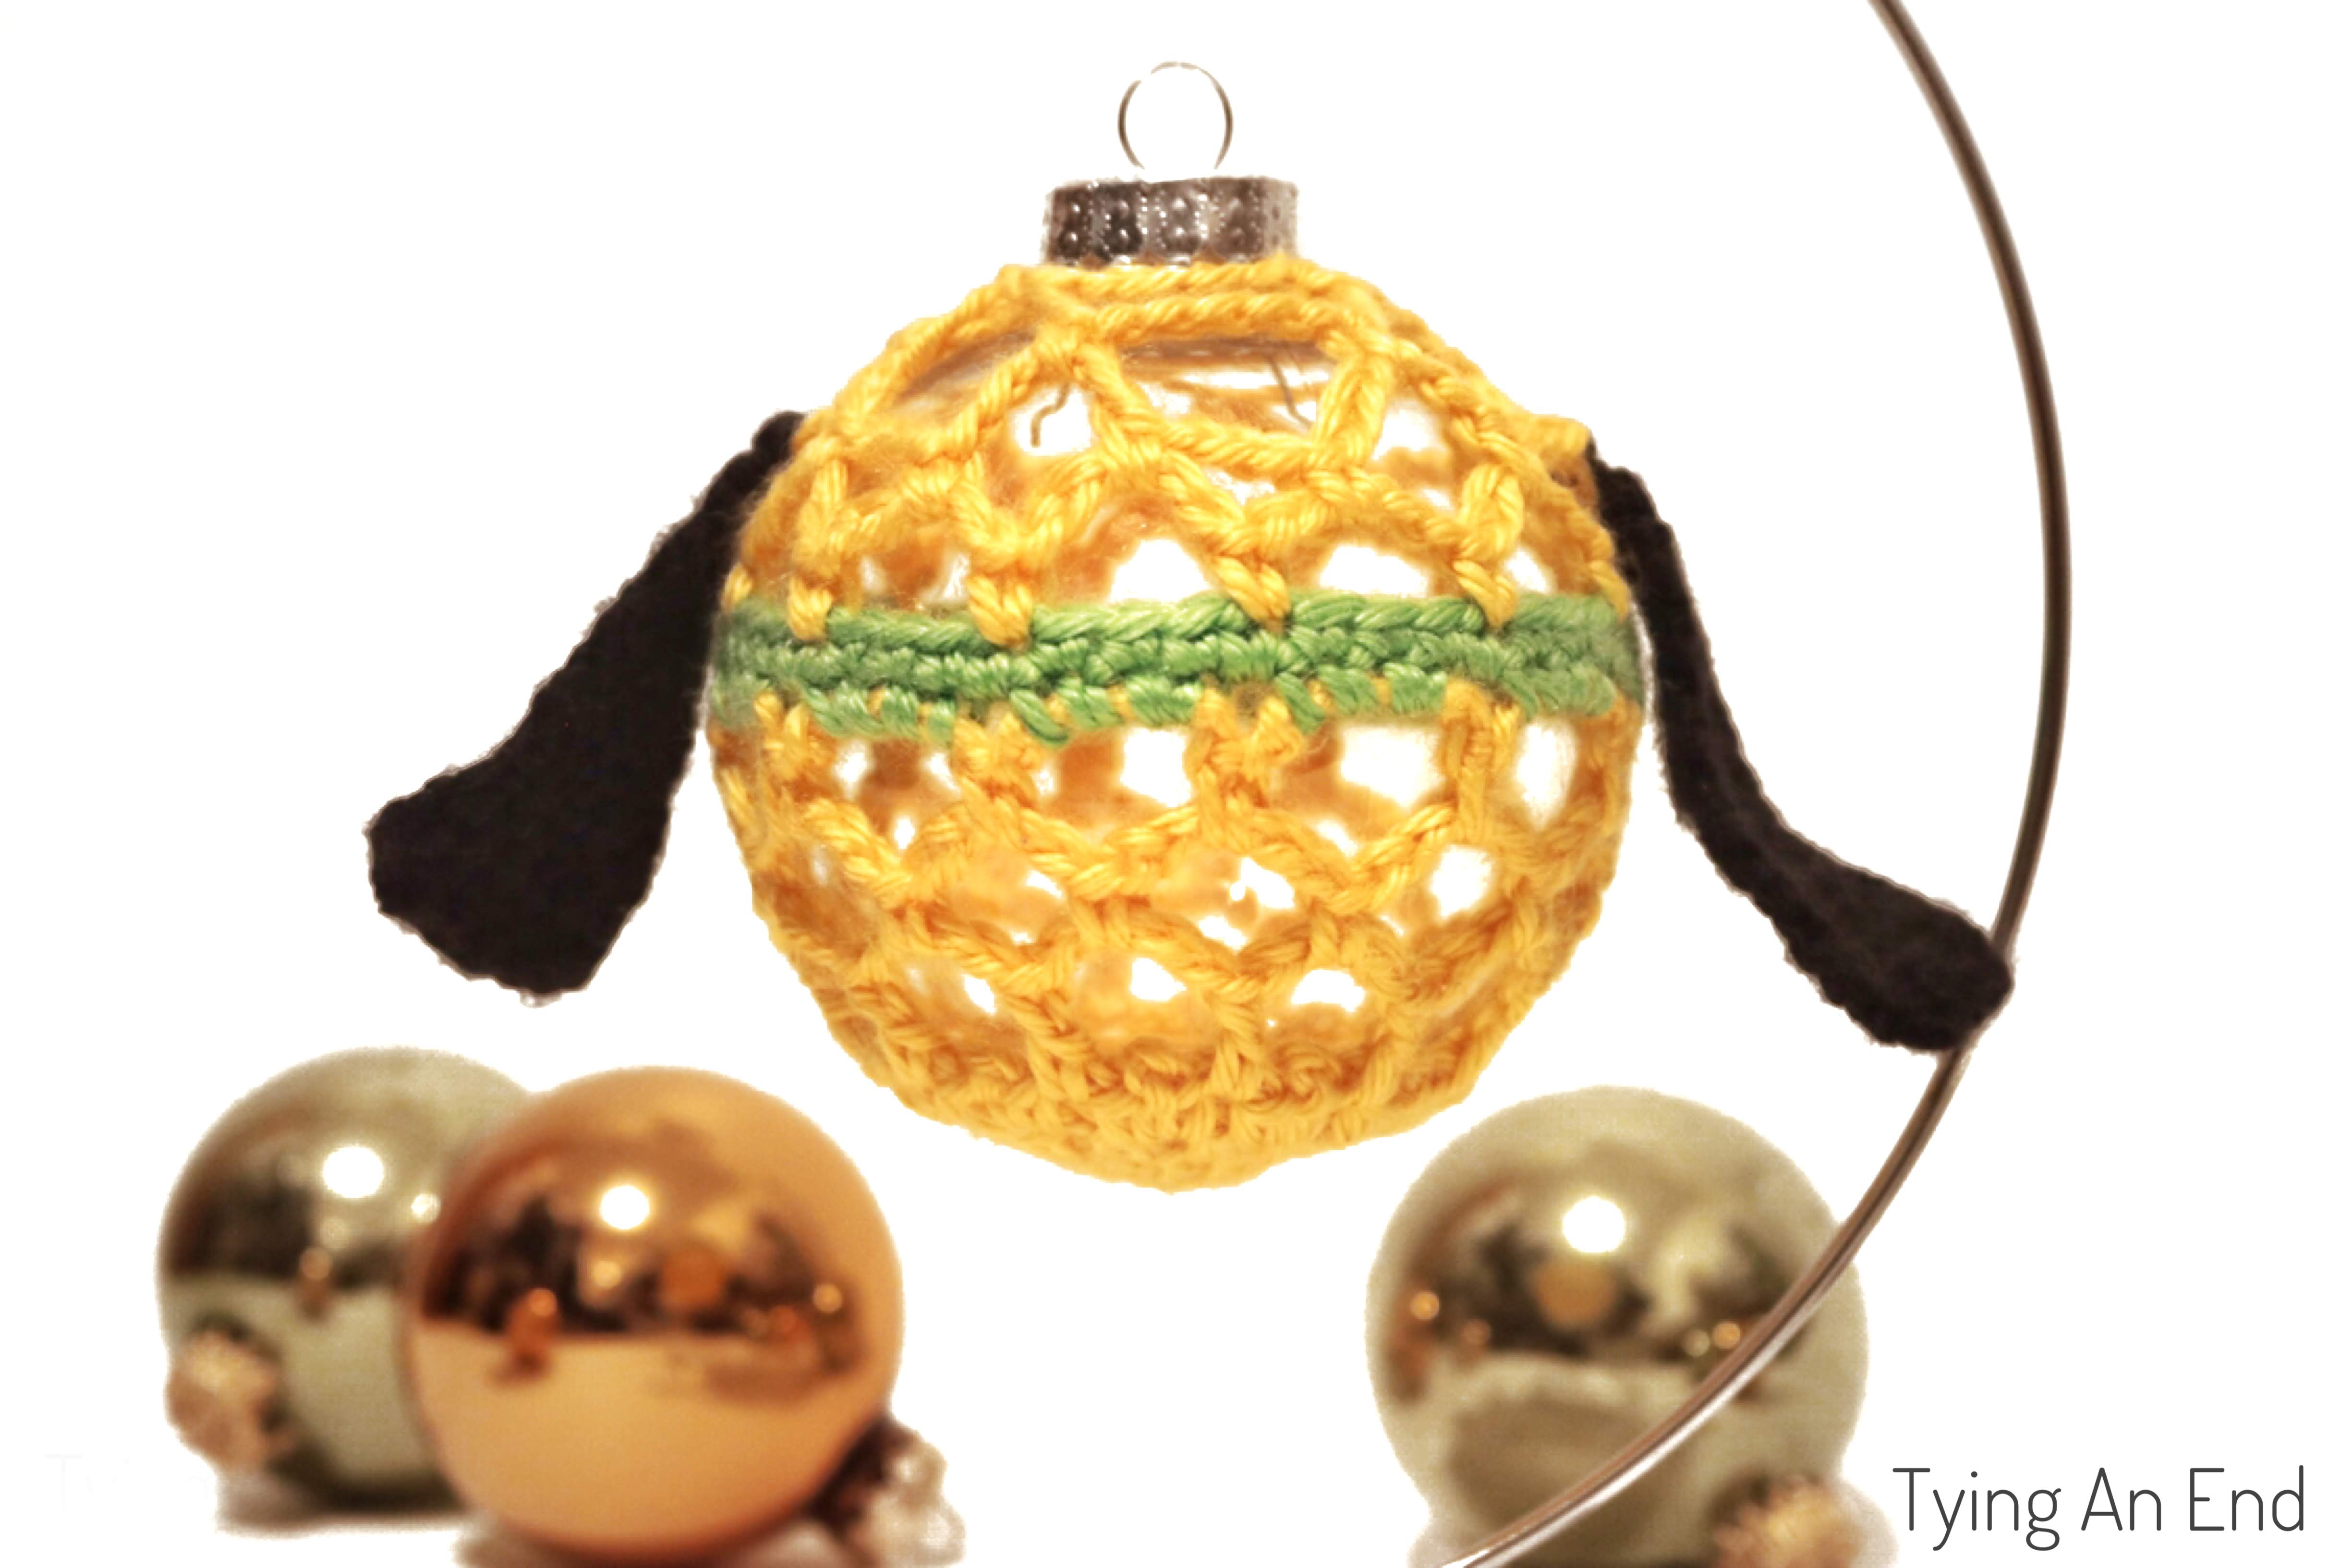
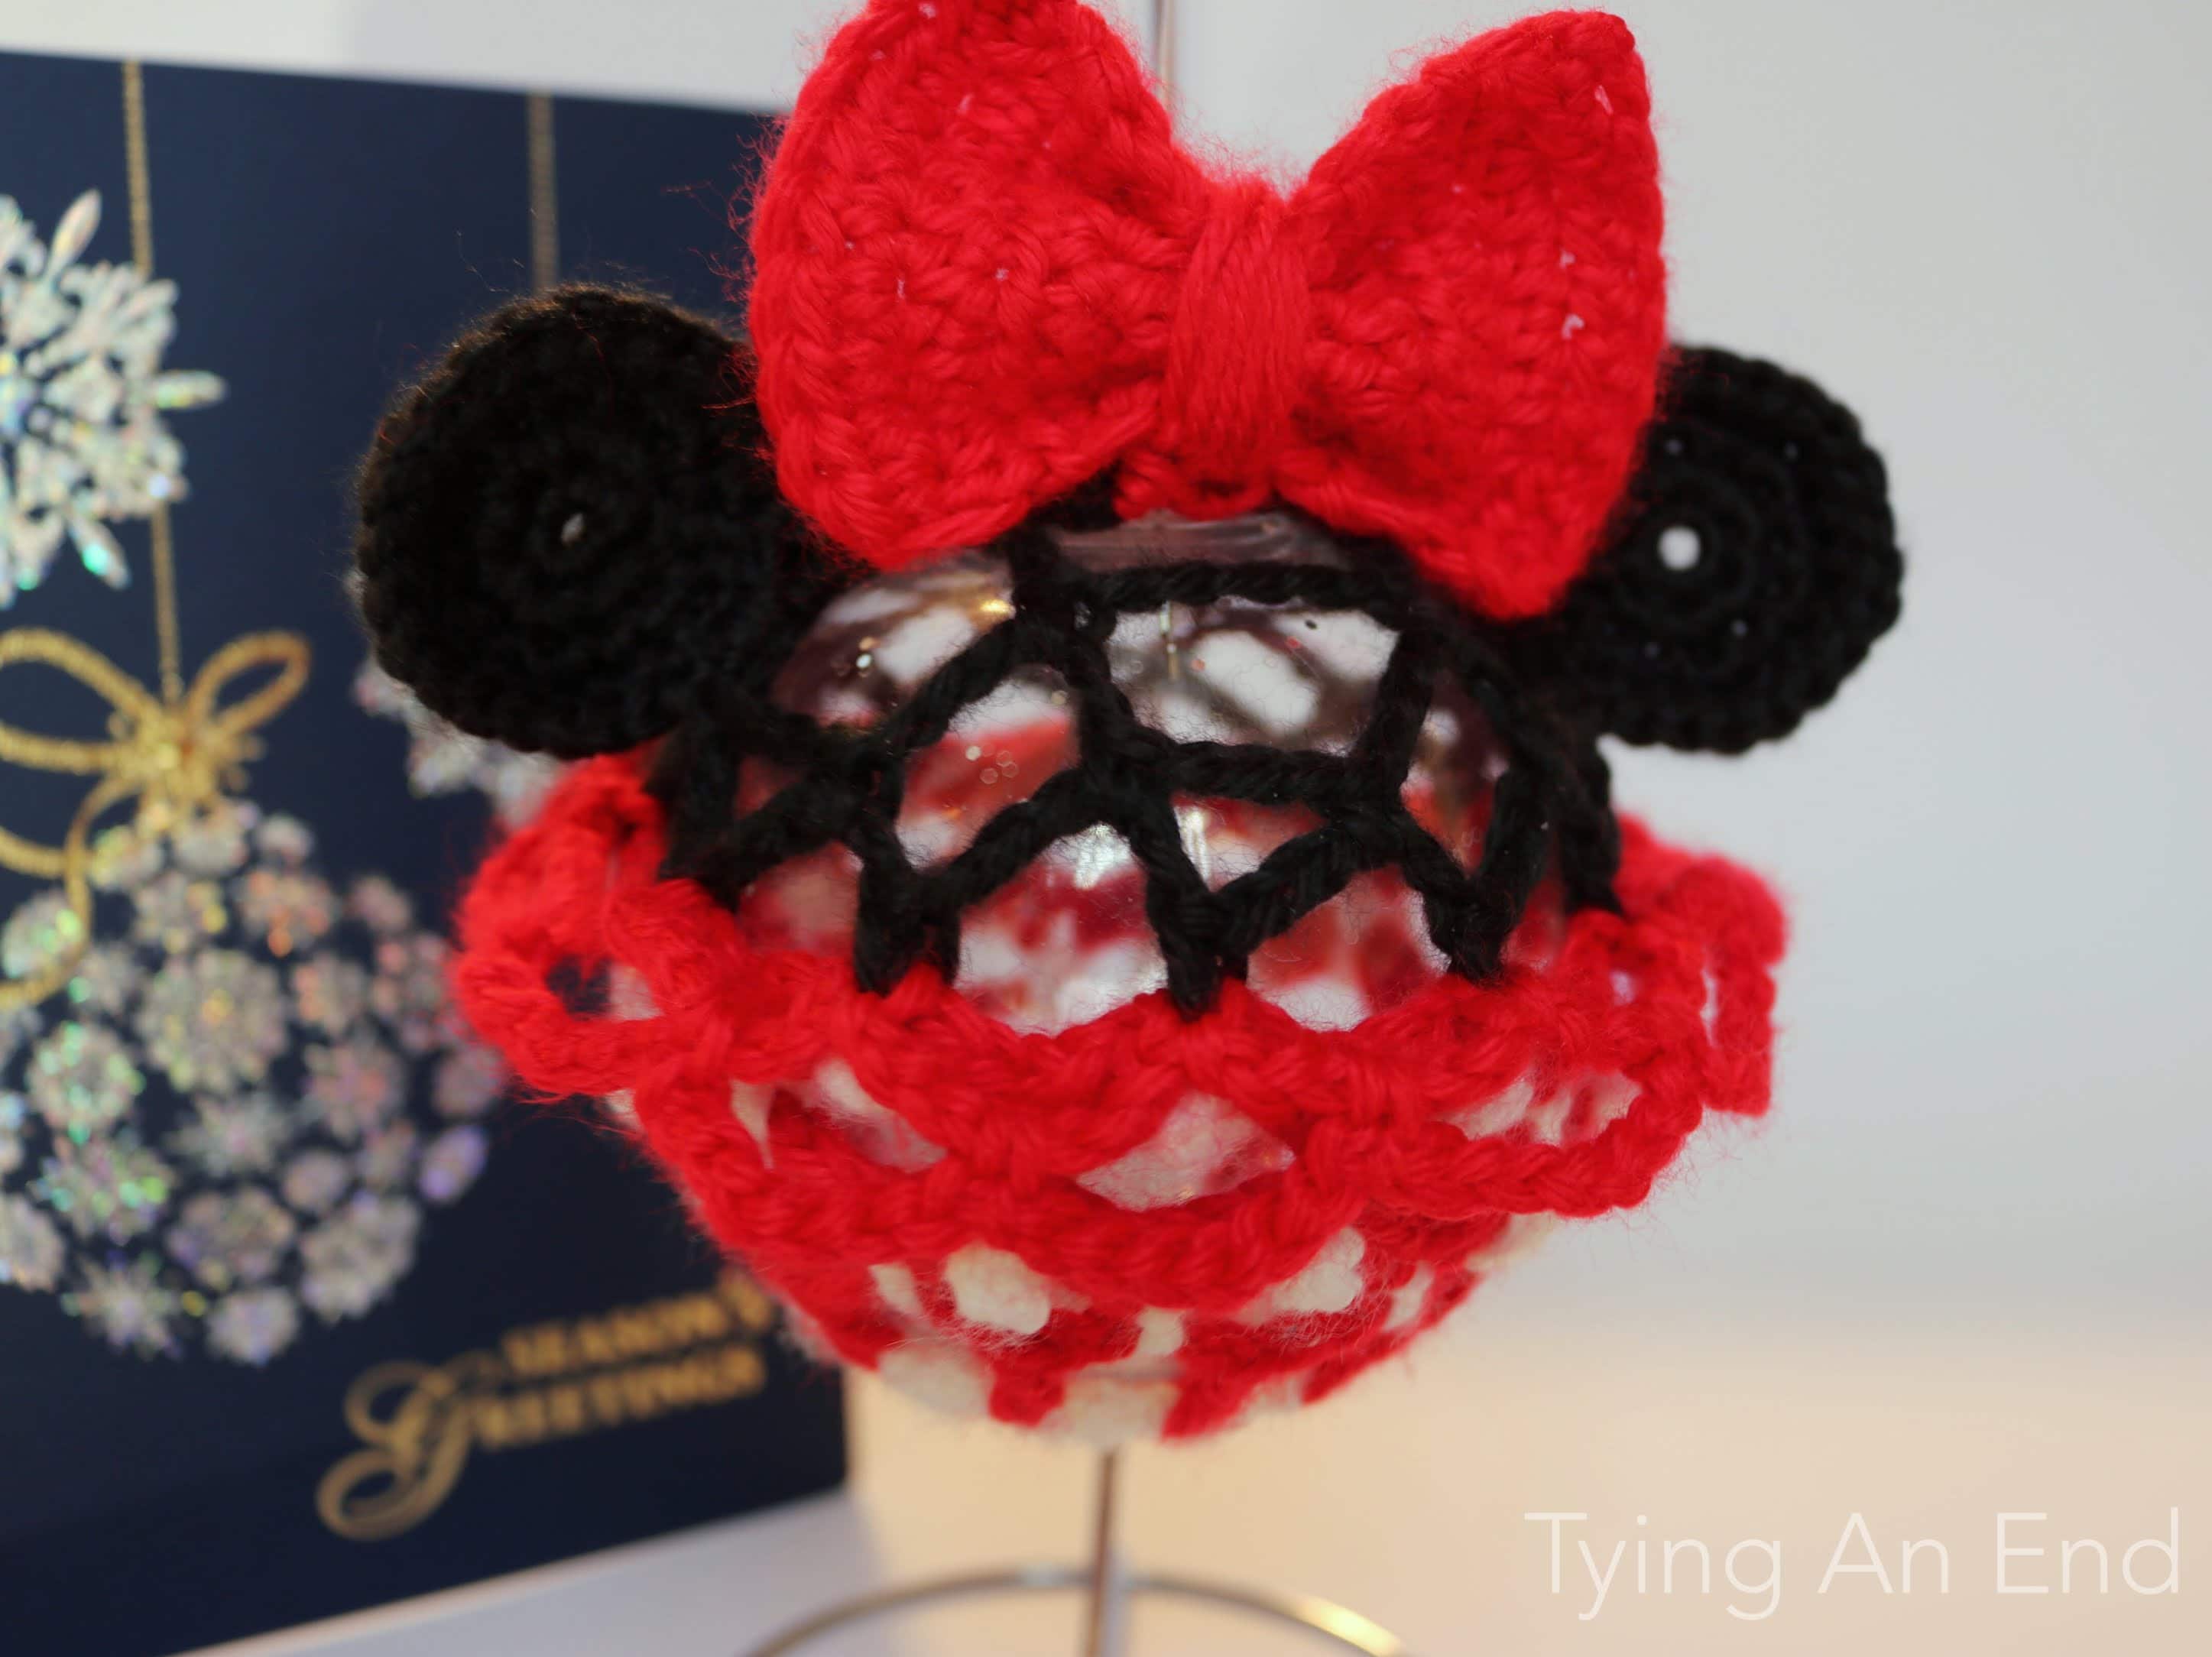
So to continue my Disney Christmas ornament series, next up is Minnie Mouse!

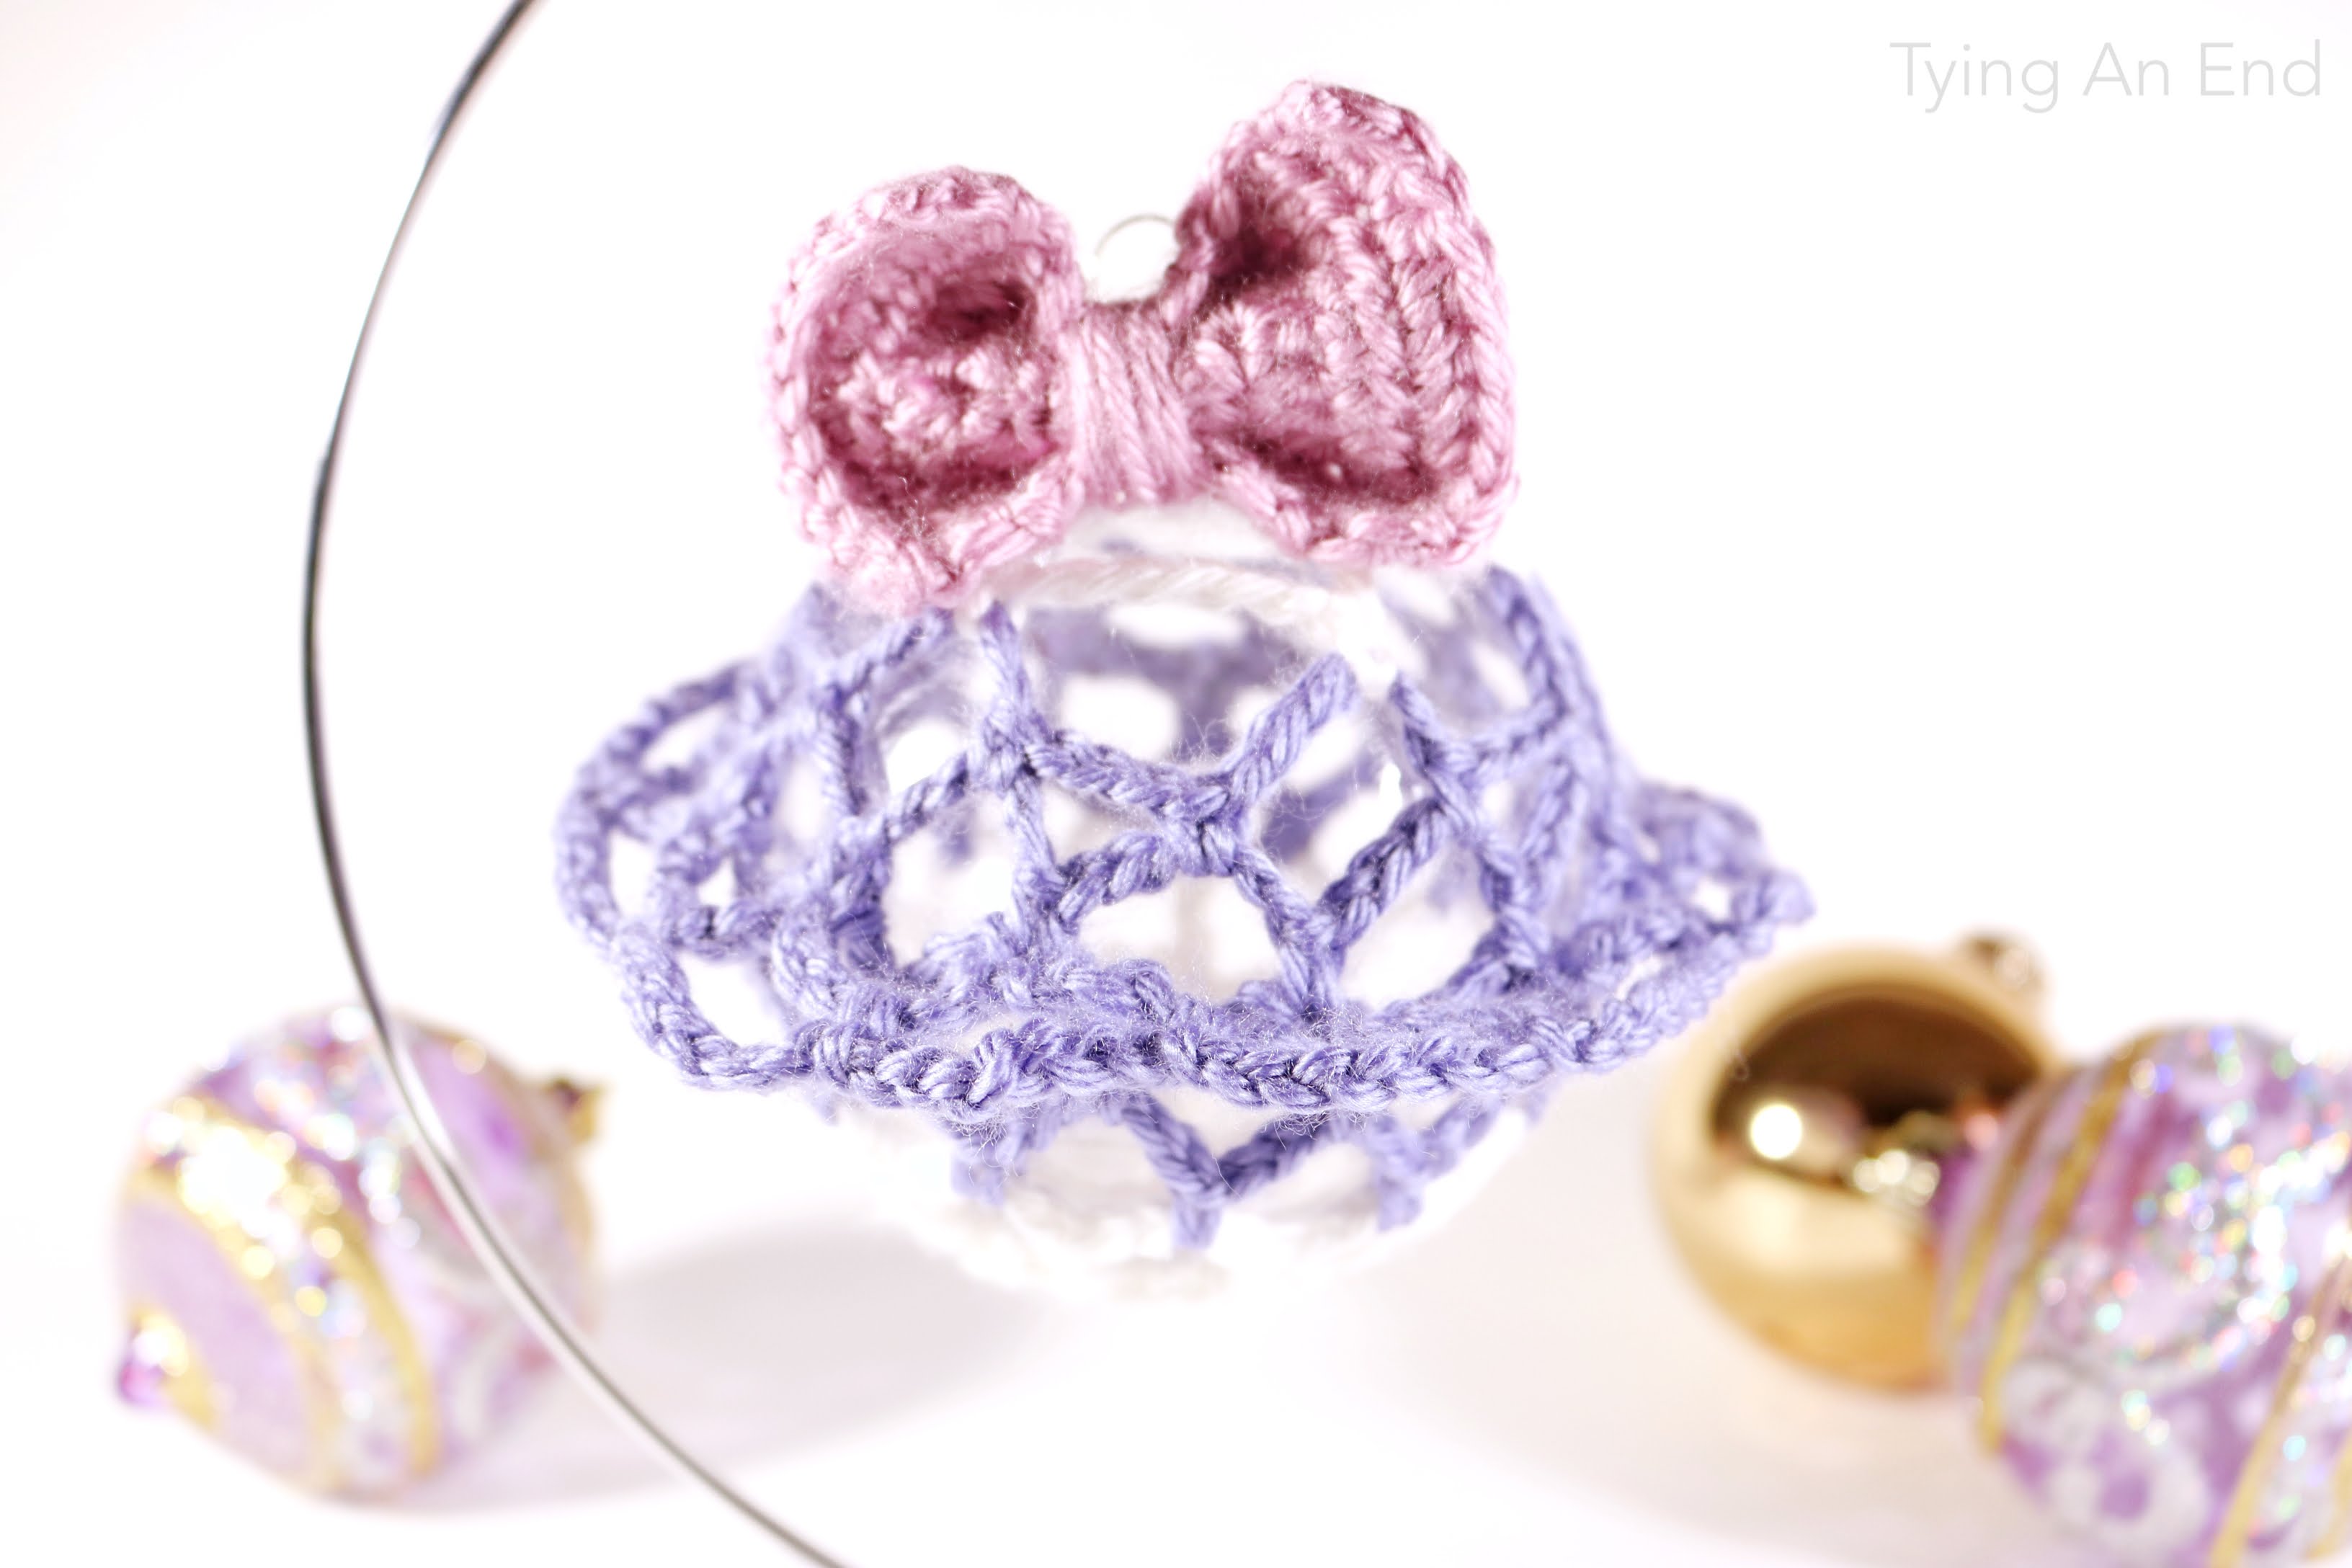
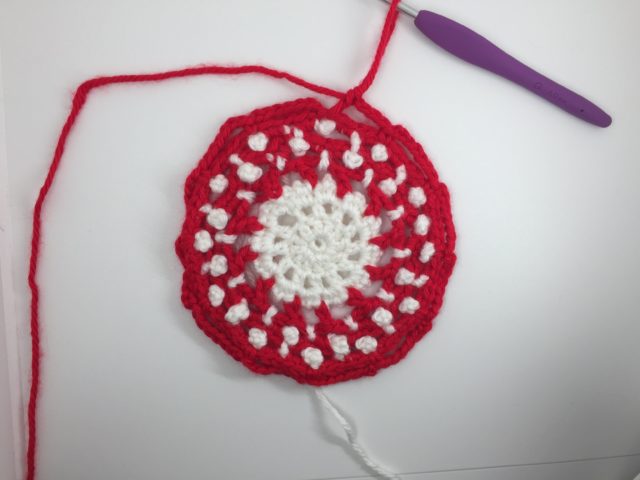
I feel like this was one of the hardest design process I made so far. Since Minnie is known for polka dot dress and ribbon, I wanted to incorporate that into this ornament. It was difficult to make polka dot design because the ornament is design as a mesh, not solid, fully covered. I’ve seen Minnie motif/designs without polka dots, but I decided to go with polka dot design. I wanted to challenge myself a little. I wanted the ribbon to have polka dots as well, but because of the size of the ribbon, I just couldn’t get the look I wanted. Ribbon is solid red, but I’m satisfied with the way it turned out.

Solid red ribbon still looks adorable! I wanna give a high-five to myself for putting skirt on it as well! More I stare at my ornament, I love it more and more! Each and every little details I added to look like Minnie Mouse is making me so happy!

I also had fun time taking photos of this ornament. My brother helped me with the photoshoot, and I learned little bit about camera. It seems easy, but it’s difficult…at least for me. I’m so used to taking photos with my iPhone, and the quality is definitely different. Photo shoot is something I need more practice with to get better, just like I practiced my crochet and got to where I am now!
I hope everyone is enjoying preparing for Christmas!! Here’s free pattern for Minnie Christmas Ornament. Enjoy!

Materials:
- Caron Simply Soft
- black
- red
- white
- 1 plastic ball ornament (83mm/about 3.25in)
- US G/4mm crochet hook
- Stitch markers (optional)
- Glitter (optional)
Notes:
- You’re going to work in joined round.
- Number in [ ] indicates number of stitches in that round.
- You are going to carry over red and white yarn in Round 4 through 9. The spruce explains very nicely on how to change colors!
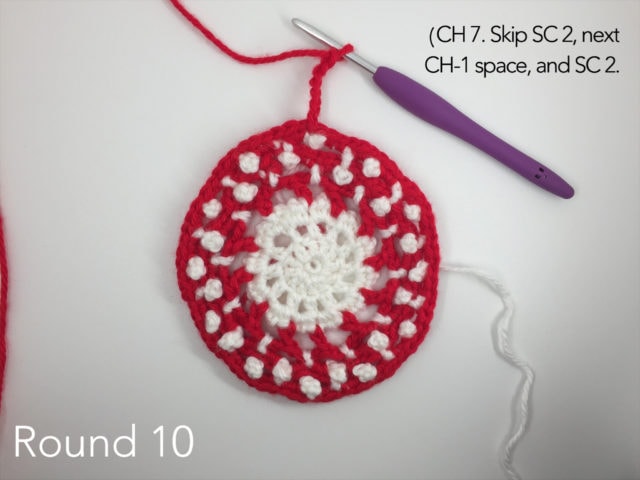
- Round 10 and 11 is for skirt. It is optional, but it would look so much cuter if skirt is added. If you decide not to make a skirt, please skip Round 10 and 11 and continue on to Round 12.
- Size – 83mm (about 3.25in)
- You can put glitters if you like. It’ll look pretty with it because you can see inside the ball!
- If you have a yarn weight #3 light, that works as well. (I actually used Bernat Softee Baby for white)
- Please DO NOT sell this pattern and finished product because Minnie Mouse is licensed by Disney. It is illegal to sell their trademark character without getting their permission. Please make this ONLY for your personal use such as making for yourself and giving as a gift for someone close to you.
Abbreviations:
- CH – chain stitch
- SC – single crochet
- HDC – half double crochet
- DC – double crochet
- P – picot stitch (CH 3, SL ST to 4th CH from hook)
- SL ST – slip stitch
- YOH – yarn over hook
Instructions:
– Body –
Round 1 – With white yarn, SC 6 in magic ring. SL ST to 1st SC. [6]
Round 2 – CH 3 (count as 1 DC). DC in 1st SC. (2 DC in next SC)*. Repeat * 4 times. SL ST to 3rd CH of CH-3. [12]
Round 3 – CH 4 (count as 1 HDC and 2 CH). HDC in 1st DC. (CH 2. HDC in next DC)*. Repeat * 9 times. CH 2. SL ST to 2nd CH of CH-4.
Round 4 – CH 1. (SC. CH 2. SC) in CH-4 space. [CH 2. (SC. CH 2. SC) in CH-2 space]*. Repeat * 10 times. CH 2. SL ST to CH 1. (You will hide the carried over yarn from this round with yarn end from next round)
Round 5 – With red yarn, CH 7 (count as 1 DC and 4 CH) at SL ST from previous round. DC in 2nd CH-2 space. (CH 4. Skip SC, next CH-2 space and SC. DC in next CH-2 space)*. Repeat * 9 times. CH 1. DC in 3rd CH of CH 7.
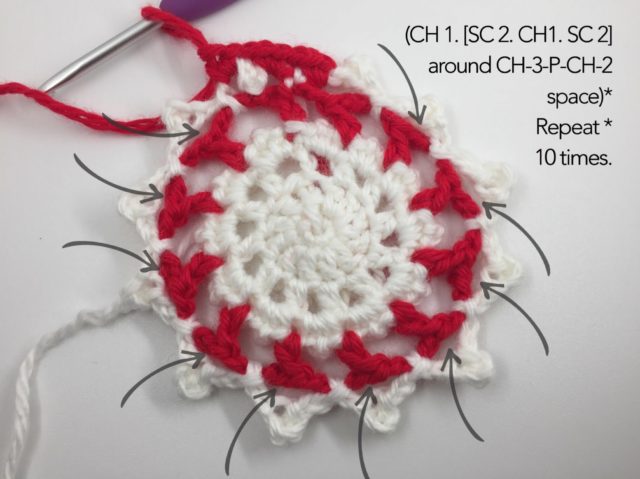
Round 6 – With white yarn, (CH 3. P. CH 2. SL ST to CH-4 space)*. Repeat * 10 times. CH 3. P. DC in DC from previous round.
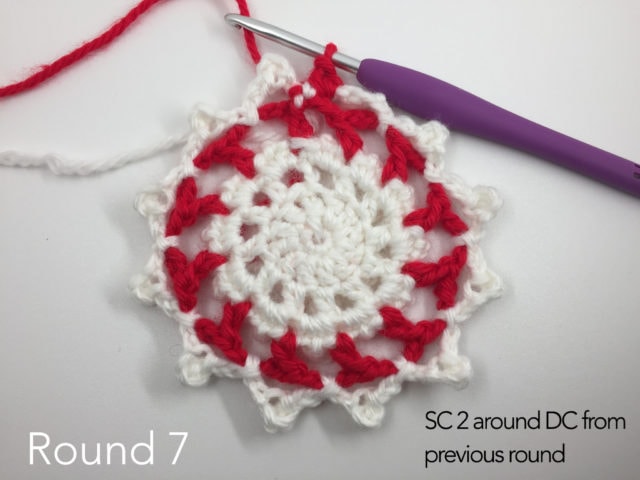
Round 7 – With red yarn, SC 2 around DC from previous round. (CH 1. [SC 2. CH 1. SC 2] around CH-3- P-CH-2 space)*. Repeat * 10 times. CH 1. SC 2 around CH-3 from previous round. CH 1. SL ST to 1st SC.
For [SC 3. CH 1. SC 3], make sure CH 1 goes behind the picot stitch.
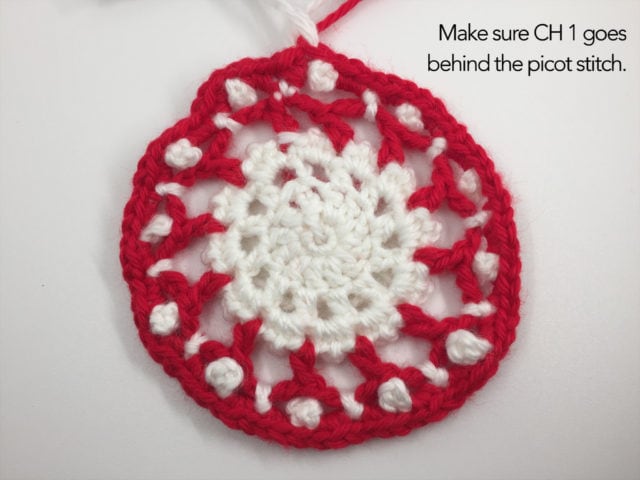
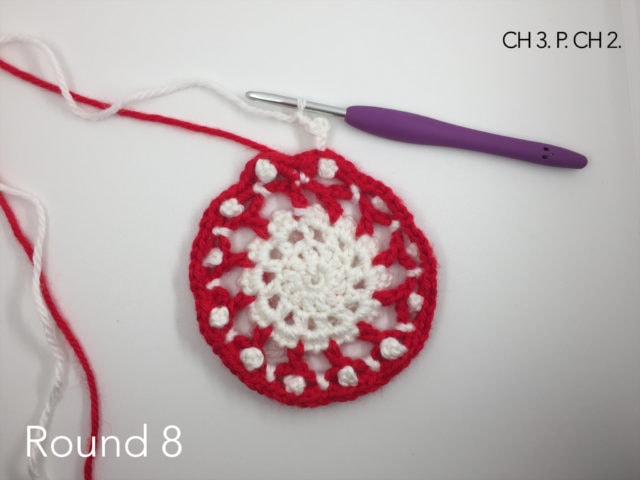
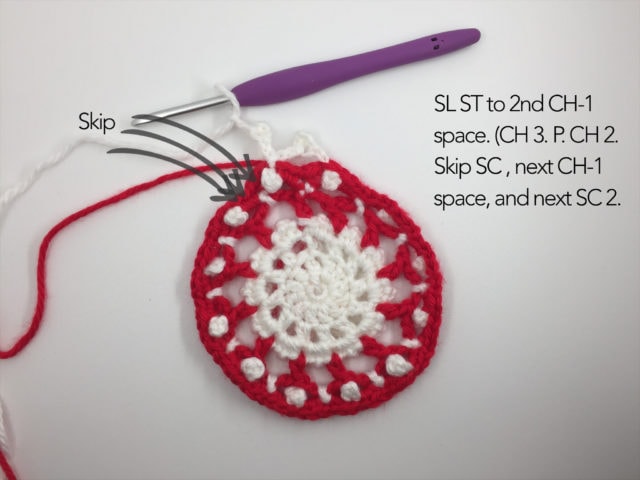
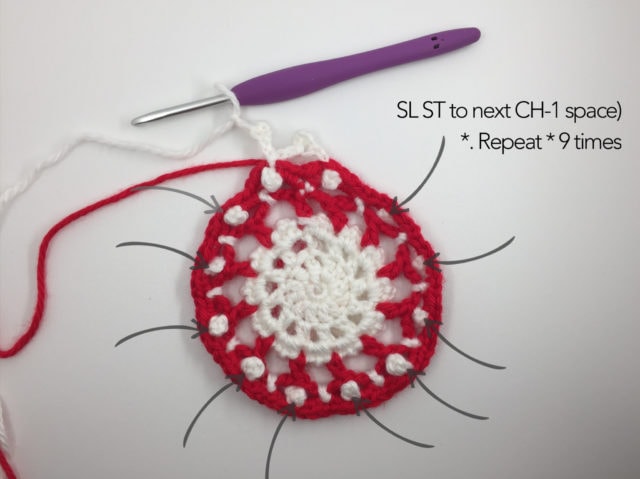
Round 8 – With white yarn, CH 3. P. CH 2. SL ST to 2nd CH-1 space (which is right above the picot stitch). (CH 3. P. CH 2. Skip SC 2, next CH-1 space, and next SC 2. SL ST to next CH-1 space)*. Repeat * 9 times. CH 3. P. DC in next CH-1 space.
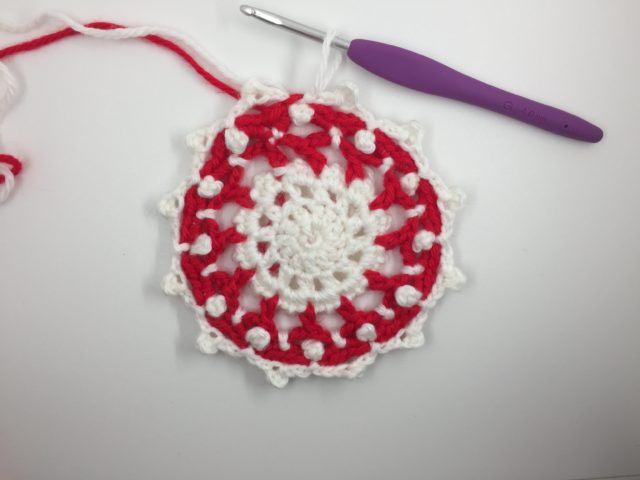
Round 9 – Repeat Round 7.
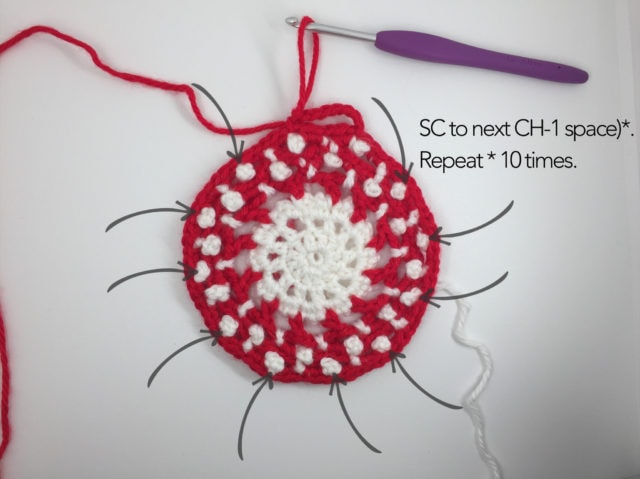
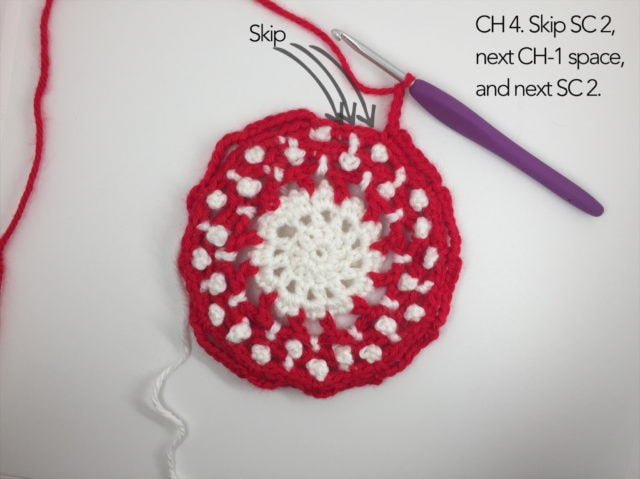
Round 10 – (CH 7. Skip SC 2, next CH-1 space, and next SC 2. SC to next CH-1 space)*. Repeat * 10 times. CH 4. Skip SC 2, next CH-1 space, and next SC 2. DC in next CH-1 space.
Round 11 – (CH 7. SL ST to CH-7 space)*. Repeat * 10 times. CH 7. SL ST to DC from previous round. Fasten off both red and white yarn.
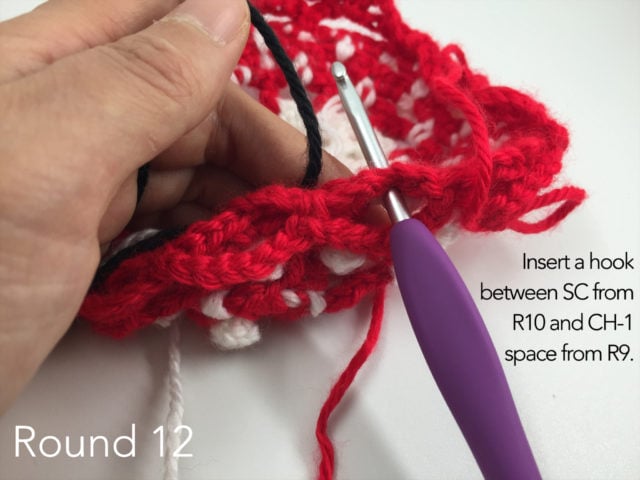
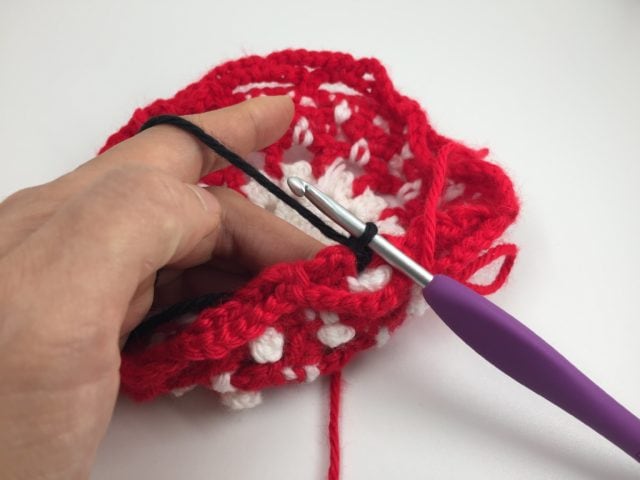
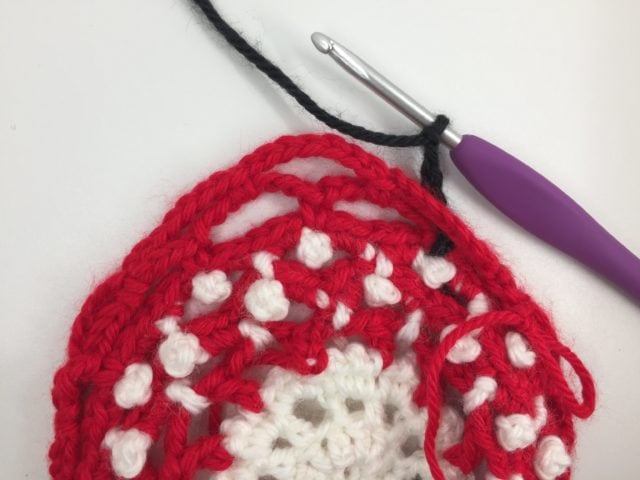
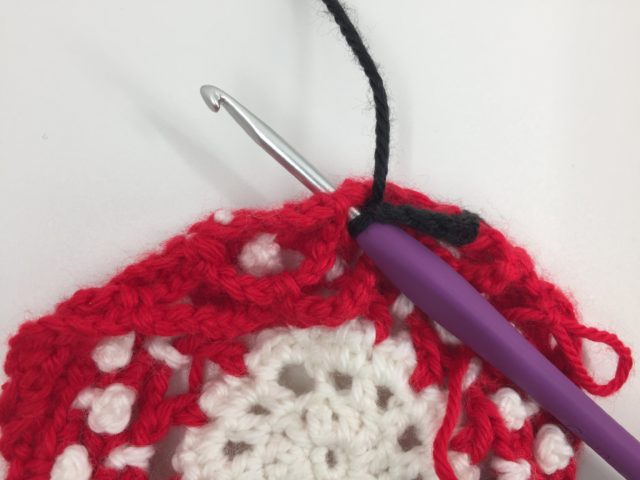
Round 12 – With black yarn, fold the skirt part towards right side and insert a hook between SC from Round 10 and CH-1 space from Round 9. Pull up a loop. (CH 5. SC in between next SC from Round 10 and CH-1 space from Round 9)*. Repeat * 10 times. CH 2. DC in 1st CH of CH-5.

Round 13 – (CH 3. SC in CH-5 space. CH 5. SC in next CH-5 space)*. Repeat * 4 times. CH 3. SC in next CH-5 space. CH 2. DC in DC from last round.
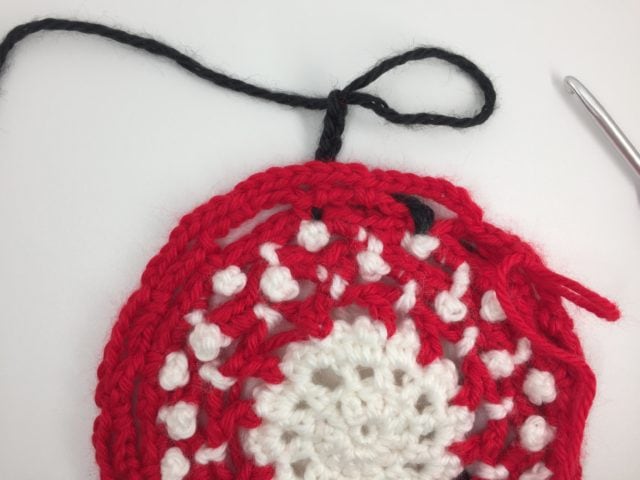
Round 14 – (CH 5. Skip CH-3 space. SC in CH-5 space.).* Repeat * 4 times. Weave in the ends. Insert an ornament ball. CH 2. DC in DC from last round.
Round 15 – (CH 5. Skip CH-5 space. SC in next CH-5 space)*. Repeat * 1 time. CH 5. SL ST to DC from last round. Fasten off and weave in ends.
– Ears –
Round 1 – With black yarn, 6 SC in magic ring. SL ST to 1st SC. [6]
Round 2 – CH 1. 2 SC in each SC around. SL ST to 1st SC. [12]
Round 3 – CH 1. (SC. 2 SC in next SC)*. Repeat * 5 times. SL ST to 1st SC. [18]
Round 4 – CH 1. (SC in next 2 SC. 2 SC in next SC)*. Repeat * 5 times. SL ST to 1st SC. [24]
Fasten off. Leave long end for sewing.
Make another one.
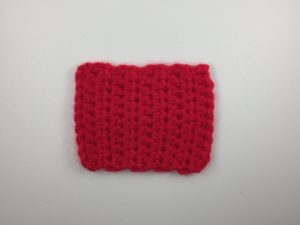
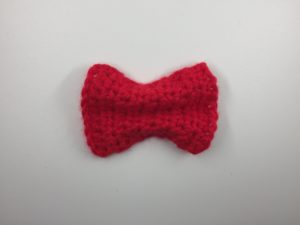
– Ribbon –
With red yarn, CH 11
Row 1 – HDC in 2nd CH from hook. HDC across [10]
Row 2 – CH 1. Turn. HDC across. [10]
Row 3~9 – Repeat Row 2
Fasten off and weave in ends.
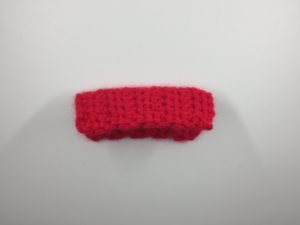
Fold the rectangle piece like photos shown above.
Cut long piece of red yarn (I cut mine 4 to 5ft long)

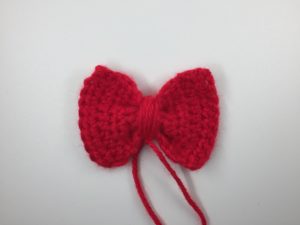
Tie a knot at the middle of rectangle piece slight tightly so that it won’t come off. Wrap it around about 5~7 times with each ends, or until the thickness you desire. Tie a knot again at the bottom side.
Sew ears and ribbon to the body. I attached my ears at Round 13 at CH-5 where it looks vertical.
If polka dot pattern was difficult to make, you can still make Minnie ornament by following Mickey pattern HERE and attach a ribbon! Make Minnie’s white bloomers (short) from R1~4, make red dress from R5~7, and make body in black from R8~11. Again, skirt is optional but I highly recommend it!
 Please let me know if you have any question about the pattern.
Thank you for reading and have a happy holidays!!

This pattern is an original pattern by Tae of Tying An End. Please do not claim this pattern as your own. If you wish to share this pattern, please link to this pattern and do not copy and paste it on to your site. You may keep a copy for your own personal use but please do not sell the pattern or distribute it. You may not sell products made from this pattern due to license issue but please clearly credit the design to me, Tae of Tying An End, and provide a link to my blog tyinganend.com when you make for your personal use. Permission is not granted for mass production or factory manufacturing of any kind. Thank you for being respectful and for your understanding!