Daisy Christmas Ornament
Christmas is around the corner! Everyone finished with shopping and decoration? My family finally put up our Christmas tree last week, and I put all 4 of my Disney Christmas ornaments!! I was little worried how they all look together, but I love it!! They’re so adorable! I cannot wait to show you later next week!
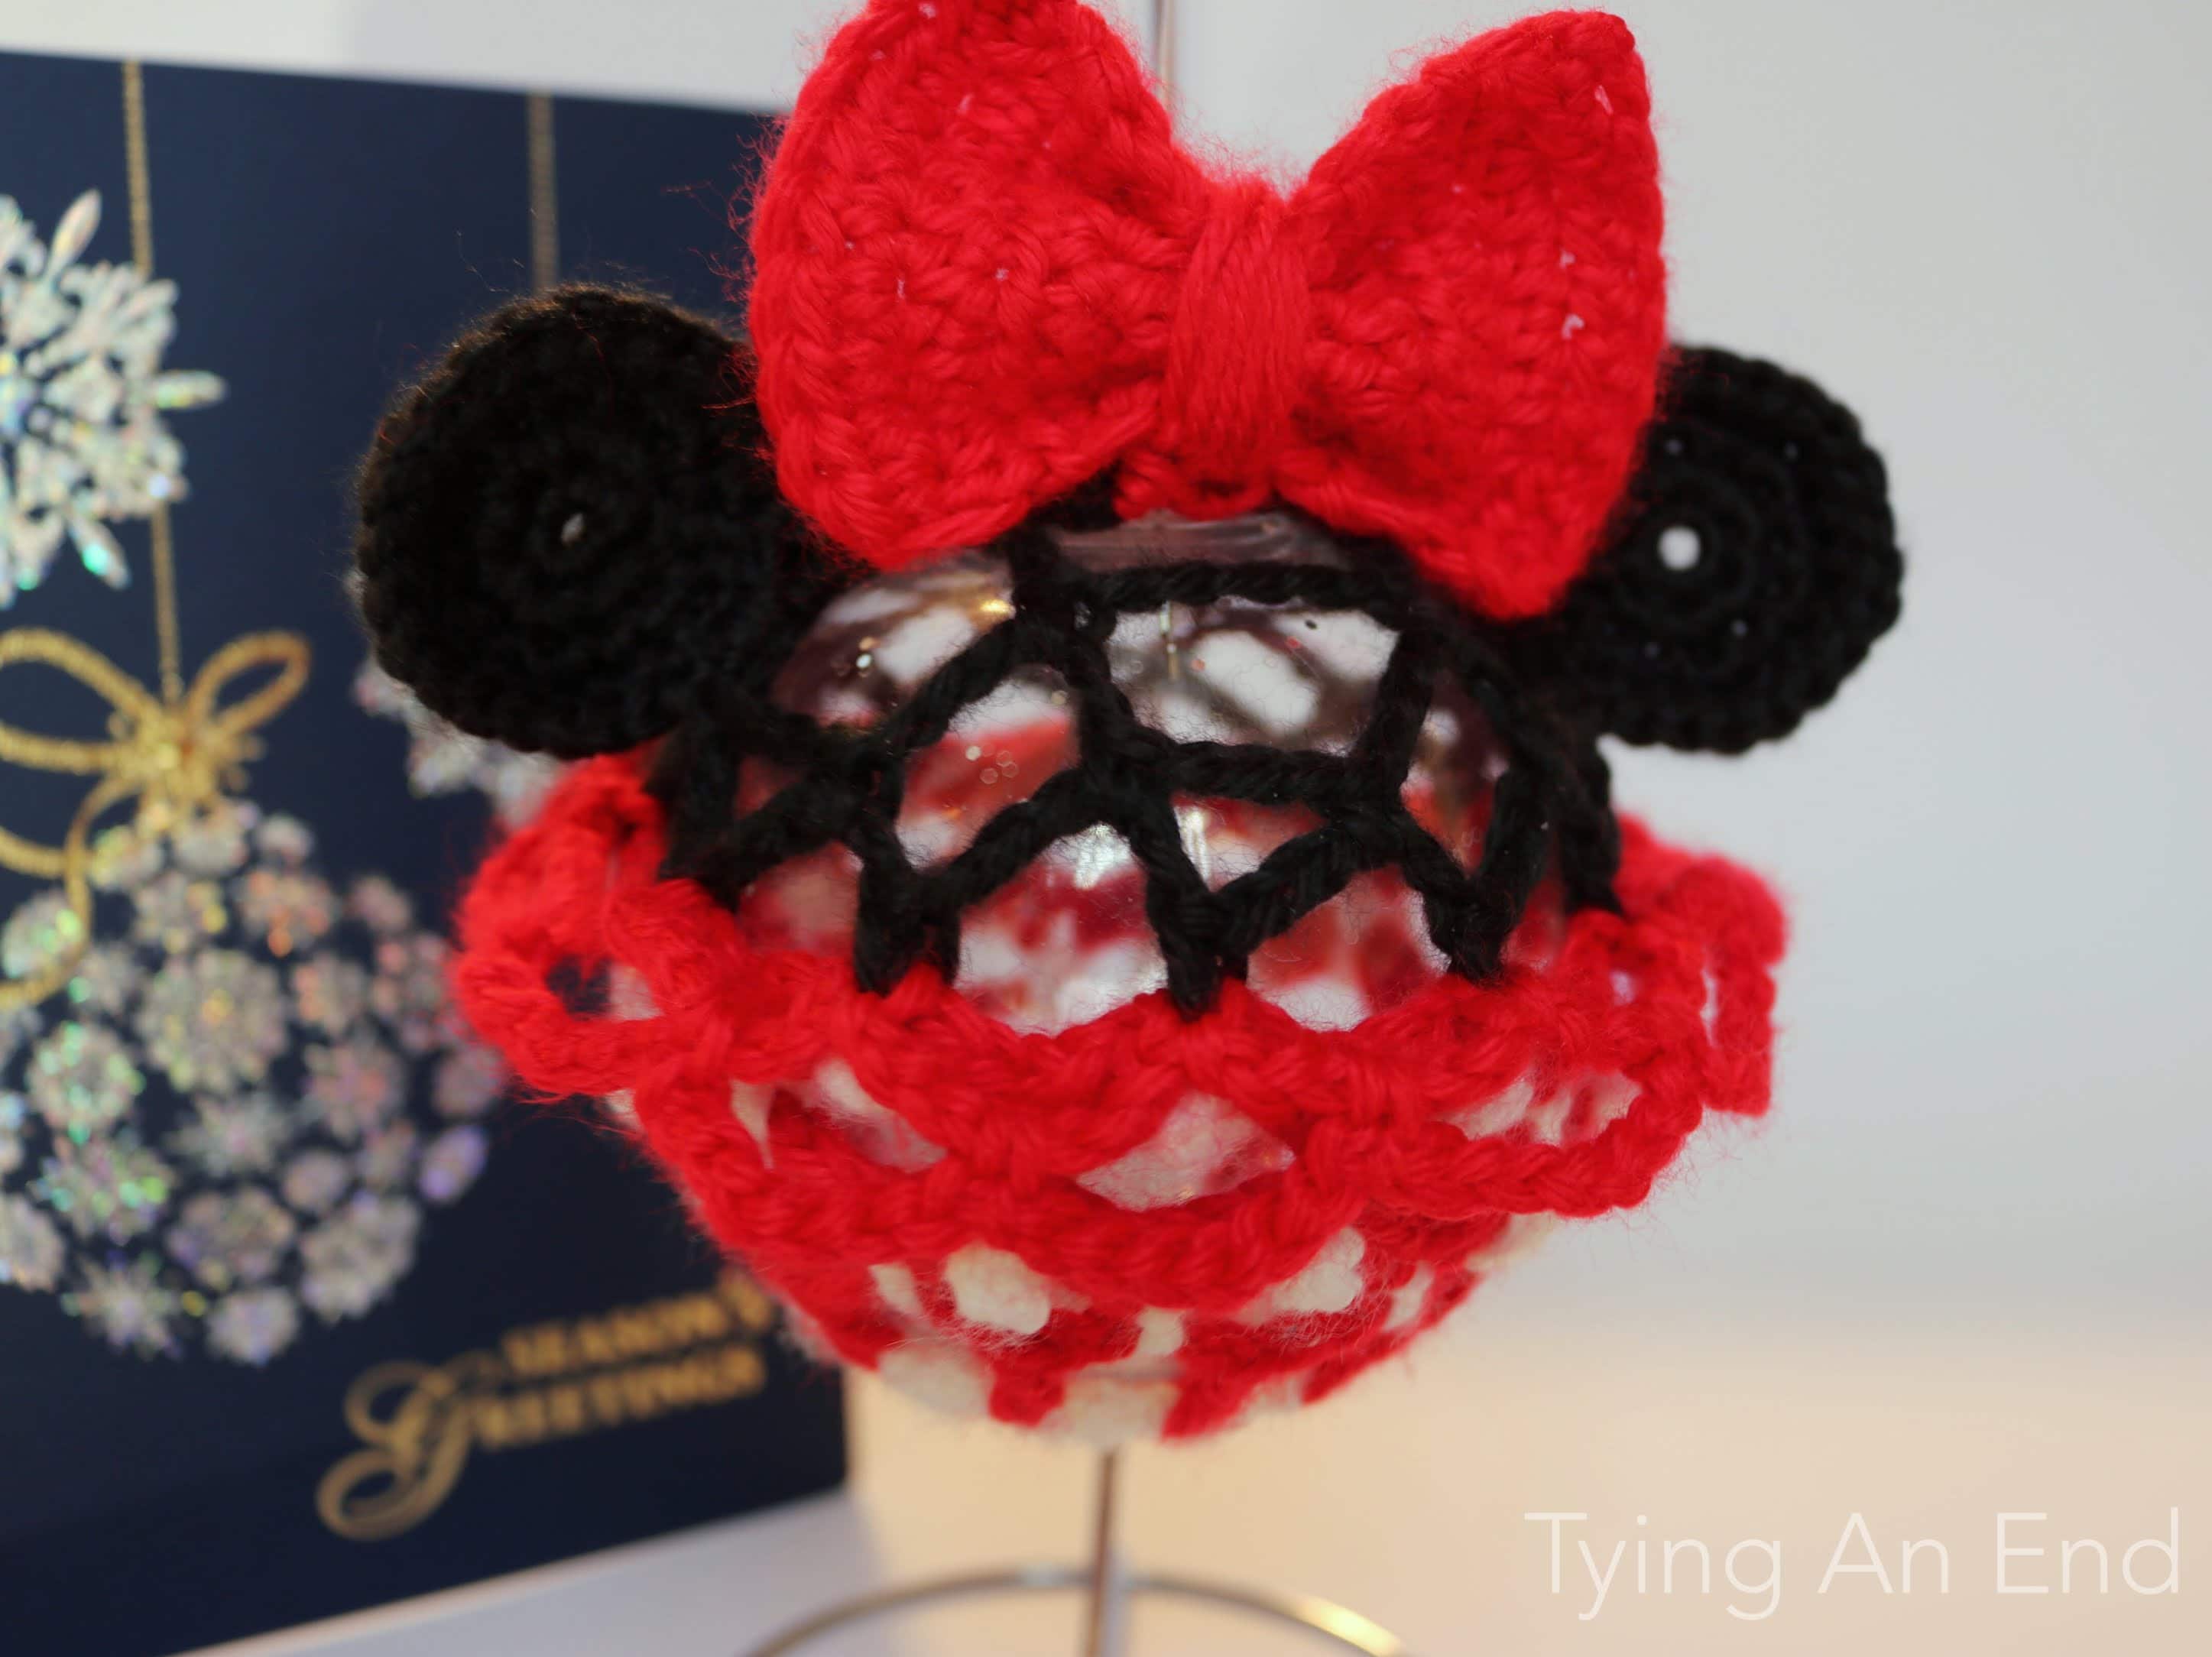
Number 4 of my Disney Christmas Ornament series is Daisy!
![[Free Crochet Pattern] Daisy Christmas Ornament by Tying An End](https://www.tyinganend.com/wp-content/uploads/2017/12/IMG_5532-640x960.jpg "[Free Crochet Pattern] Daisy Christmas Ornament by Tying An End")
I was debating really hard whether or not to put her beaks on it. Because I didn’t make them for Donald, I decided not to…and I’m happy that I didn’t! I kept all other 3 ornaments simple yet few key details (like Mickey and Minnie for their ears) so I believe it wouldn’t go so well if I added her beaks.
![[Free Crochet Pattern] Daisy Christmas Ornament by Tying An End](https://www.tyinganend.com/wp-content/uploads/2017/12/IMG_5511-640x427.jpg "[Free Crochet Pattern] Daisy Christmas Ornament by Tying An End")
![[Free Crochet Pattern] Daisy Christmas Ornament by Tying An End](https://www.tyinganend.com/wp-content/uploads/2017/12/IMG_5533-640x427.jpg "[Free Crochet Pattern] Daisy Christmas Ornament by Tying An End")
Having same feature as Minnie is so cute! Ribbon is same size as Minnie’s and so is skirt!
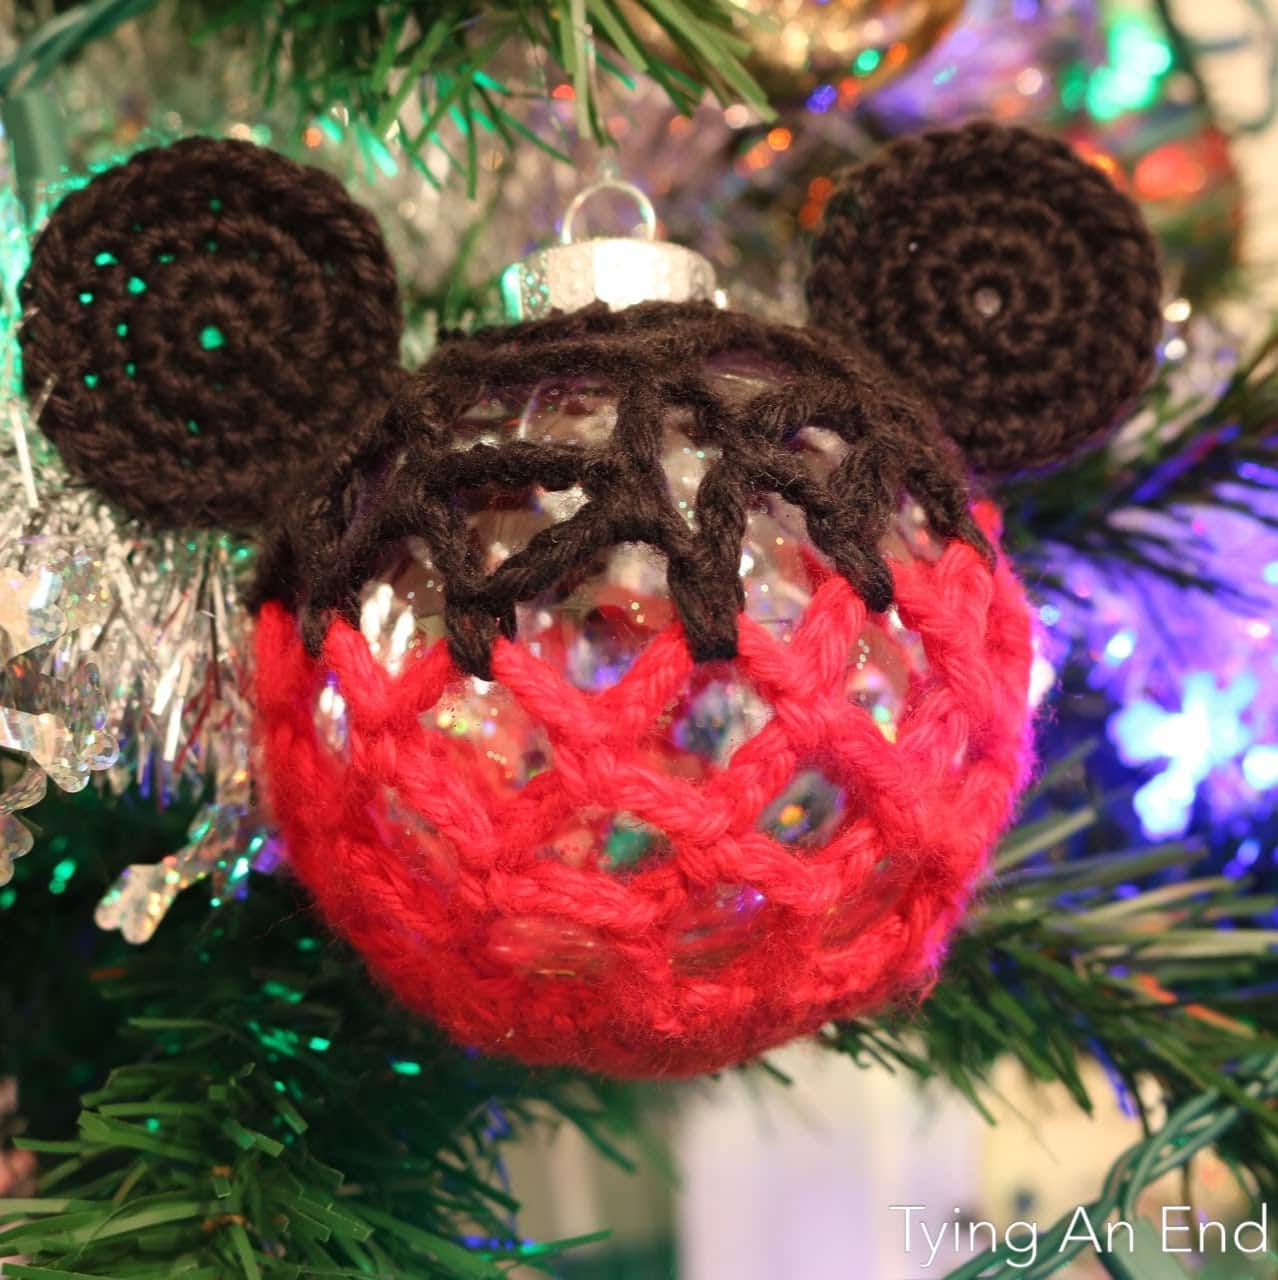
I’ll be making more Disney ornaments next year, and I hope I can share more (and earlier!) Make sure to check out my other 3 Disney Christmas ornaments! Here’s free pattern for Donald Christmas Ornament. Enjoy!
![[Free Crochet Pattern] Daisy Christmas Ornament by Tying An End](https://www.tyinganend.com/wp-content/uploads/2017/12/IMG_5540-640x427.jpg "[Free Crochet Pattern] Daisy Christmas Ornament by Tying An End")
Materials:
- Caron Simply Soft
- white
- lavender blue
- blackberry
- 1 plastic ball ornament (83mm/about 3.25in)
- US G/4mm crochet hook
- Stitch markers (optional)
- Glitter (optional)
Notes:
- You’re going to work in joined round.
- Number in [ ] indicates number of stitches in that round.
- The spruce explains very nicely on how to change colors!
- Size – 83mm (about 3.25in)
- You can put glitters if you like. It’ll look pretty with it because you can see inside the ball!
- If you have a yarn weight #3 light, that works as well. Just make each stitch slightly bigger than you normally crochet.
- Please DO NOT sell this pattern and finished product because Daisy Duck is licensed by Disney. It is illegal to sell their trademark character without getting their permission. Please make this ONLY for your personal use such as making for yourself and giving as a gift for someone.
Abbreviations:
- CH – chain stitch
- SC – single crochet
- HDC – half double crochet
- DC – double crochet
- SL ST – slip stitch
Instructions:
– Body –
Round 1 – With white yarn, SC 6 in magic ring. SL ST to 1st SC. [6]
Round 2 – CH 3 (count as 1 DC). DC in 1st SC. (2 DC in next SC)*. Repeat * 4 times. SL ST to 3rd CH of CH-3. [12]
Round 3 – CH 4 (count as 1 HDC and 2 CH). HDC in 1st DC. (CH 2. HDC in next DC)*. Repeat * 9 times. CH 2. SL ST to 2nd CH of CH-4.
Round 4 – CH 1. (SC. CH 2. SC) in CH-4 space. [CH 2. (SC. CH 2. SC) in CH-2 space]*. Repeat * 10 times. CH 2. SL ST to CH 1.
Round 5 – CH 7 (count as 1 DC and 4 CH). DC in 2nd CH-2 space. (CH 4. Skip SC, next CH-2 space and SC. DC in next CH-2 space)*. Repeat * 9 times. CH 1. DC in 3rd CH of CH 7.
Round 6 – With lavender blue yarn, CH 5. SC in CH-7 space. (CH 5. SC in CH-4 space)*. Repeat * 9 times. CH 2. DC in DC from previous round.
Round 7 – (CH 5. SC in CH-5 space)*. Repeat * 10 times. CH 2. DC in DC from previous round.
Round 8 – (CH 7. SC in CH-5 space)*. Repeat * 10 times. CH 4. DC in DC from previous round.
Round 9 – (CH 7. SL ST to CH-7 space)*. Repeat * 10 times. CH 7. SL ST to DC from previous round.
Round 10 – Fold the skirt part towards right side. SL ST to bottom loop of DC from previous round. (SL ST. SC 1. SL ST) around DC from previous round. SL ST to bottom loop of DC from Round 7. CH 1. SC to bottom loop of DC from Round 7 (same stitch you just made SL ST to). (CH 5. SC in between SC from Round 8)*. Repeat * 10 times. CH 2. DC in 1st SC.
![[Free Crochet Pattern] Daisy Christmas Ornament by Tying An End](https://www.tyinganend.com/wp-content/uploads/2017/12/IMG_5539-300x225.jpg)
**For easier way to start Round 10, but more weaving later: Fasten off after Round 9. CH 1 in between any SC from Round 8 and work your way around.**
***Follow Minnie Christmas Ornament Round 12 for what I meant by “SC in between SC from Round 8***
Round 11 – (CH 3. SC in CH-5 space. CH 5. SC in next CH-5 space)*. Repeat * 4 times. CH 3. SC in next CH-5 space. CH 2. DC in DC from previous round.
Round 12 – With white yarn, (CH 5. Skip CH-3 space. SC in CH-5 space.).* Repeat * 4 times. Weave in ends. Insert an ornament ball. CH 2. DC in DC from previous round.
Round 13 – (CH 5. Skip CH-5 space. SC in next CH-5 space)*. Repeat * 1 time. CH 5. SL ST to DC from previous round. Fasten off and weave in ends.
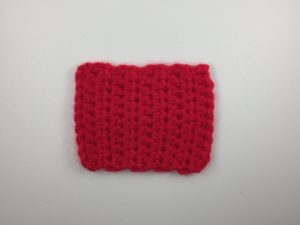
– Ribbon –
With blackberry yarn, CH 11
Row 1 – HDC in 2nd CH from hook. HDC across [10]
Row 2 – CH 1. Turn. HDC across. [10]
Row 3~9 – Repeat Row 2
Fasten off and weave in ends.
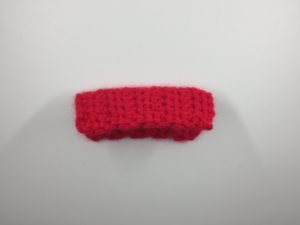
Fold the rectangle piece like photos shown above.
Cut long piece of blackberry yarn (I cut mine 4 to 5ft long)

Tie a knot at the bottom of rectangle piece tightly so that it won’t come off. Wrap it around about 5~7 times with each ends, or until the thickness you desire. Tie a knot. (Ribbon pictures are from Minnie Christmas Ornament)
Fasten off.
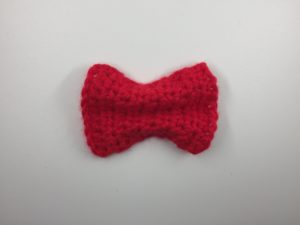
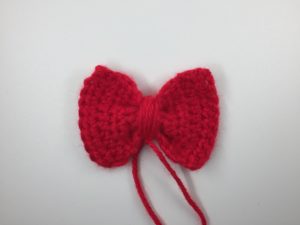
Attach the ribbon to the body. Weave in ends.
It’s little bit hard to tell that it’s Daisy if it’s just this ornament, but if you put Donald next to it, they look so adorable together!
![[Free Crochet Pattern] Daisy Christmas Ornament by Tying An End](https://www.tyinganend.com/wp-content/uploads/2017/12/IMG_5534-640x427.jpg "[Free Crochet Pattern] Daisy Christmas Ornament by Tying An End")
Happy crocheting and happy holidays!
![[Free Crochet Pattern] Daisy Christmas Ornament by Tying An End](https://www.tyinganend.com/wp-content/uploads/2017/12/IMG_5529-435x1024.jpg "[Free Crochet Pattern] Daisy Christmas Ornament by Tying An End")
This pattern is an original pattern by Tae of Tying An End. Please do not claim this pattern as your own. If you wish to share this pattern, please link to this pattern and do not copy and paste it on to your site. You may keep a copy for your own personal use but please do not sell the pattern or distribute it. You may not sell products made from this pattern due to license issue but please clearly credit the design to me, Tae of Tying An End, and provide a link to my blog tyinganend.com when you make for your personal use. Permission is not granted for mass production or factory manufacturing of any kind. Thank you for being respectful and for your understanding!

Donald Christmas Ornament
![[Free Crochet Pattern] Eve Crochet Headband by Tying An End](https://www.tyinganend.com/wp-content/uploads/2018/01/IMG_5855.jpg)