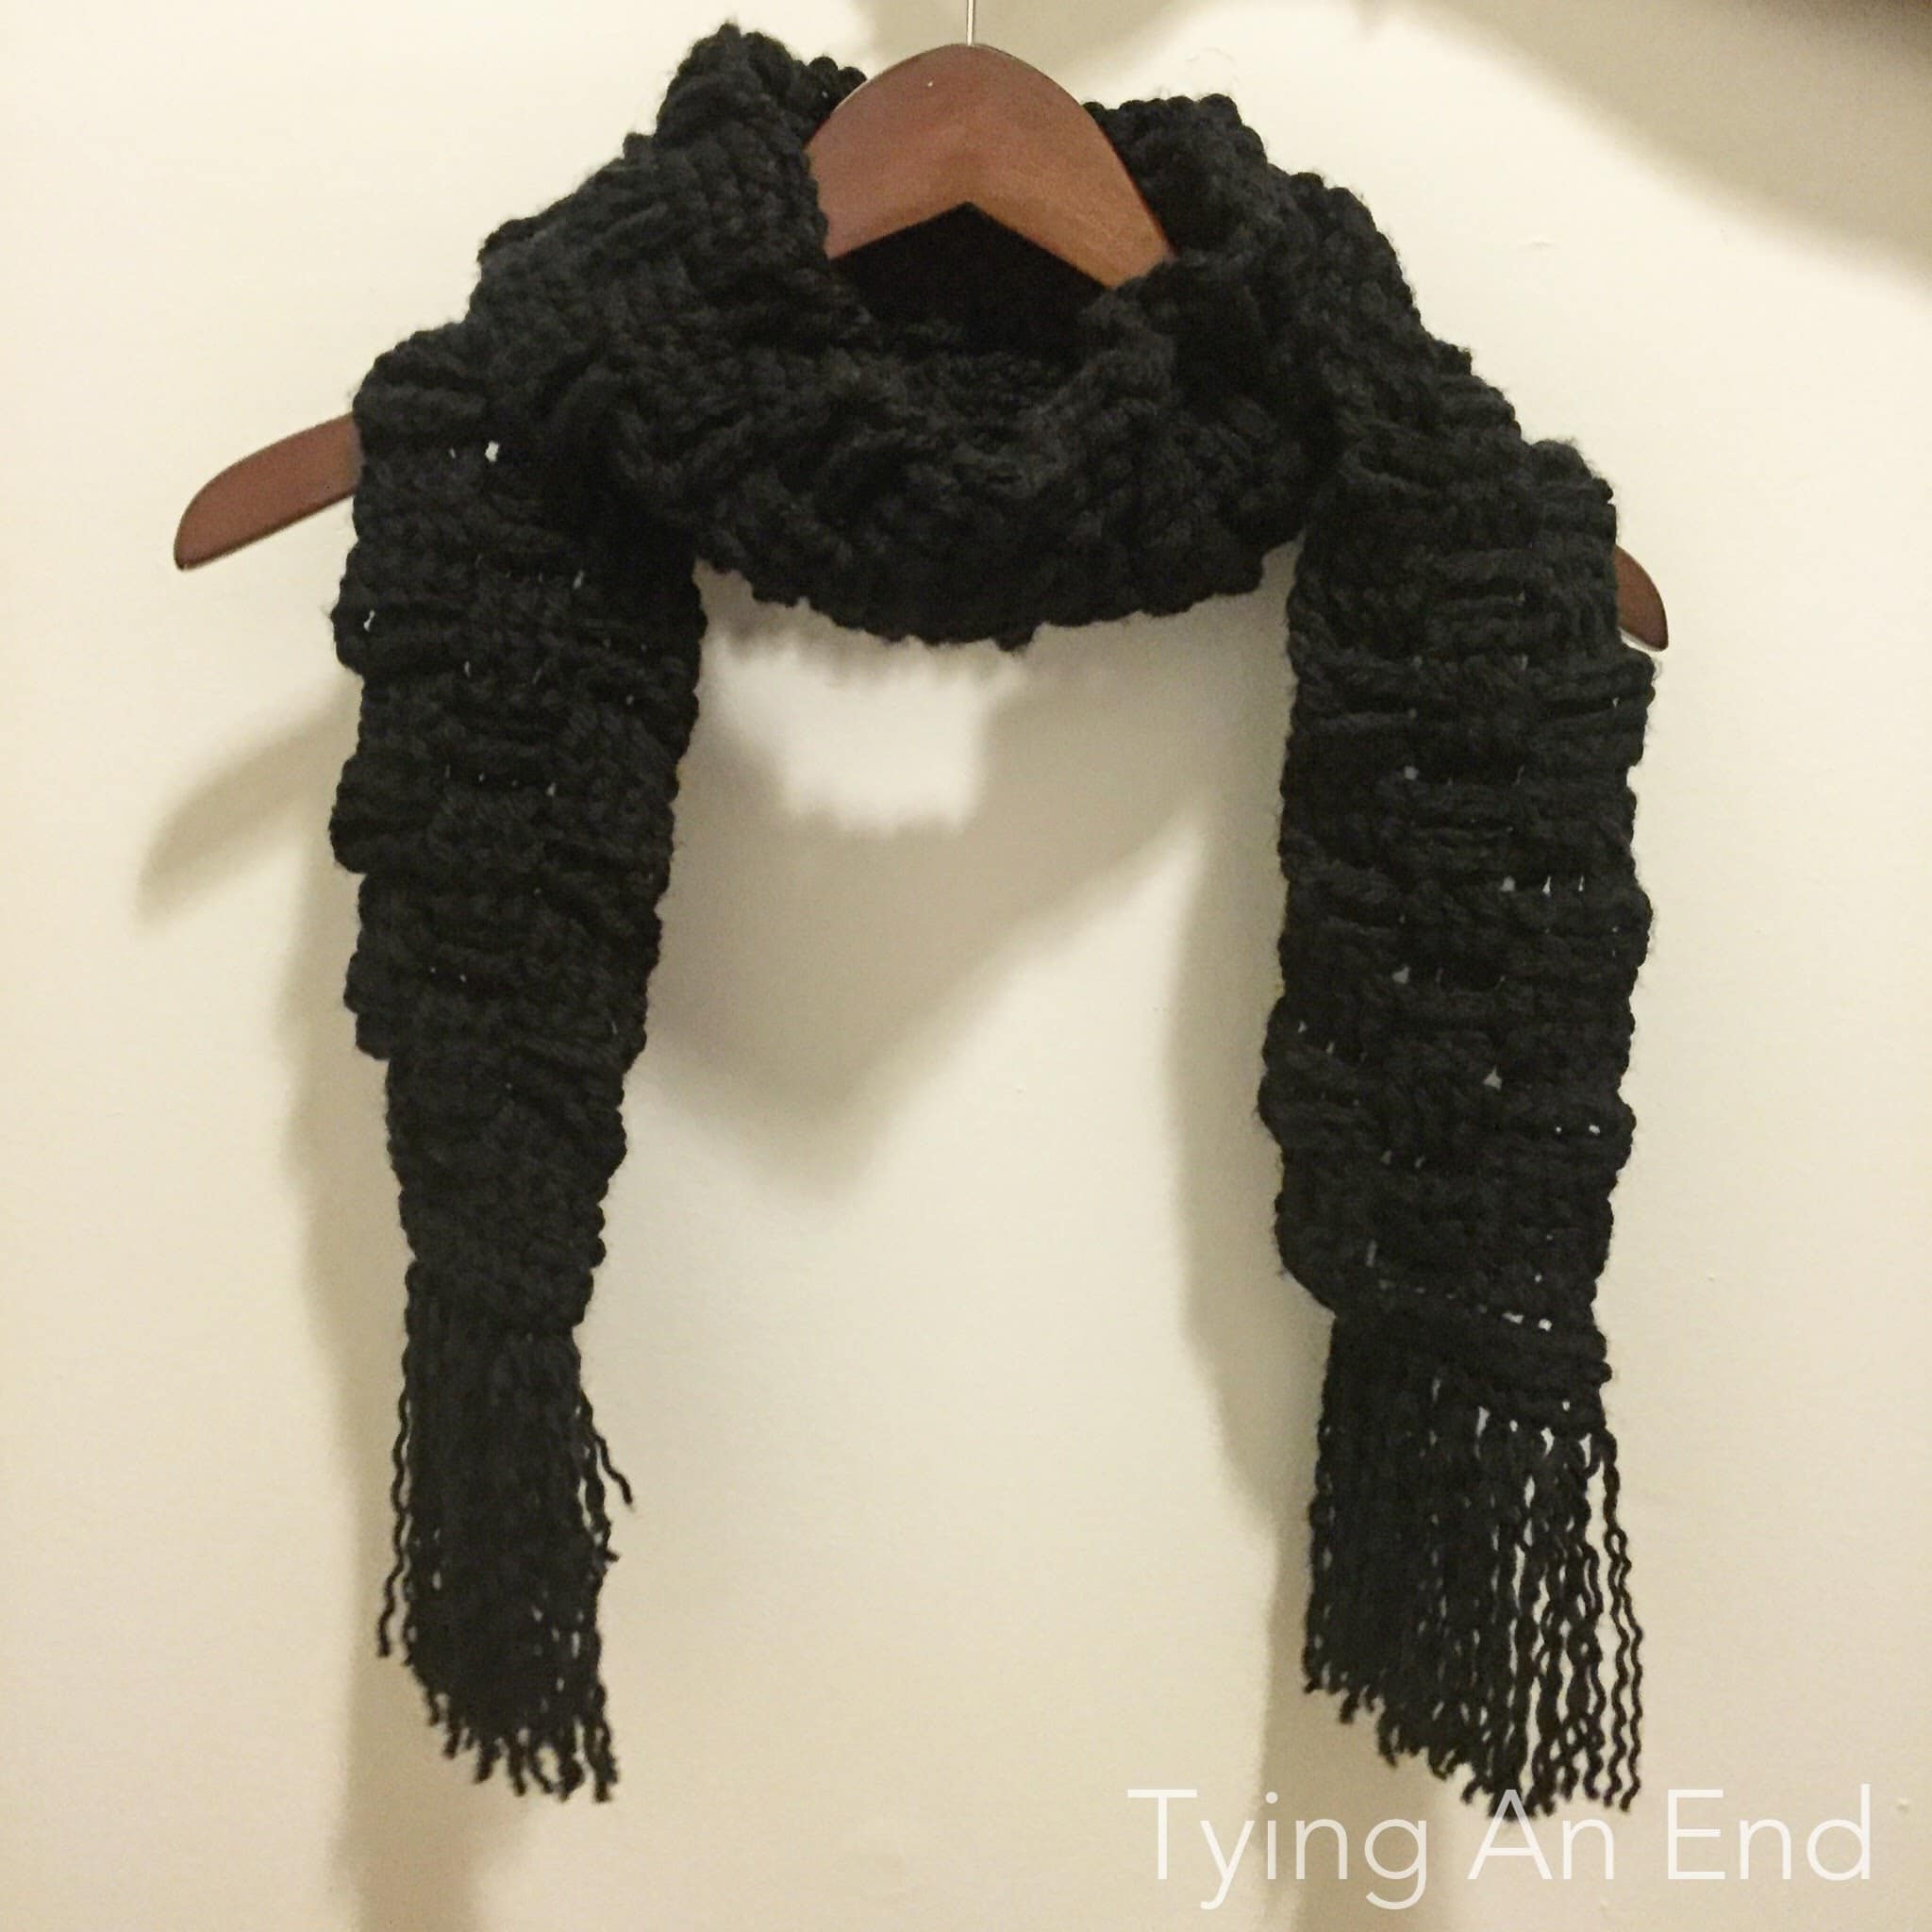
Slim Basketweave Scarf
Another basketweave stitch scarf is complete! This is slim version, but if you want to make chunkier version, check out my Chunky Basketweave Scarf !
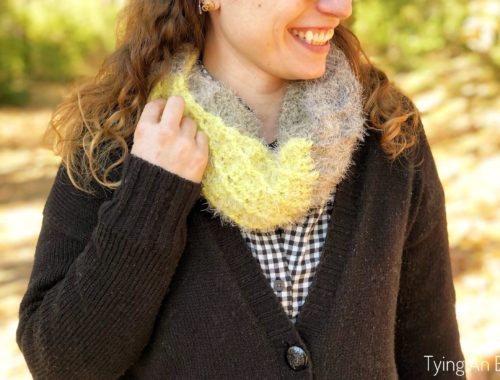
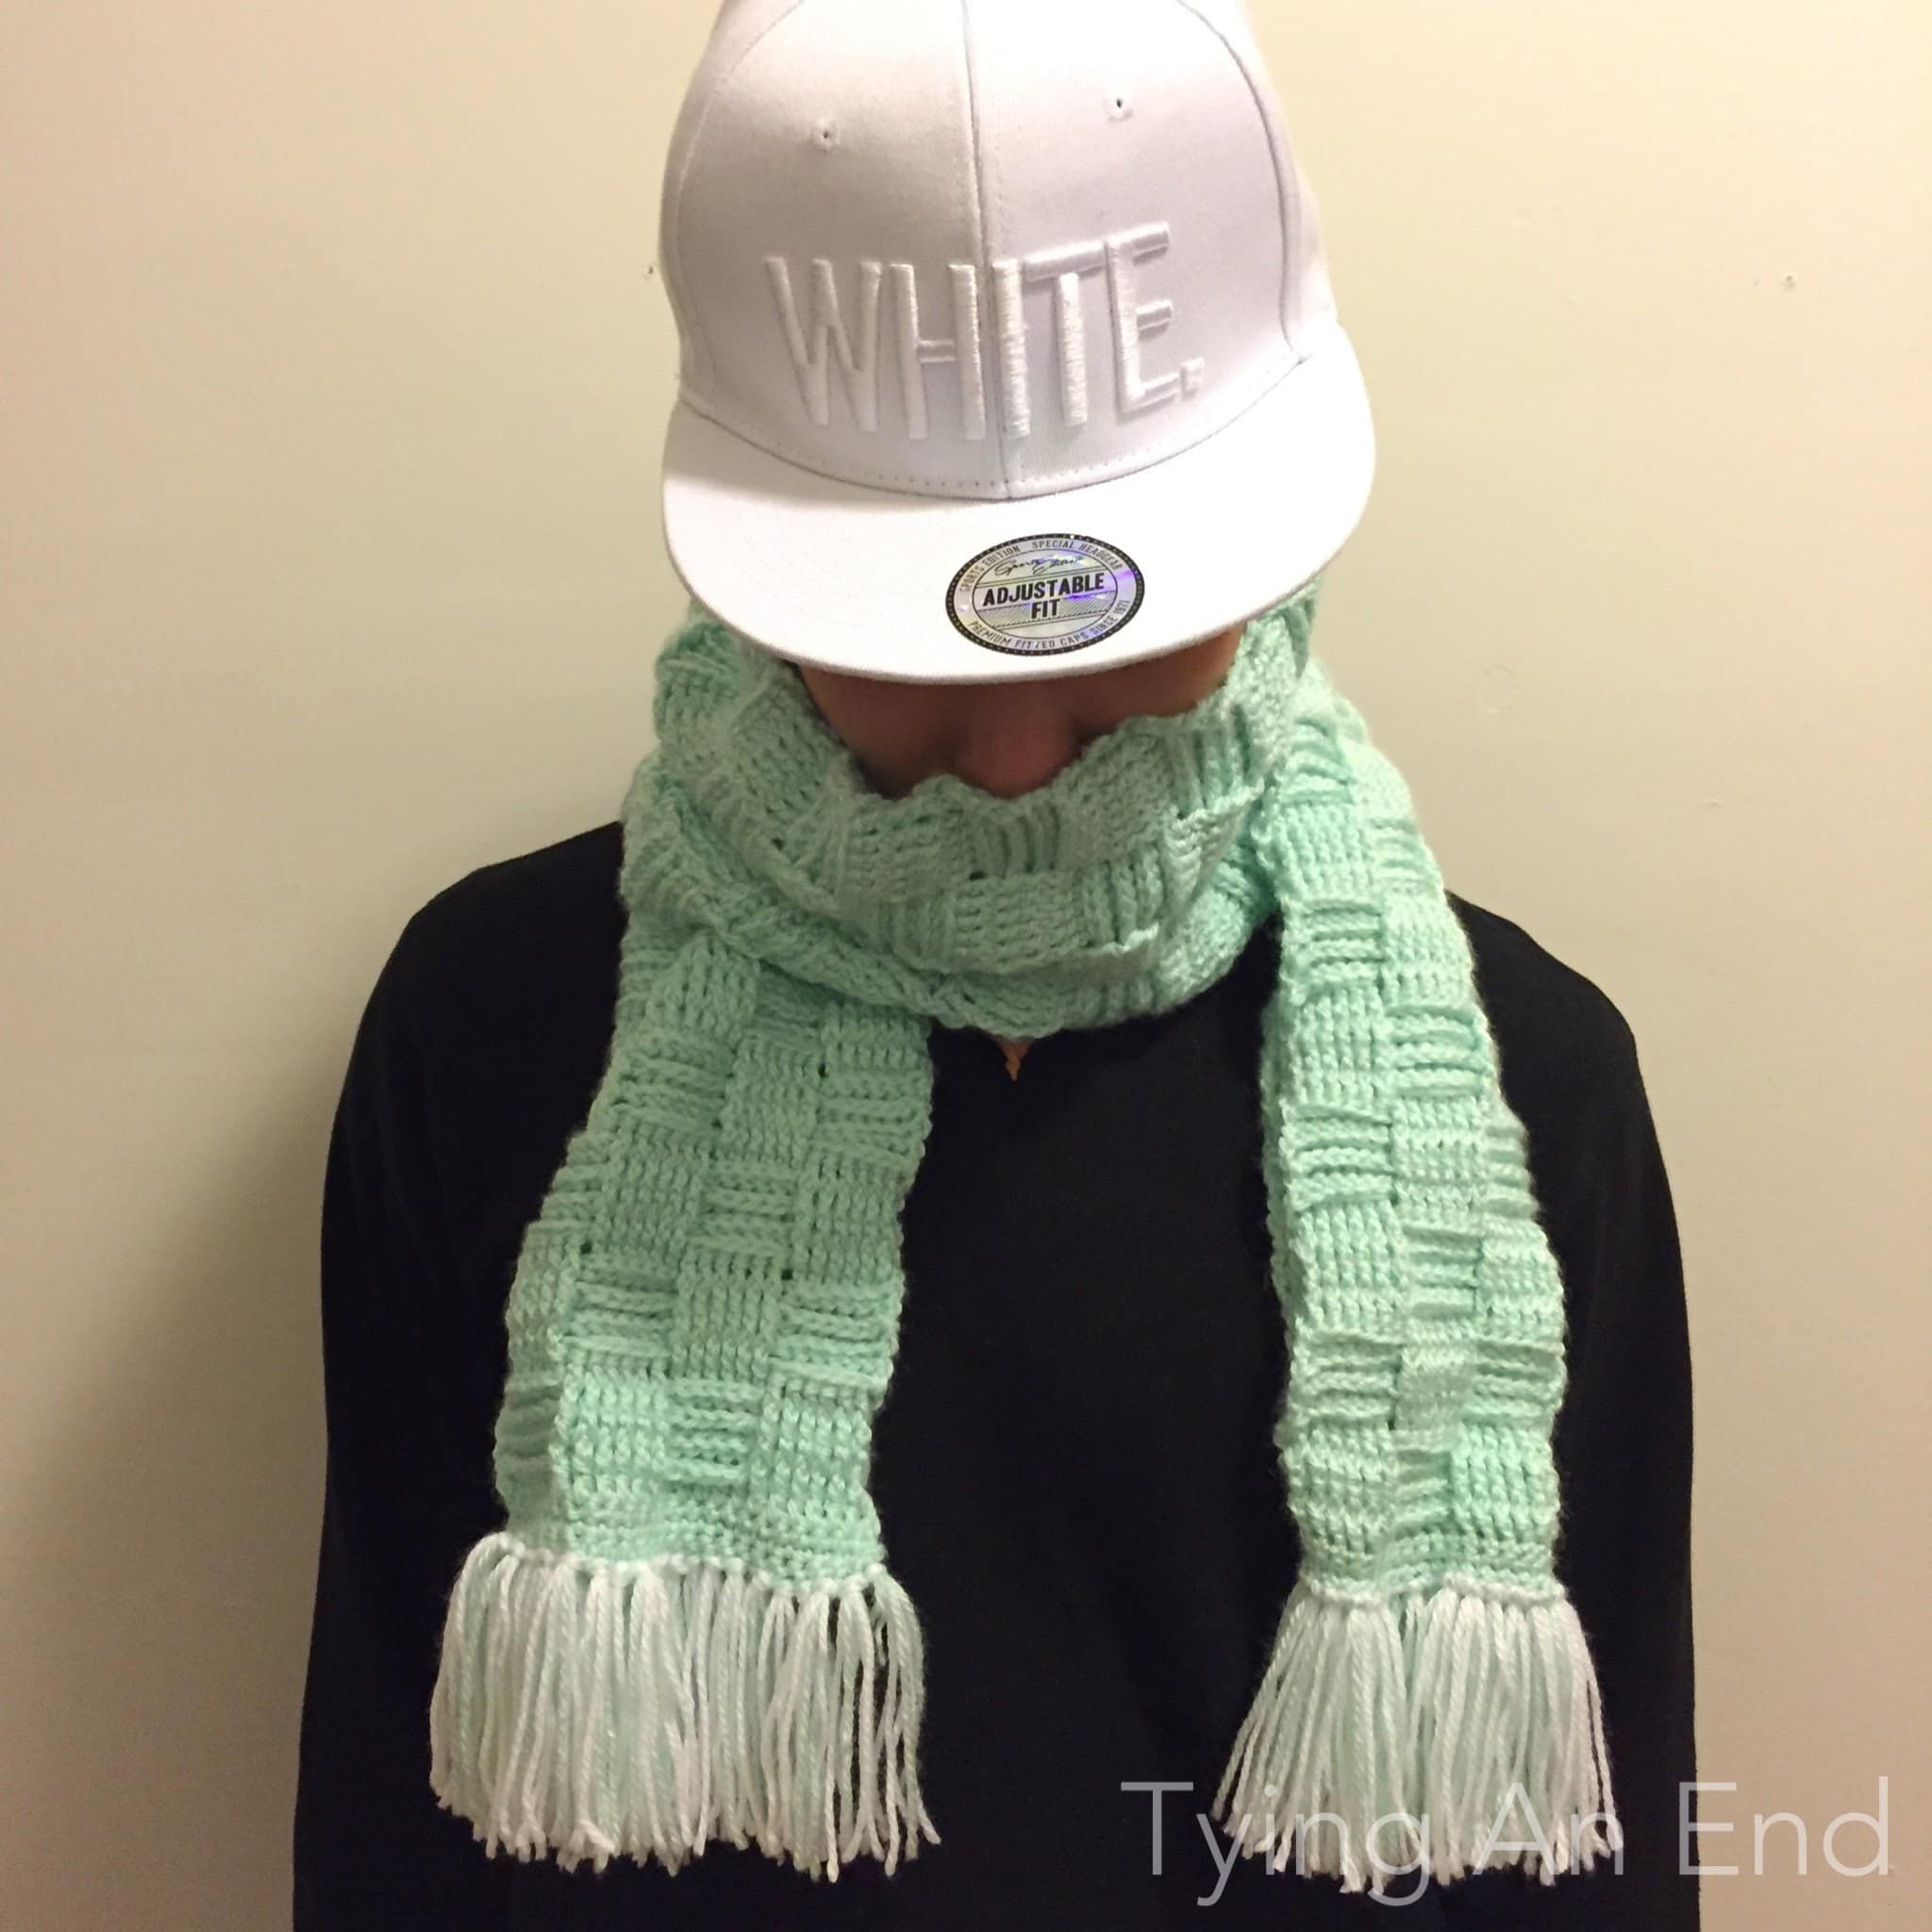
I went yarn shopping with my brother when I went to buy yarn for this scarf, and he picked out this beautiful mint green yarn! I was going to pick white yarn because he loves wearing all white outfit, but he actually chose different color. He said “It’s my instinct telling me this color!”
 This is the first thing he did when I gave him the scarf. I’m glad he likes the scarf and hope this will keep him warm throughout this winter!
*Below is the pattern to make the scarf!*
- Crochet hook 6mm
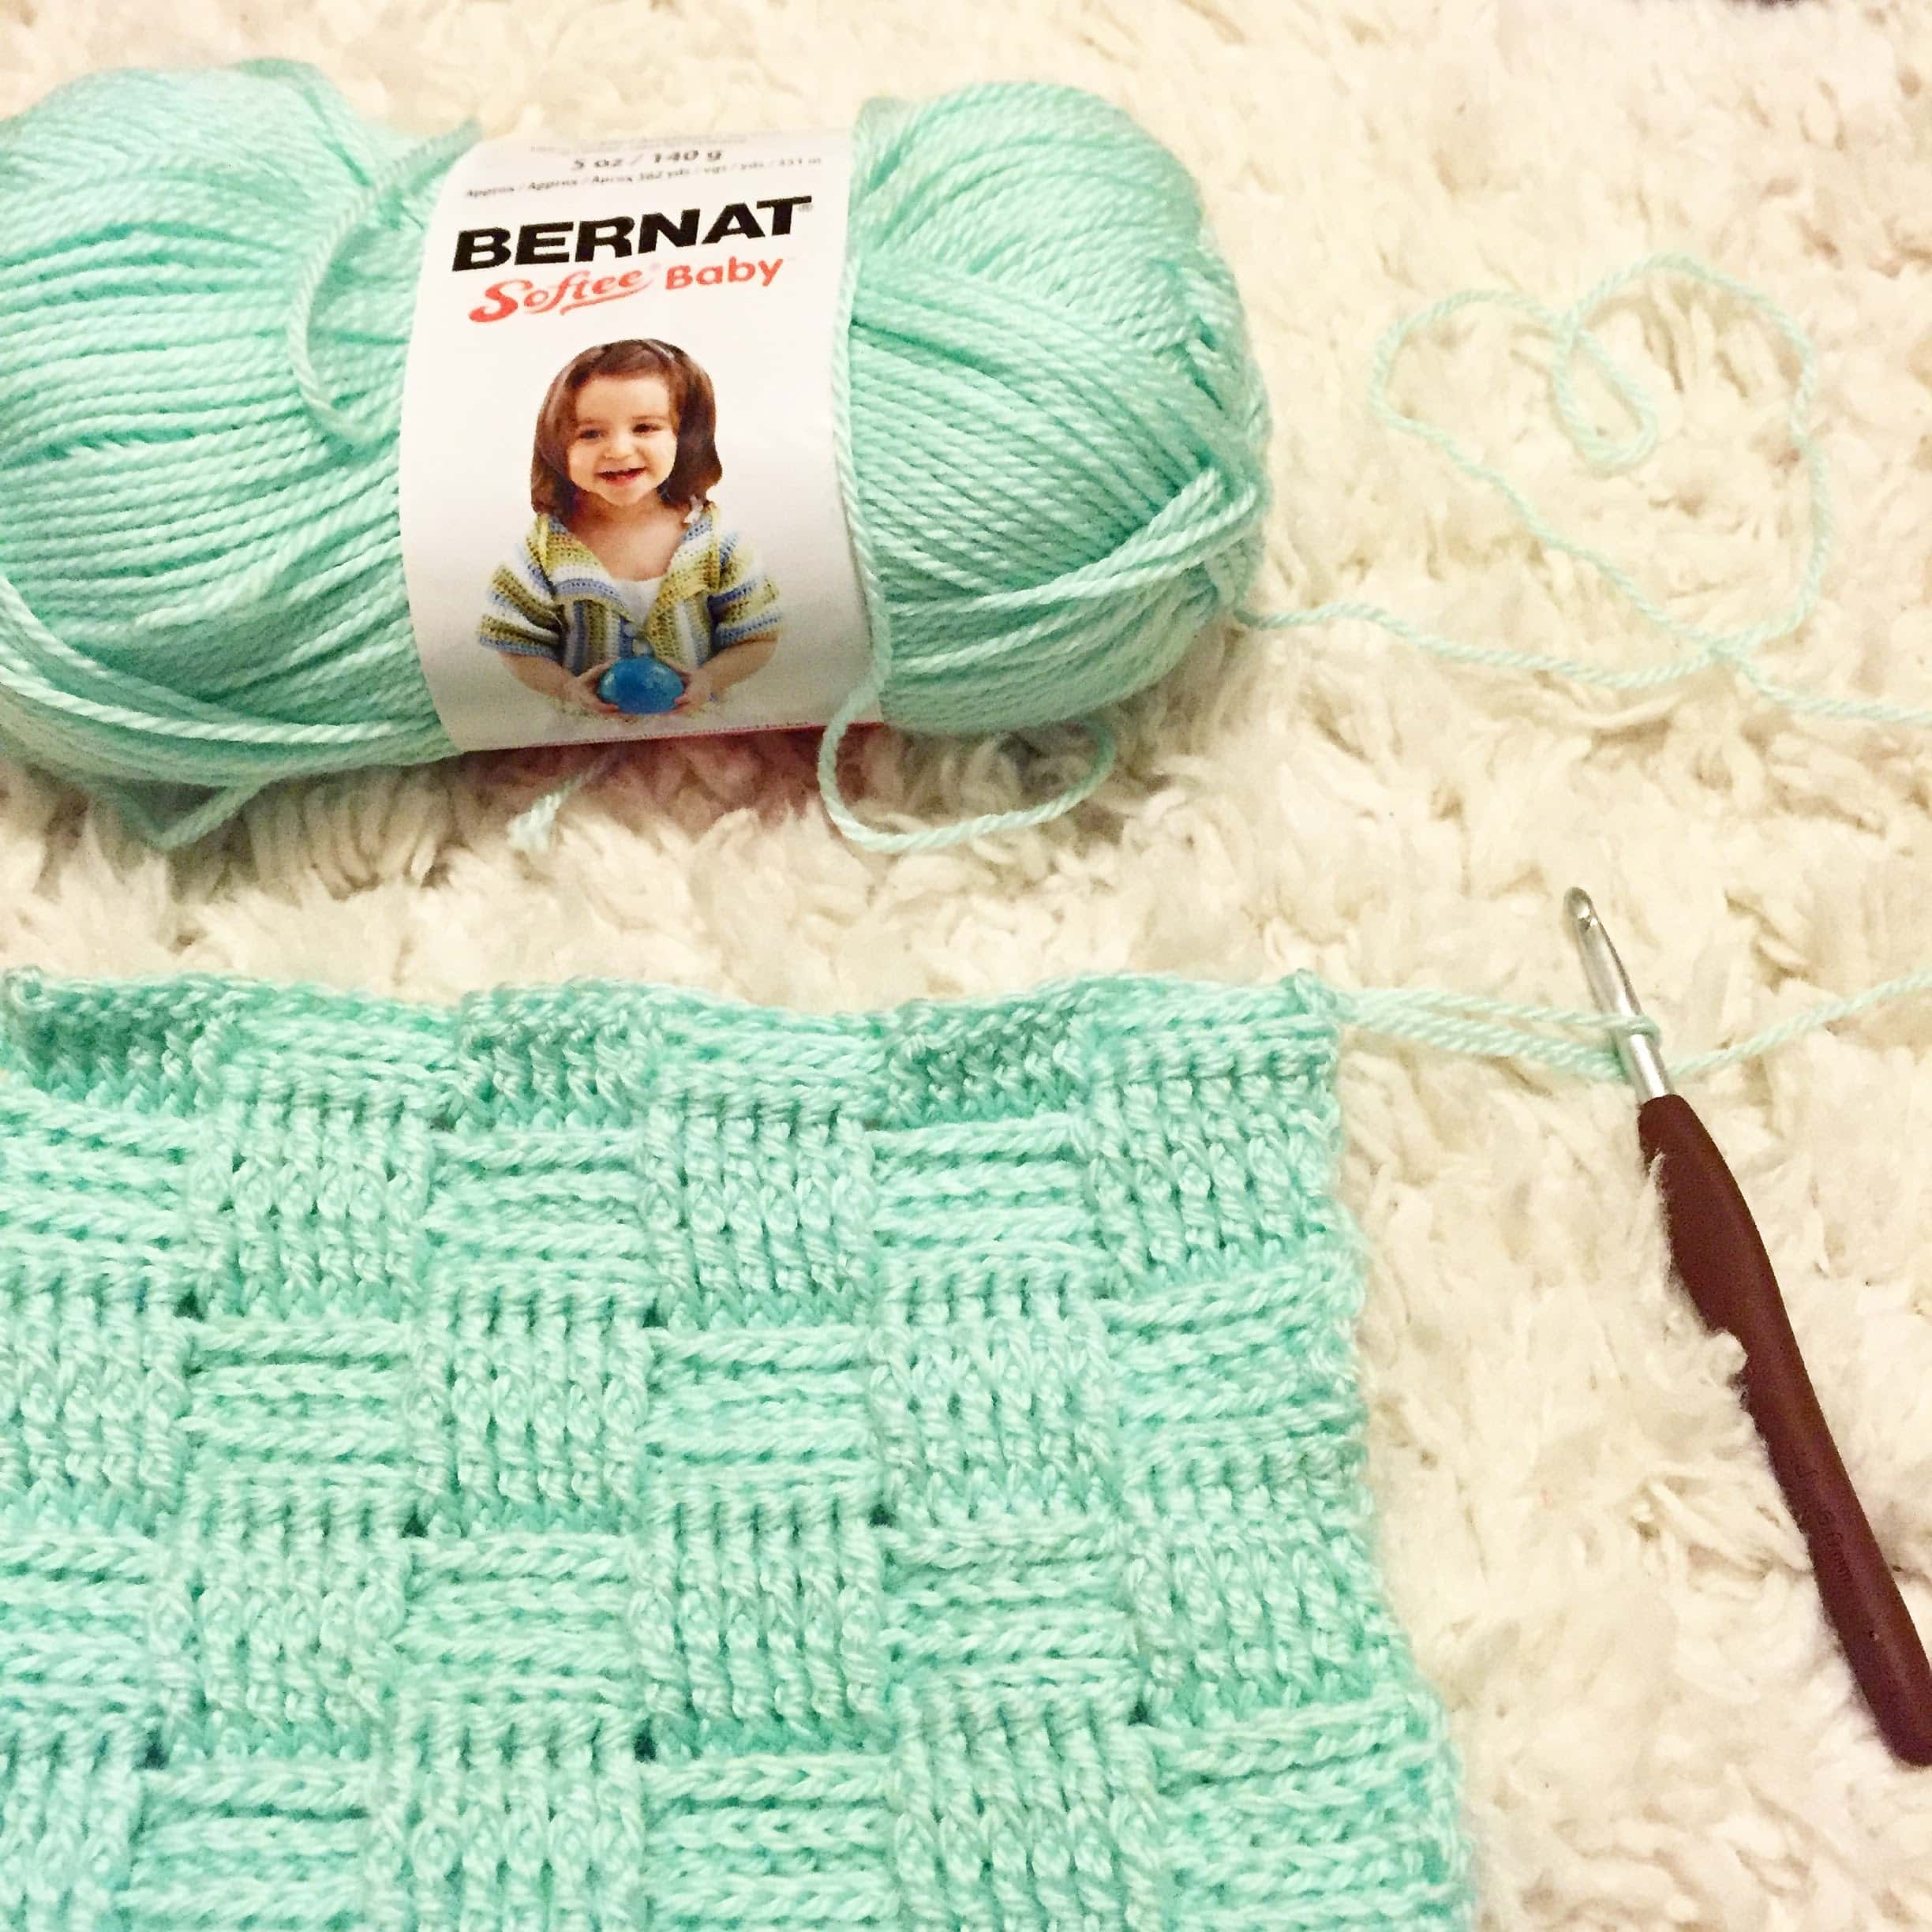
- Bernat Softee Baby in mint (or any other [3] light yarn) – I used 2 skeins and it wraps around 1 time
[6] 6×4 squaresChain 39
Row 1 – 1sc in 2nd ch from hook. 1 sc in each ch across. 38 sts.
Row 2 – Turn. Ch 1. 1 sc in each ch across. 38 sts.
Row 3 – Turn. Ch 1. 1 sc in each ch across. 38 sts.
Row 4 – Turn. Ch 3 (count as 1 dc here and throughout). Skip first st, 1 dc in each sc across. 38sts
Row 5 – Turn. Ch 3. Skip 1st dc. *(1 fpdc in next 6 dc. 1 bpdc in next 6 dc.) repeat * 2 more times. 1 dc in turning ch. 38 sts.
Row 6 – Turn. Ch 3. Skip 1st dc. *(1 bpdc in next 6 sts. 1 fpdc in next 6 sts.) repeat * 2 more times 1 bpdc in next 3 sts. 1 dc in turning ch. 38sts.
Row 7 – Turn. Ch 3. Skip 1st dc. *(1 fpdc in next 6 dc. 1 bpdc in next 6 dc.) repeat * 2 more times. 1 dc in turning ch. 38 sts.
Row 8 – Turn. Ch 3. Skip 1st dc. *(1 bpdc in next 6 sts. 1 fpdc in next 6 sts.) repeat * 2 more times 1 bpdc in next 3 sts. 1 dc in turning ch. 38sts.
Row 9 – Turn. Ch 3. Skip 1st dc. *(1 bpdc in next 6 sts. 1 fpdc in next 6 sts.) repeat * 2 more times 1 bpdc in next 3 sts. 1 dc in turning ch. 38sts.
Row 10 – Turn. Ch 3. Skip 1st dc. *(1 fpdc in next 6 dc. 1 bpdc in next 6 dc.) repeat * 2 more times. 1 dc in turning ch. 38 sts.
I like how that white pops within mint green.

You may sell products made from this pattern but please clearly credit the design to me, Tae of Tying An End, and provide a link to my blog tyinganend.com. Permission is NOT granted for mass production or factory manufacturing of any kind. Thank you for being respectful and for your understanding!
もう一つのマフラー完成しました!
こちらは模様が小さくなってます。模様が大きめのがいい方はこちらをどうぞ!
このマフラーを作るのに必要な毛糸を弟と一緒に買いに行ったんですけど、弟はミントグリーンを自分で選びました。
いつも真っ白コーデなので、私は白のマフラー作ろうと思ってたんですけど、彼は全然違う色を選びました。
「本能がこの色がいいと言ってる」とかなんとか。
まぁ、でも仕上がり気に入ってくれたみたいでよかったです。
これで寒い冬を乗り越えればいいなと思います✨
- 使用糸: 合太~並太 (私は約660m 使って1回首に巻く長さにしました)
- 使用針: 6mm かぎ針
1段目 – 細編みをかぎ針から2目目に1目編みます。残りの鎖目に細編みを1目ずつ編みます。計38目
2段目 – 裏返して立ち上がり1目編みます。細編みを1目ずつ。計38目
3段目 – 裏返して立ち上がり1目編みます。細編みを1目ずつ。計38目
4段目 – 裏返して立ち上がり3目編みます。1目目は飛ばして、長編みを1目ずつ。計38目
5段目 – 裏返して立ち上がり3目編みます。1目目は飛ばして、*(次の6目に長編みの表引き上げ編みを1目ずつ。次の6目に裏引き上げ編みを1目ずつ。) *を2回繰り返し。立ち上がり目の間に長編みを1目。
6段目 – 裏返して立ち上がり3目編みます。1目目は飛ばして、*(次の6目に長編みの裏引き上げ編みを1目ずつ。次の6目に表引き上げ編みを1目ずつ。) *を2回繰り返し。立ち上がり目の間に長編みを1目。
7段目 – 裏返して立ち上がり3目編みます。1目目は飛ばして、*(次の6目に長編みの表引き上げ編みを1目ずつ。次の6目に裏引き上げ編みを1目ずつ。) *を2回繰り返し。立ち上がり目の間に長編みを1目。
8段目 – 裏返して立ち上がり3目編みます。1目目は飛ばして、*(次の6目に長編みの裏引き上げ編みを1目ずつ。次の6目に表引き上げ編みを1目ずつ。) *を2回繰り返し。立ち上がり目の間に長編みを1目。
9段目 – 裏返して立ち上がり3目編みます。1目目は飛ばして、*(次の6目に長編みの裏引き上げ編みを1目ずつ。次の6目に表引き上げ編みを1目ずつ。) *を2回繰り返し。立ち上がり目の間に長編みを1目。
10段目 – 裏返して立ち上がり3目編みます。1目目は飛ばして、*(次の6目に長編みの表引き上げ編みを1目ずつ。次の6目に裏引き上げ編みを1目ずつ。) *を2回繰り返し。立ち上がり目の間に長編みを1目。
11段目 – 裏返して立ち上がり3目編みます。1目目は飛ばして、*(次の6目に長編みの裏引き上げ編みを1目ずつ。次の6目に表引き上げ編みを1目ずつ。) *を2回繰り返し。立ち上がり目の間に長編みを1目。
12段目 – 裏返して立ち上がり3目編みます。1目目は飛ばして、*(次の6目に長編みの表引き上げ編みを1目ずつ。次の6目に裏引き上げ編みを1目ずつ。) *を2回繰り返し。立ち上がり目の間に長編みを1目。
好きな長さになるまで5~12段目を繰り返し編んでいきます
Ready for cold weather?