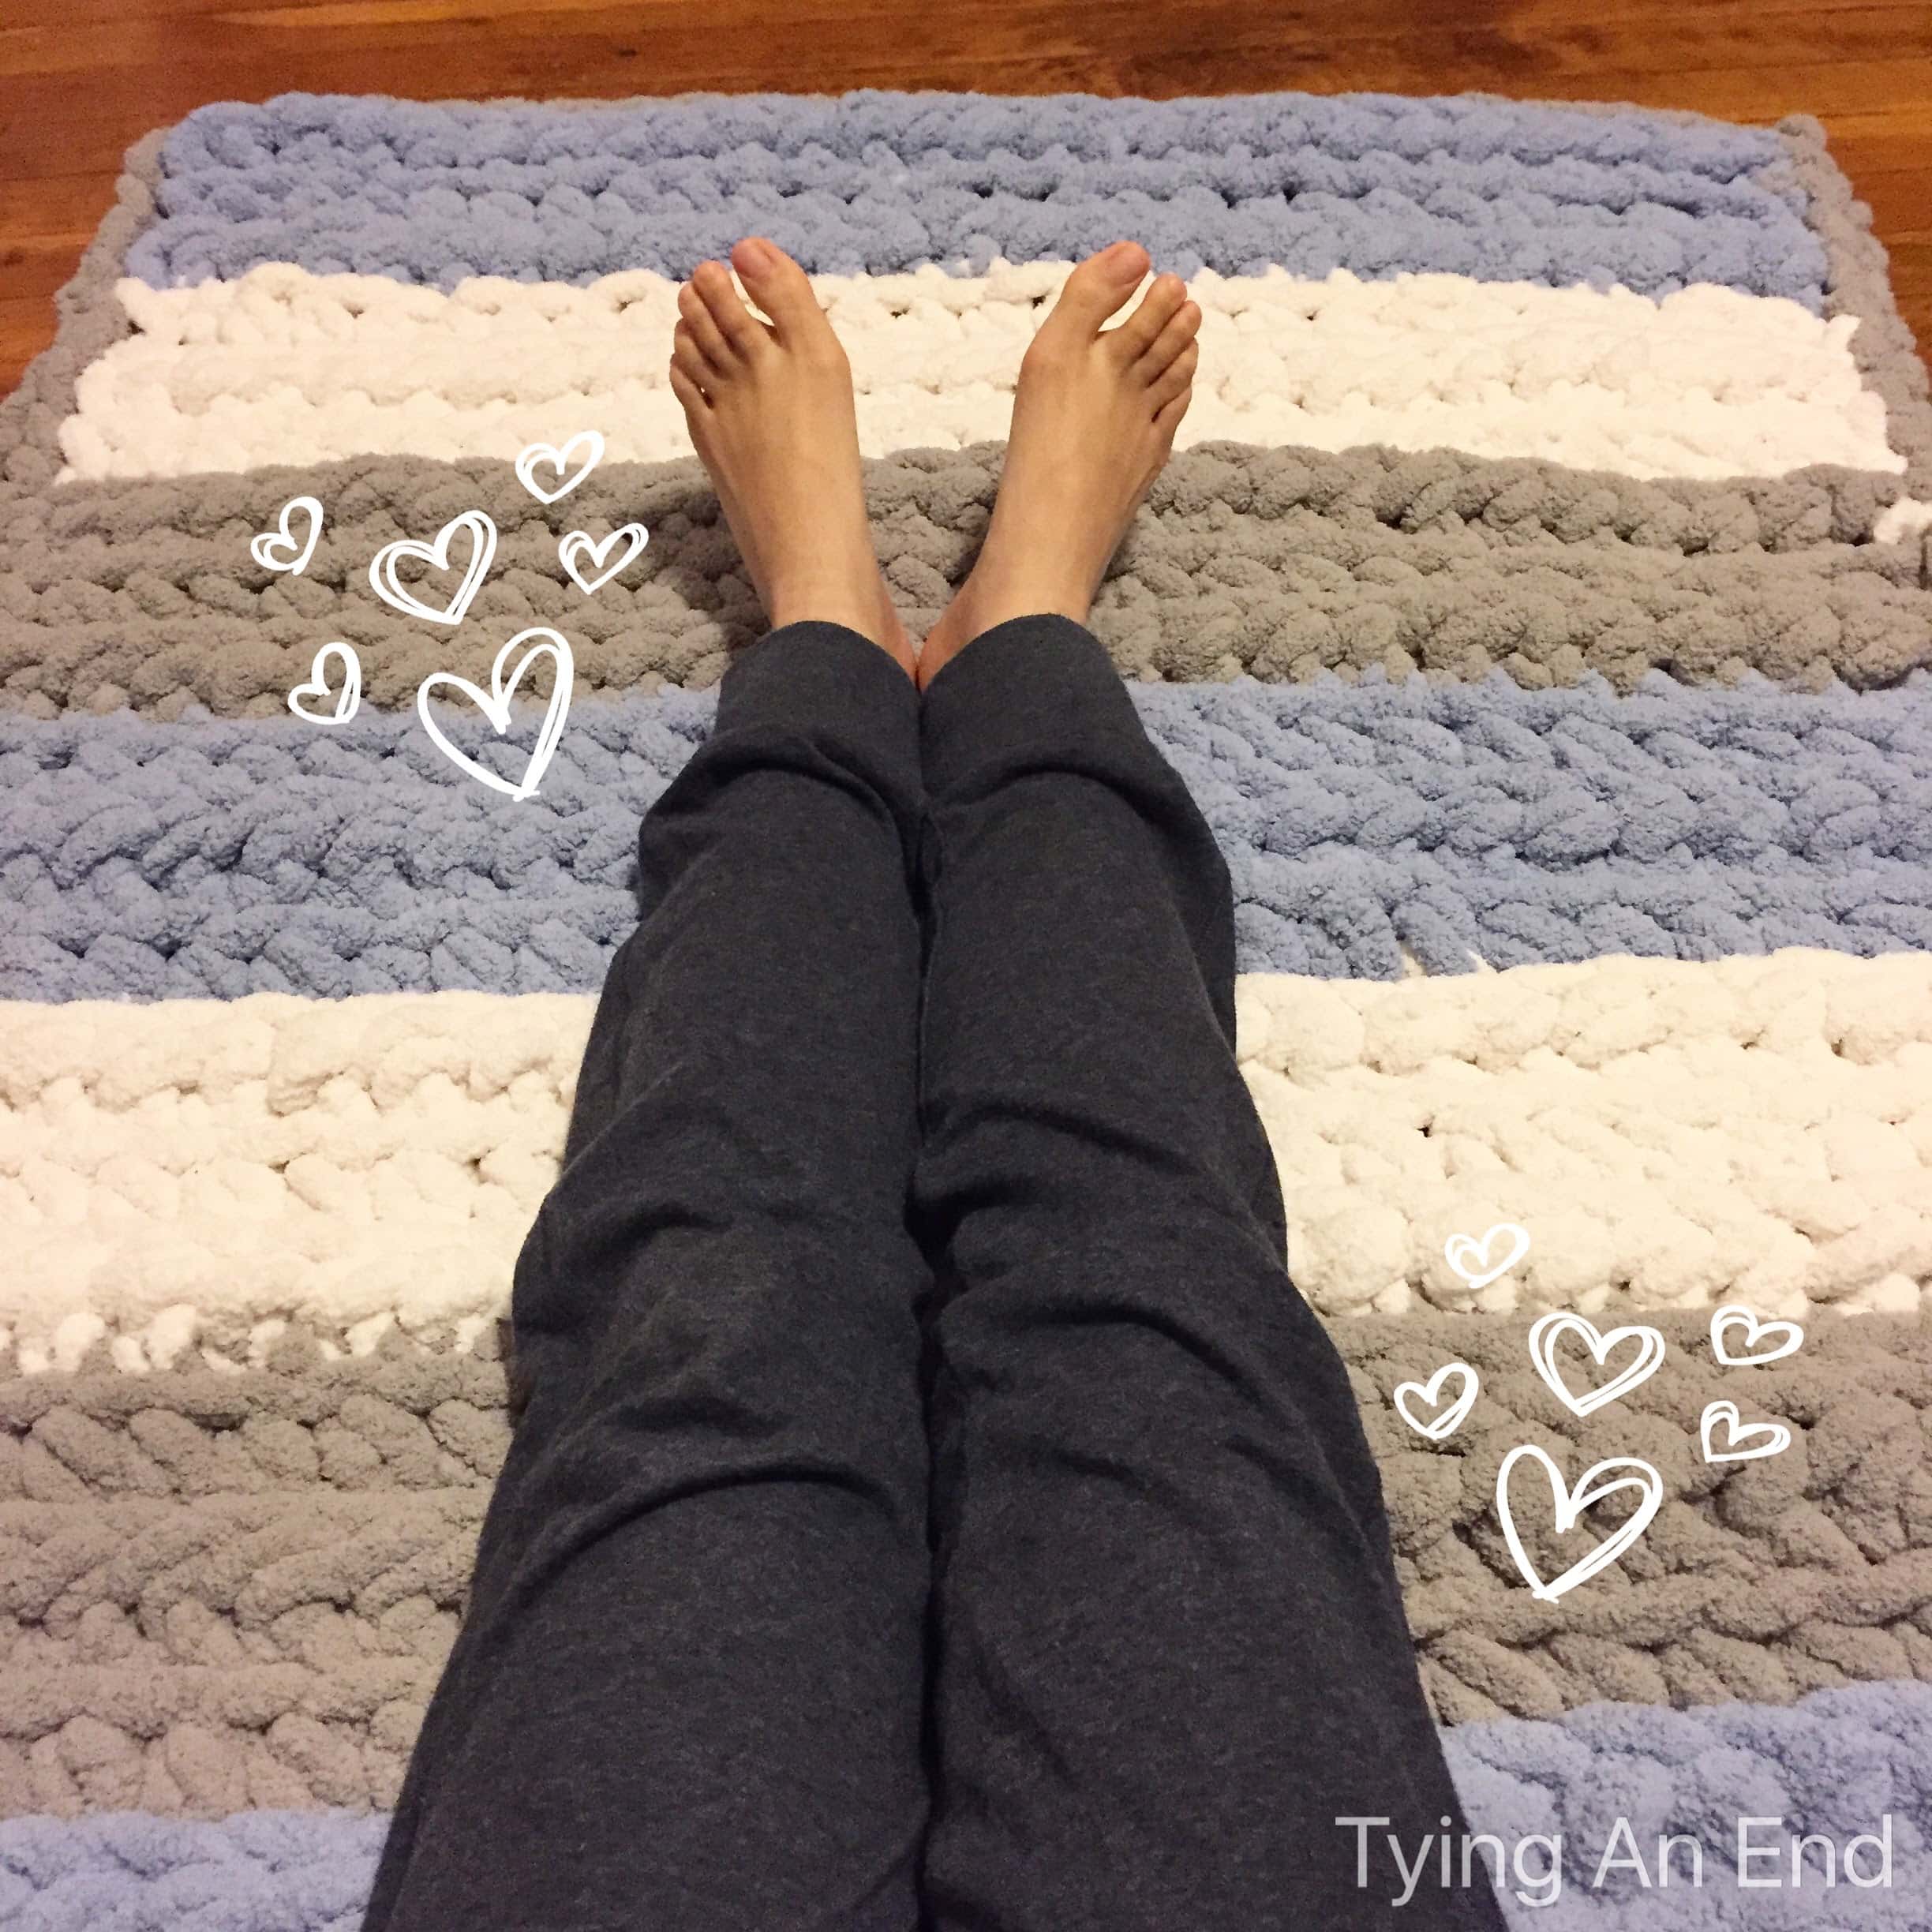
Cloud Fluffy Rug
Without any solid plan, I bought 3 skeins of Bernat Blanket BIG yarn at Michaels couple months ago. (Click HERE for simple review of this yarn)
Because it was so chunky, I wanted to make either blanket or rug…and I’ve decided to make a rug!It’s very simple, and I wanted to share this with others.
Here’s the free pattern for “Cloud Fluffy Rug” !
Materials:
- 9 skeins of Bernat Blanket BIG Yarn
- 3 skeins each of Big Sky (A), Pale Gray (B), and Vintage White (C) (or any other colors)
- US 50/ 25mm crochet hook
- Rug gripper pad (optional)
Notes:
- Size – about 37in x 68in (about 94cm x 173cm)
- Gauge – 2.5 stiches x 3 rows = 4in (10cm)
- CH 2 at beginning of each row does NOT count as 1st HDC.
- When joining colors, work to last 2 loops on hook of 1st color. Draw new color through last 2 loops and proceed. Do not carry color when not in use.
Abbreviation:
- CH – chain stitch
- HDC – half double crochet
- ST – stitch
- SC – single crochet
- SL ST – slip stitch
Instructions:
With color A, chain 27
Row 1 – 1 HDC in 3rd CH from hook. 1 HDC in each CH across. (25 STs)
Row 2 – Turn. CH 2.1 HDC in each ST across front loop only.
Row 3 – Turn. CH 2. 1 HDC in each ST across back loop only. Join color B.
Row 4 – Turn. With color B, CH 2.1 HDC in each ST across front loop only.
Row 5 – Turn. 1 HDC in each ST across back loop only.
Row 6 – Turn. CH 2. 1 HDC in each ST across front loop only. Join color C.
Row 7 – Turn. With color C, CH 2. 1 HDC in each ST across back loop only.
Row 8 – Turn. CH 2. 1 HDC in each ST across front loop only.
Row 9 – Turn. CH 2. 1 HDC in each ST across back loop only. Join color A.
Row 10 – Turn. With color A, CH 2. 1 HDC in each ST across front loop only.
Row 11 – Turn. CH 2. 1 HDC in each ST across back loop only.
Row 12 – Turn. CH 2. 1 HDC in each ST across front loop only. Join color B.
Row 13 – Turn. With color B, CH 2. 1 HDC in each ST across back loop only.
Row 14 – Turn. CH 2. 1 HDC in each ST across front loop only.
Row 15 – Turn. CH 2. 1 HDC in each ST across back loop only. Join color C.
Row 16 – Turn. With color C, CH 2. 1 HDC in each ST across front loop only.
Row 17 – Turn. CH 2. 1 HDC in each ST across back loop only.
Row 18 – Turn. CH 2. 1 HDC in each ST across front loop only. Join color A.
Row 19 – Turn. With color A, CH 2. 1 HDC in each ST across back loop only.
Row 20 – 30 – Repeat Row 2 to Row 12. Do not join new color. Fasten off.
[Optional] – With right side facing, join color B with SL ST to any corner back loop. CH 1. 1 SL ST evenly around entire edge of rug on back loop only, having 3 SL ST in each corner. Join with SL ST to 1st SL ST. Fasten off.*Please contact me or leave a comment if there’s anything wrong with the pattern! Thank you!Below photos are how I treated each time I changed the color. After I joined next color, I cut the previous color leaving little bit of length. Then I tied both ends pretty tightly and hid them in to the stitches.


I took snap shot for where the front loops and back loops are. Remember right side is the side with tail you made during foundation chain on the left.


 Reason why I decided not to treat CH 2 at beginning of each row as 1st HDC because if you do that, it makes pretty big space. I tried both ways to see how it’s gonna look, and stitches looked much better and tighter space with treating CH 2 as not HDC.
Do you see my finger in the photo? I’m not really pulling it. When you do next row above this, CH will pulled even more and creates bigger hole space.
I tried without CH 2 as well, and that made the row height shorter in the beginning. That didn’t go well either. Depending on how you crochet, long CH 1 might work though! I would suggest make small swatch and see how it would look like.
It took me many trials to get to what I like. My arms were aching a little, but I’m happy with the finished product!
Happy crocheting, everyone!

Bernat Blanket BIG IS LITERALLY BIG

![[Free Crochet Pattern] If autumn is your favorite weather, this would be perfect project! Even if there's no window or poor view of outside from your bathroom, you still can feel autumn! Hello Autumn Bath Mat by Tying An End](https://www.tyinganend.com/wp-content/uploads/2018/09/IMG_9777.jpg)
![[Free Crochet Pattern] Summer is still here! Small reminder from your bathroom! Hello Summer Bath Mat by Tying An End](https://www.tyinganend.com/wp-content/uploads/2018/08/IMG_9434.jpg)
One Comment
Pingback: