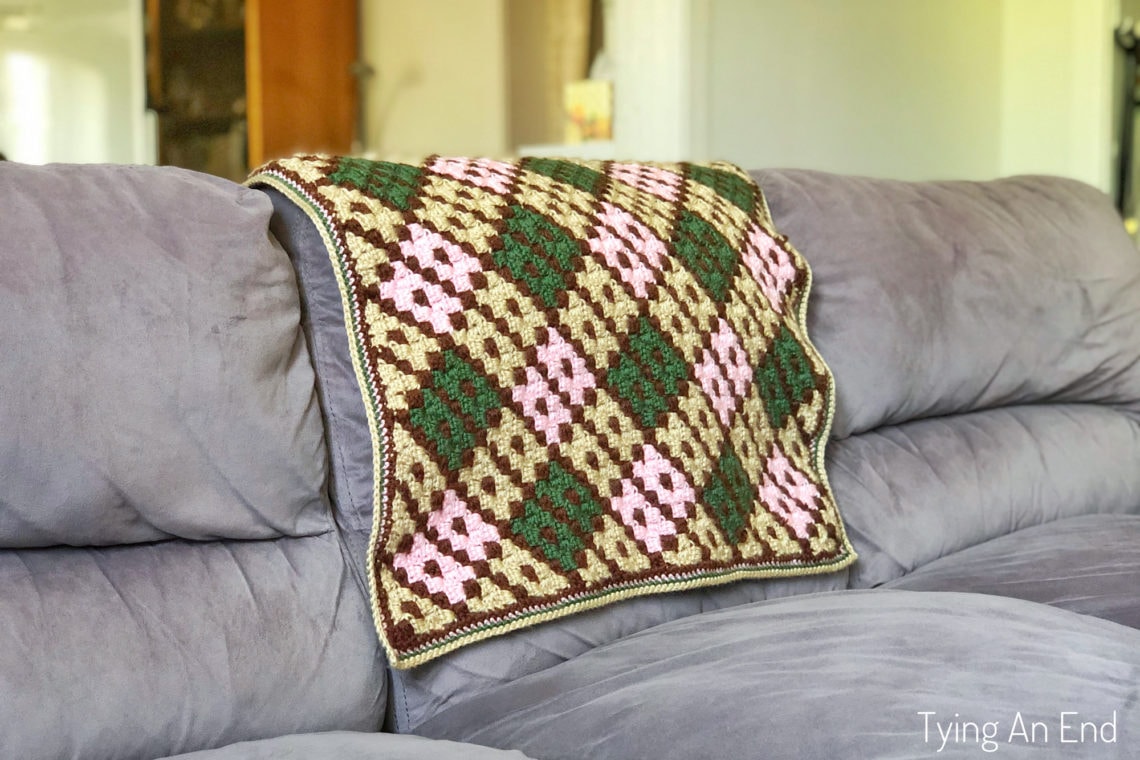
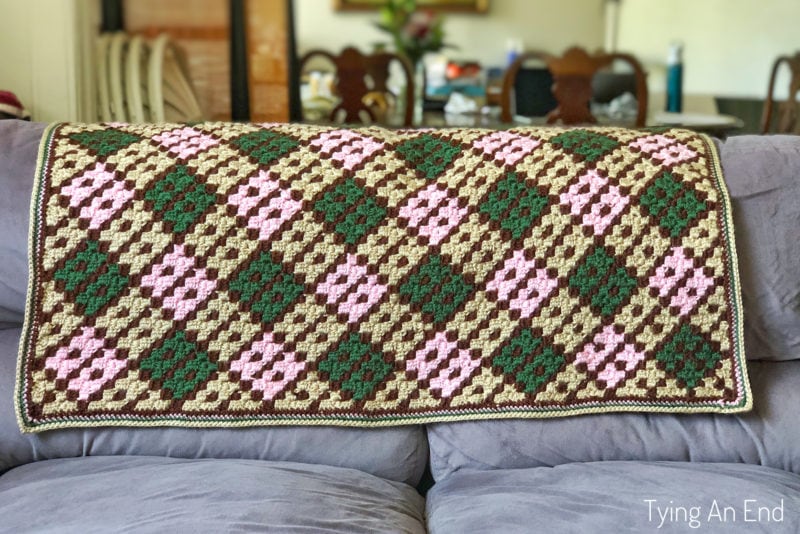
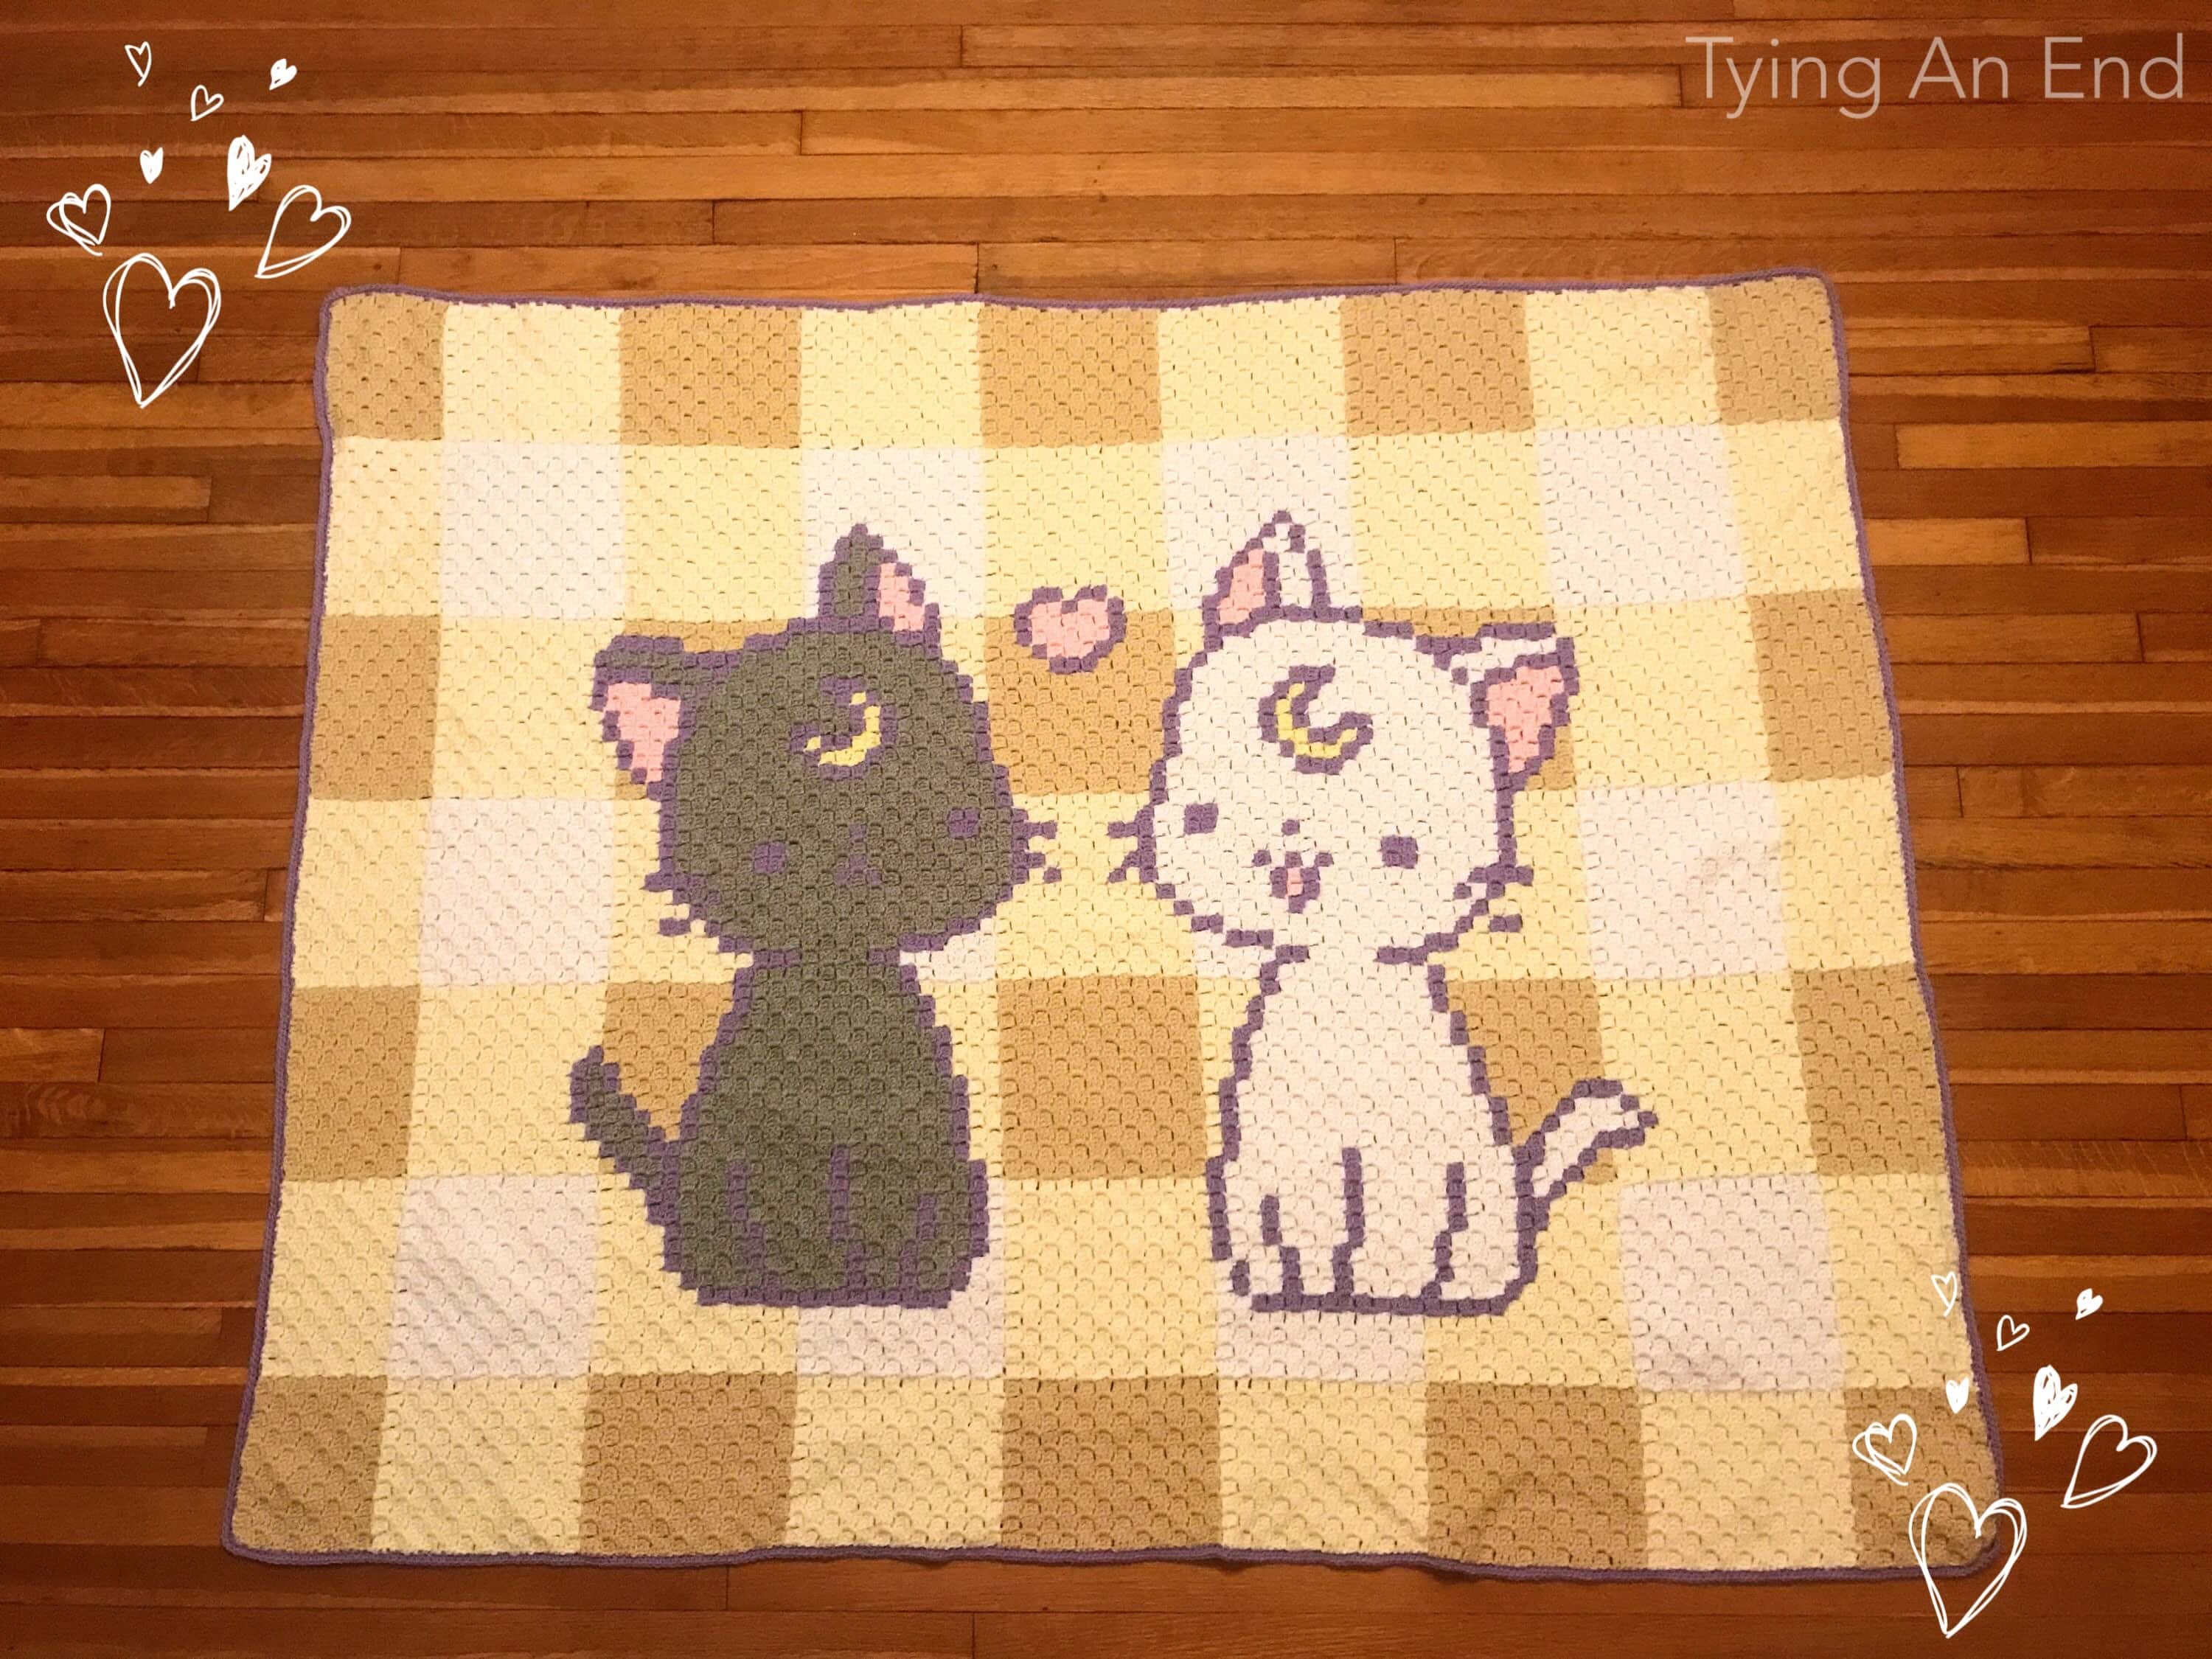
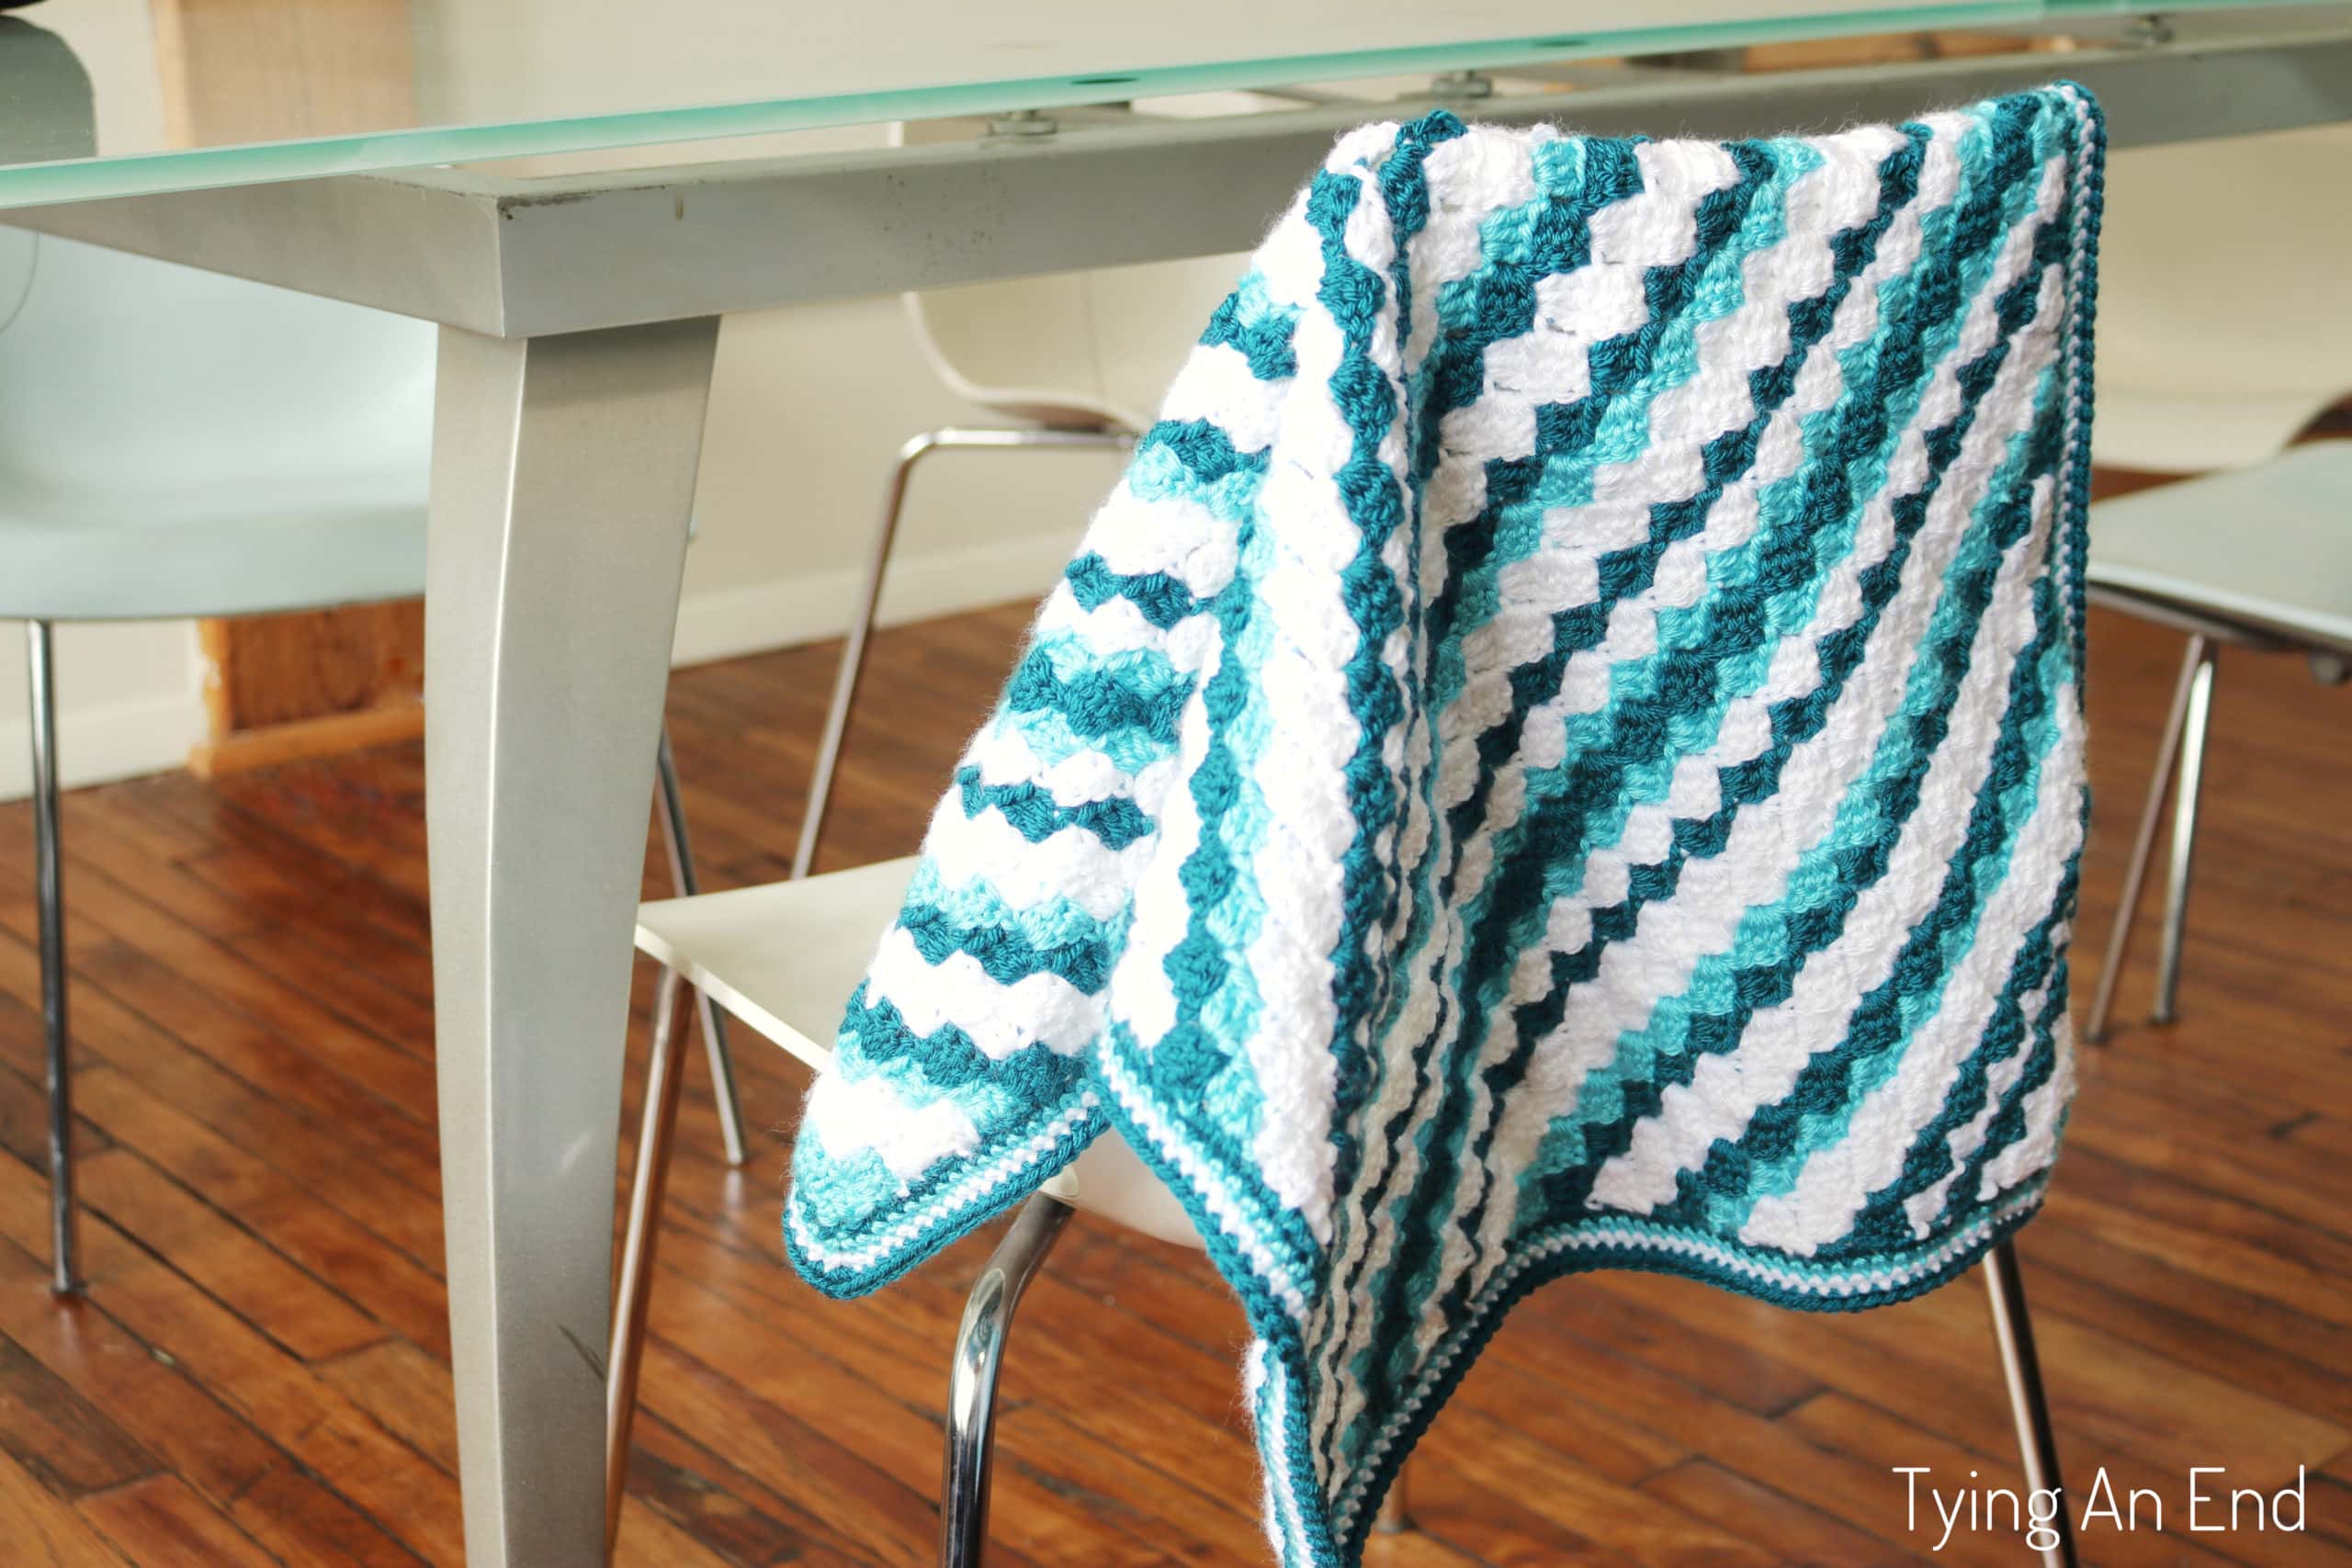
Argyle Lap Throw
This crochet argyle lap throw, using C2C technique, keeps you warm plus helps you improve on your C2C. Get the free crochet pattern below or you can purchase ad-free, printable PDF on my Etsy, Lovecrafts, or Ravelry! Written pattern and photo instructions for color change are included!
C2C (corner-to-corner) is probably one of my most favorite crochet technique out there. I love how it is so easy to make and very easy to design! This month, I would like to share with you my newest C2C design!
Inspiration
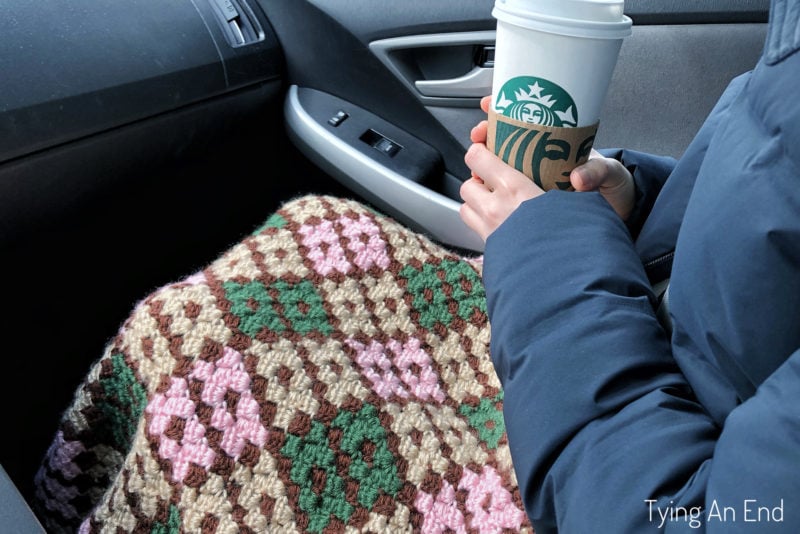
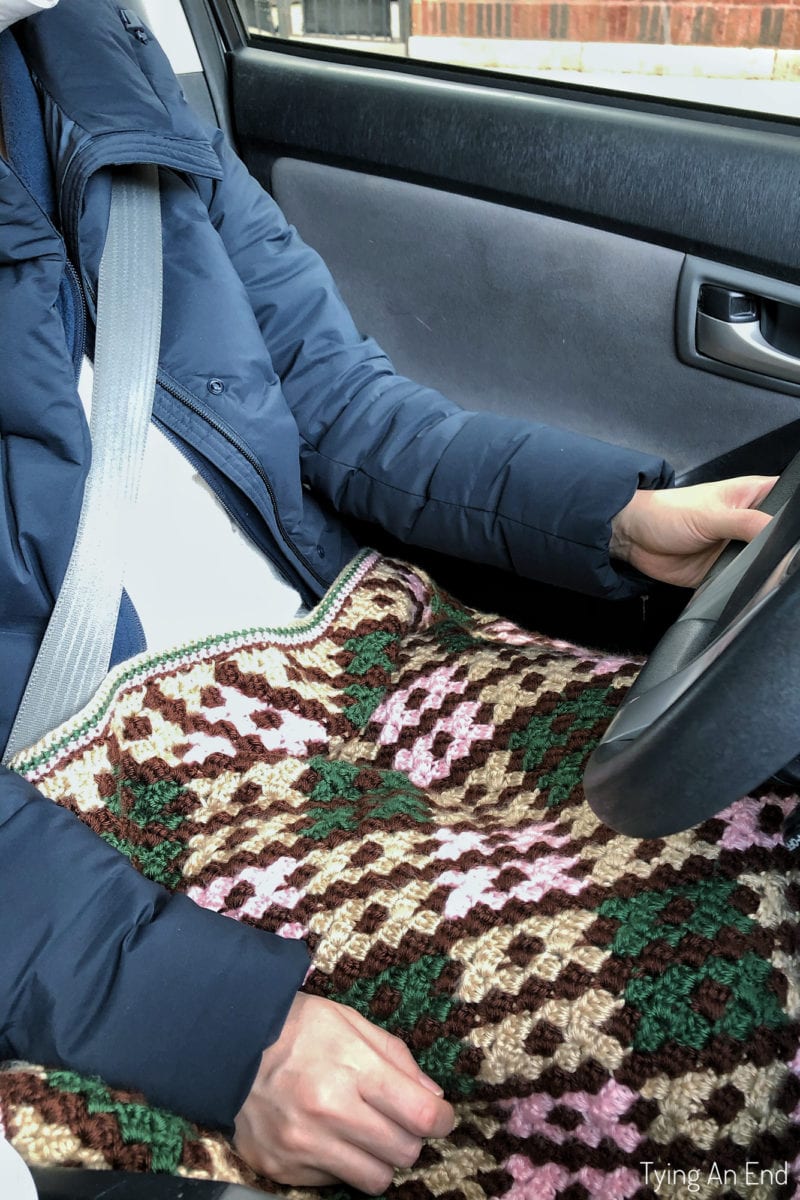
This crochet argyle lap throw is a gift for a friend who is like my older sister. She gave me a Christmas present last year, and plus as a thank-you gift for being my older-sister figure, I wanted to make something for her. One day, we were walking together in a cold winter weather. If you ever been in Chicago during winter season, oh it’s ridiculously cold. My feet feel like they are constantly cold. It takes quite long time to warm up your car, too. As we both experience this cold weather every year, I knew lap throw would be perfect for a gift. I already have a lap throw in my car, and it helps soooooo much! I use it all the time for keeping my legs warm!
Slightly Challenging for Beginner
I chose argyle design for this lap throw because (1) my friend chose 4 colors and (2) I’ve wanted to try this design. Stitch Fiddle is my go-to pattern design resource when it comes to C2C for its easy process (and their subscription is very reasonable price with more functions available!) Initially, I was going to make it with double crochet like usual. However, when I calculated how big it was going to be with the graph I designed, it was going to be way too big as a lap throw. So I decided to make it with half double crochet. After I switched the stitch, it worked out perfectly! It was working out pretty easy until I hit about half way…
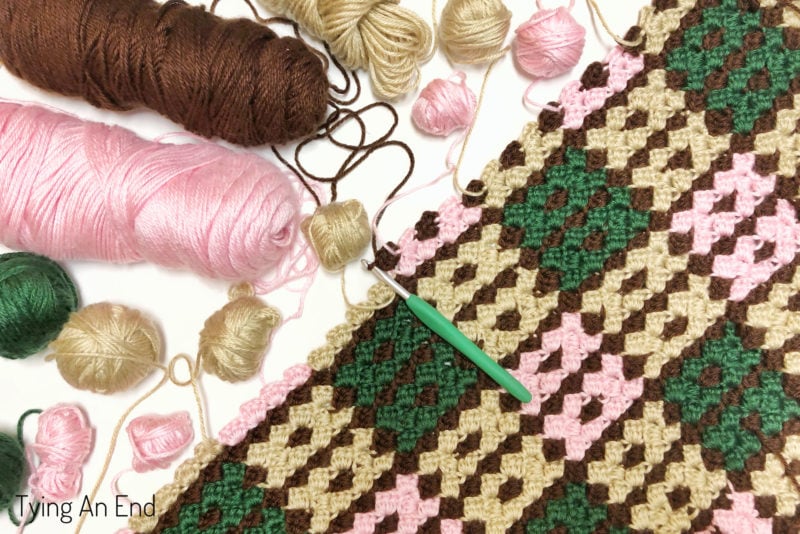
About half way into the design, I realized I have 11 yarn ends! That’s quite a lot to work with for beginners, in my opinion. You’re going to have multiple small bobbles/balls and you need to be careful not to get tangled.
Pin it now, crochet later!

Boundless Number of Color Choice
I used Caron Simply Soft, which is slightly thinner than typical worsted weigh (category 4) yarn. (this yarn is used for my Disney Christmas ornaments!) I love how there are so many colors to choose from! You can choose to pick out 4 different colors or eliminate 1 color (color C or D in the pattern) If you decide to use different yarn, just make sure you make gauge swatch first! Otherwise, your finished lap throw might end up too big or too small when you follow the pattern exactly. You can always eliminate rows to make it smaller or add more rows to make it bigger (both in increment of 8 rows)!
MATERIALS:
- Caron Simply Soft [1 skein = 315yd/288m, 6oz/170g, category 4 – medium/worsted weight]
- 2 skeins of Color A (photo shown “Bone”)
- 2 skeins of Color B (photo shown “Chocolate”)
- 1 skein of Color C (photo shown “Soft Pink”)
- 1 skein of Color D (photo shown “Dark Sage”)
- US I/5.5mm crochet hook
- Tapestry needle
- Stitch marker (optional)
PATTERN NOTES:
- Size – about 23″ x 36.5″ (58.42cm x 92.71cm)
- Gauge – 7.5 x 7.5 squares = 4″ x 4″
- Work in half double crochet C2C (corner-to-corner)
- ” (type of a stitch) #” means to make an indicated stitch into the next indicated number of stitches.
- Example: if pattern calls out for “HDC 4”, make 1 HDC in next 4 stitches
- ” #(type of a stitch)” means to make an indicated number of stitches into the same stitch.
- Example: if pattern calls out for “3SC”, make 3 SC into the same stitch
- I highly recommend dividing 1 skein of Color A into 5 balls. It would be much easier to work around.
- For less yarn ends to weave in, I recommend to not cut Color A when you switch to another color.
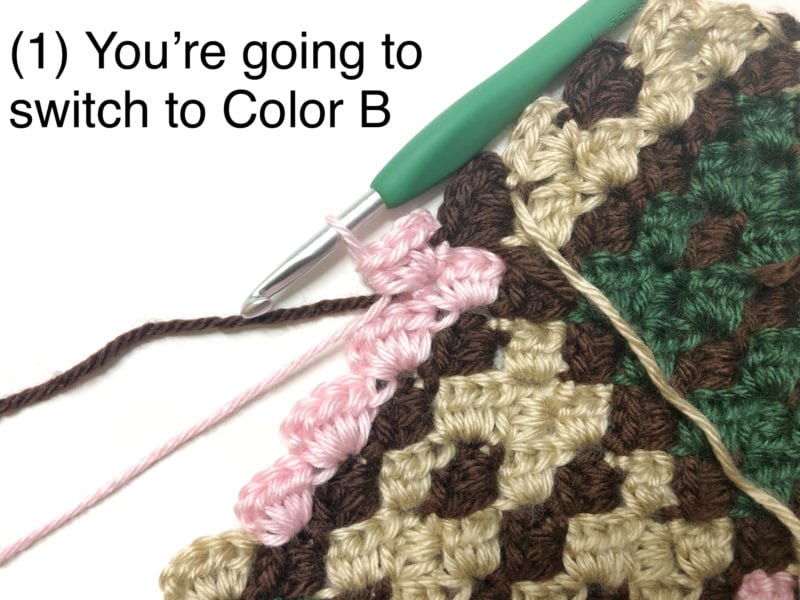
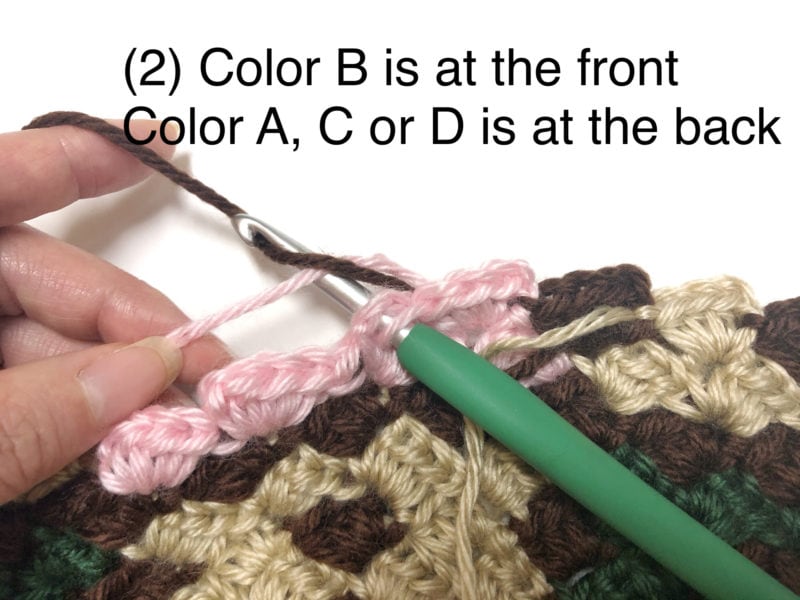
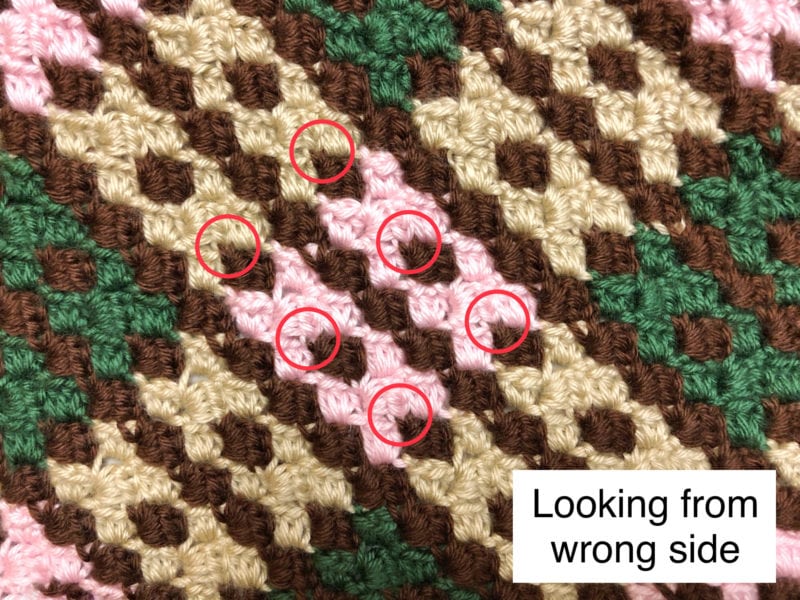
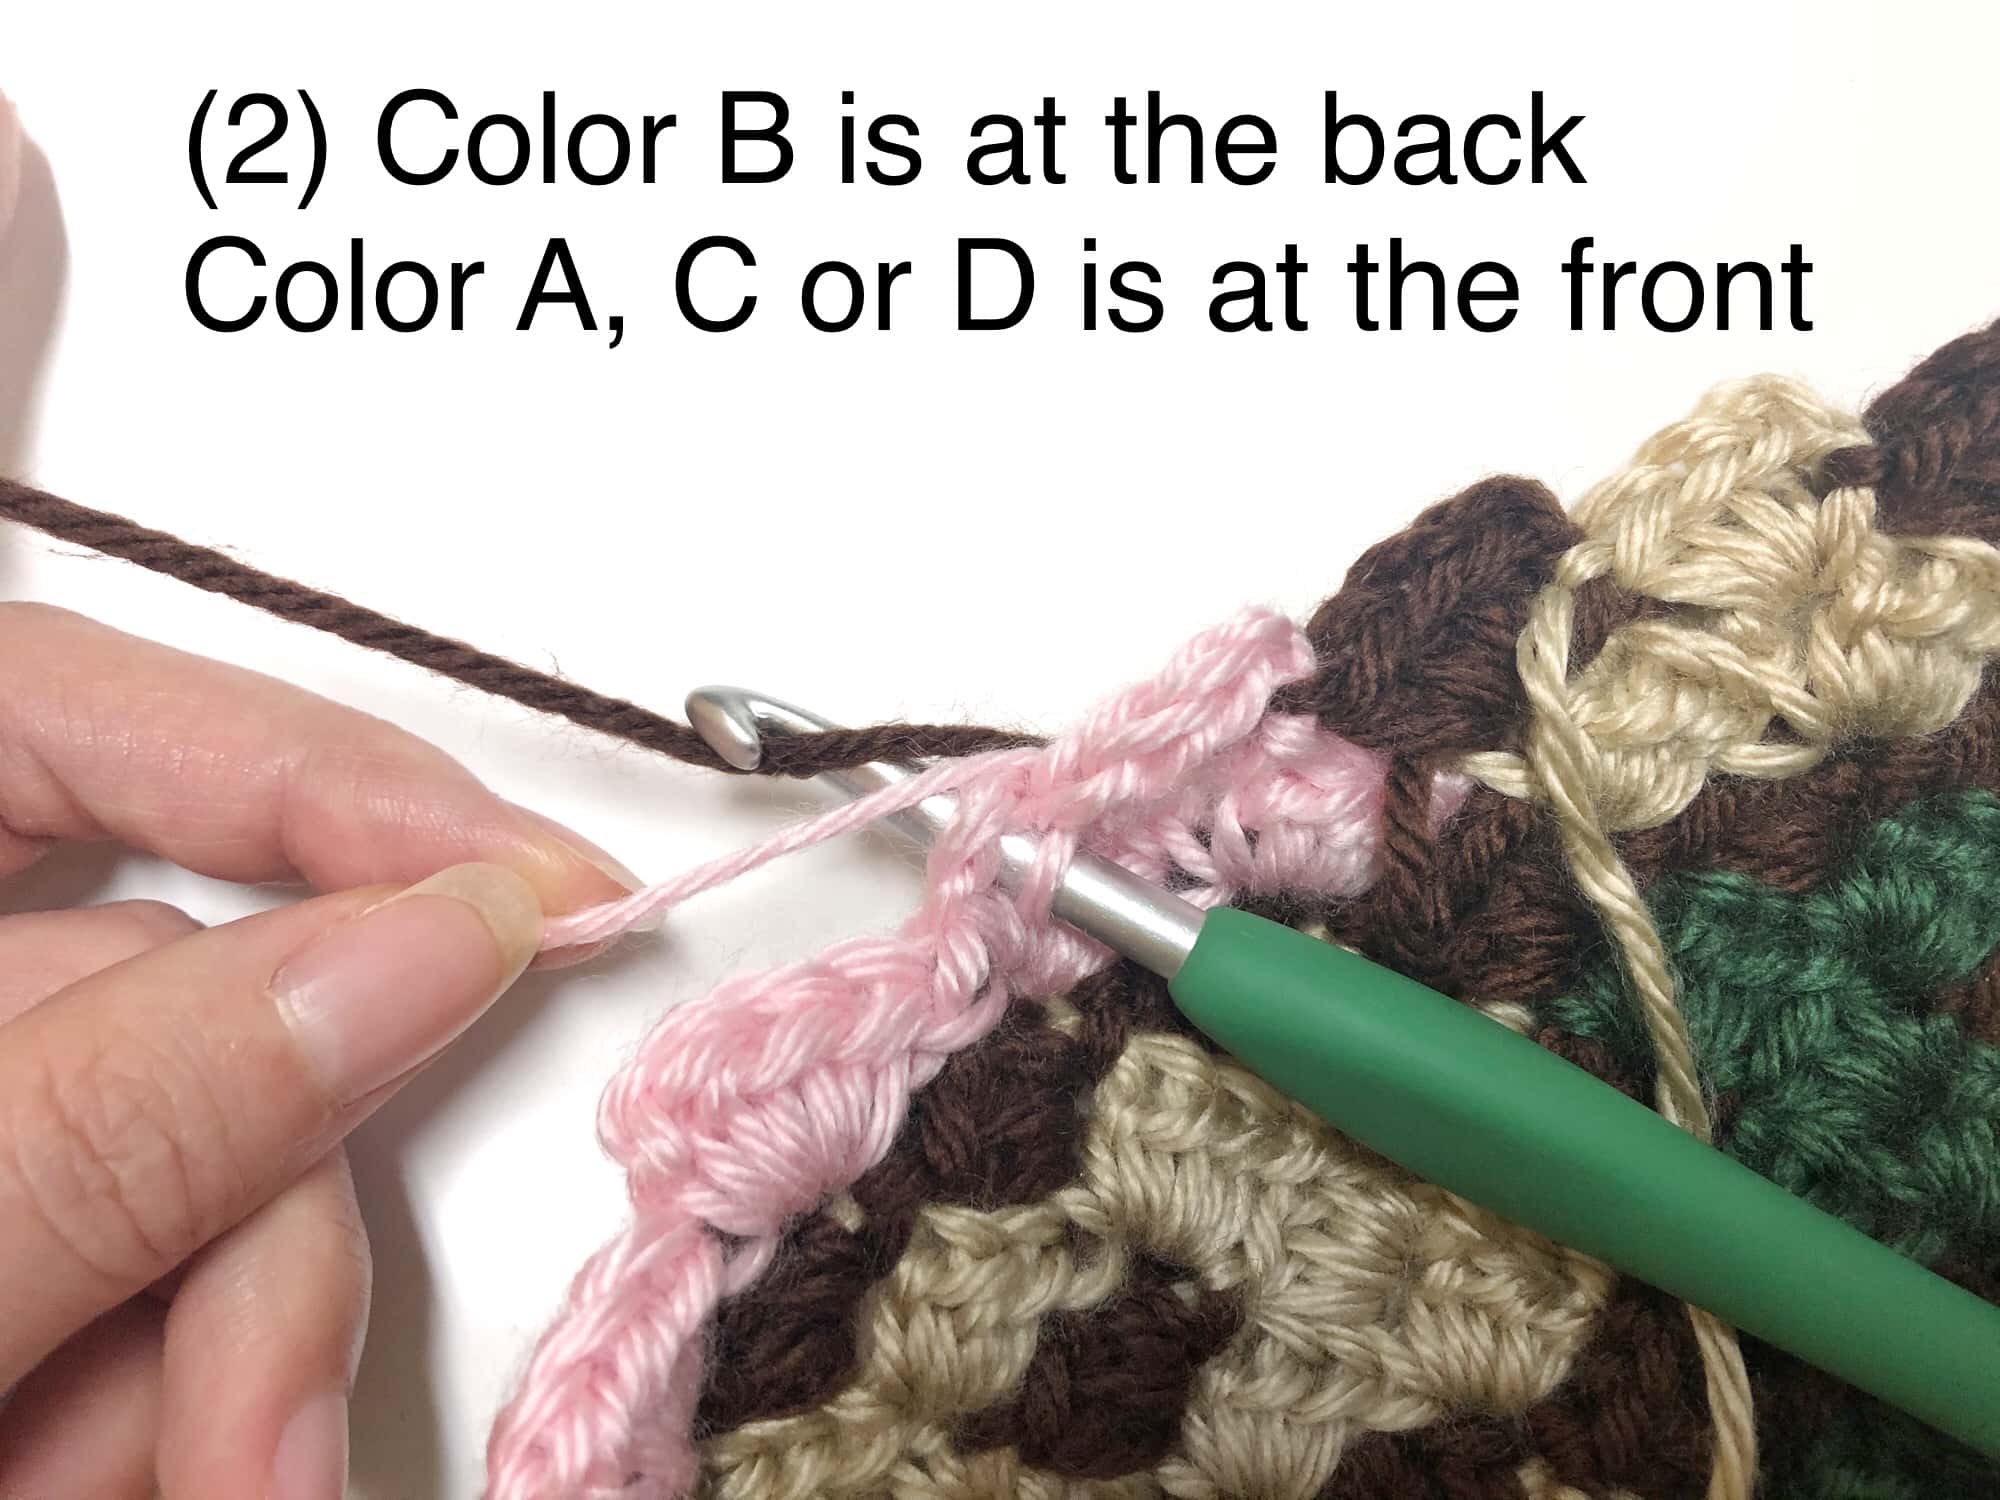
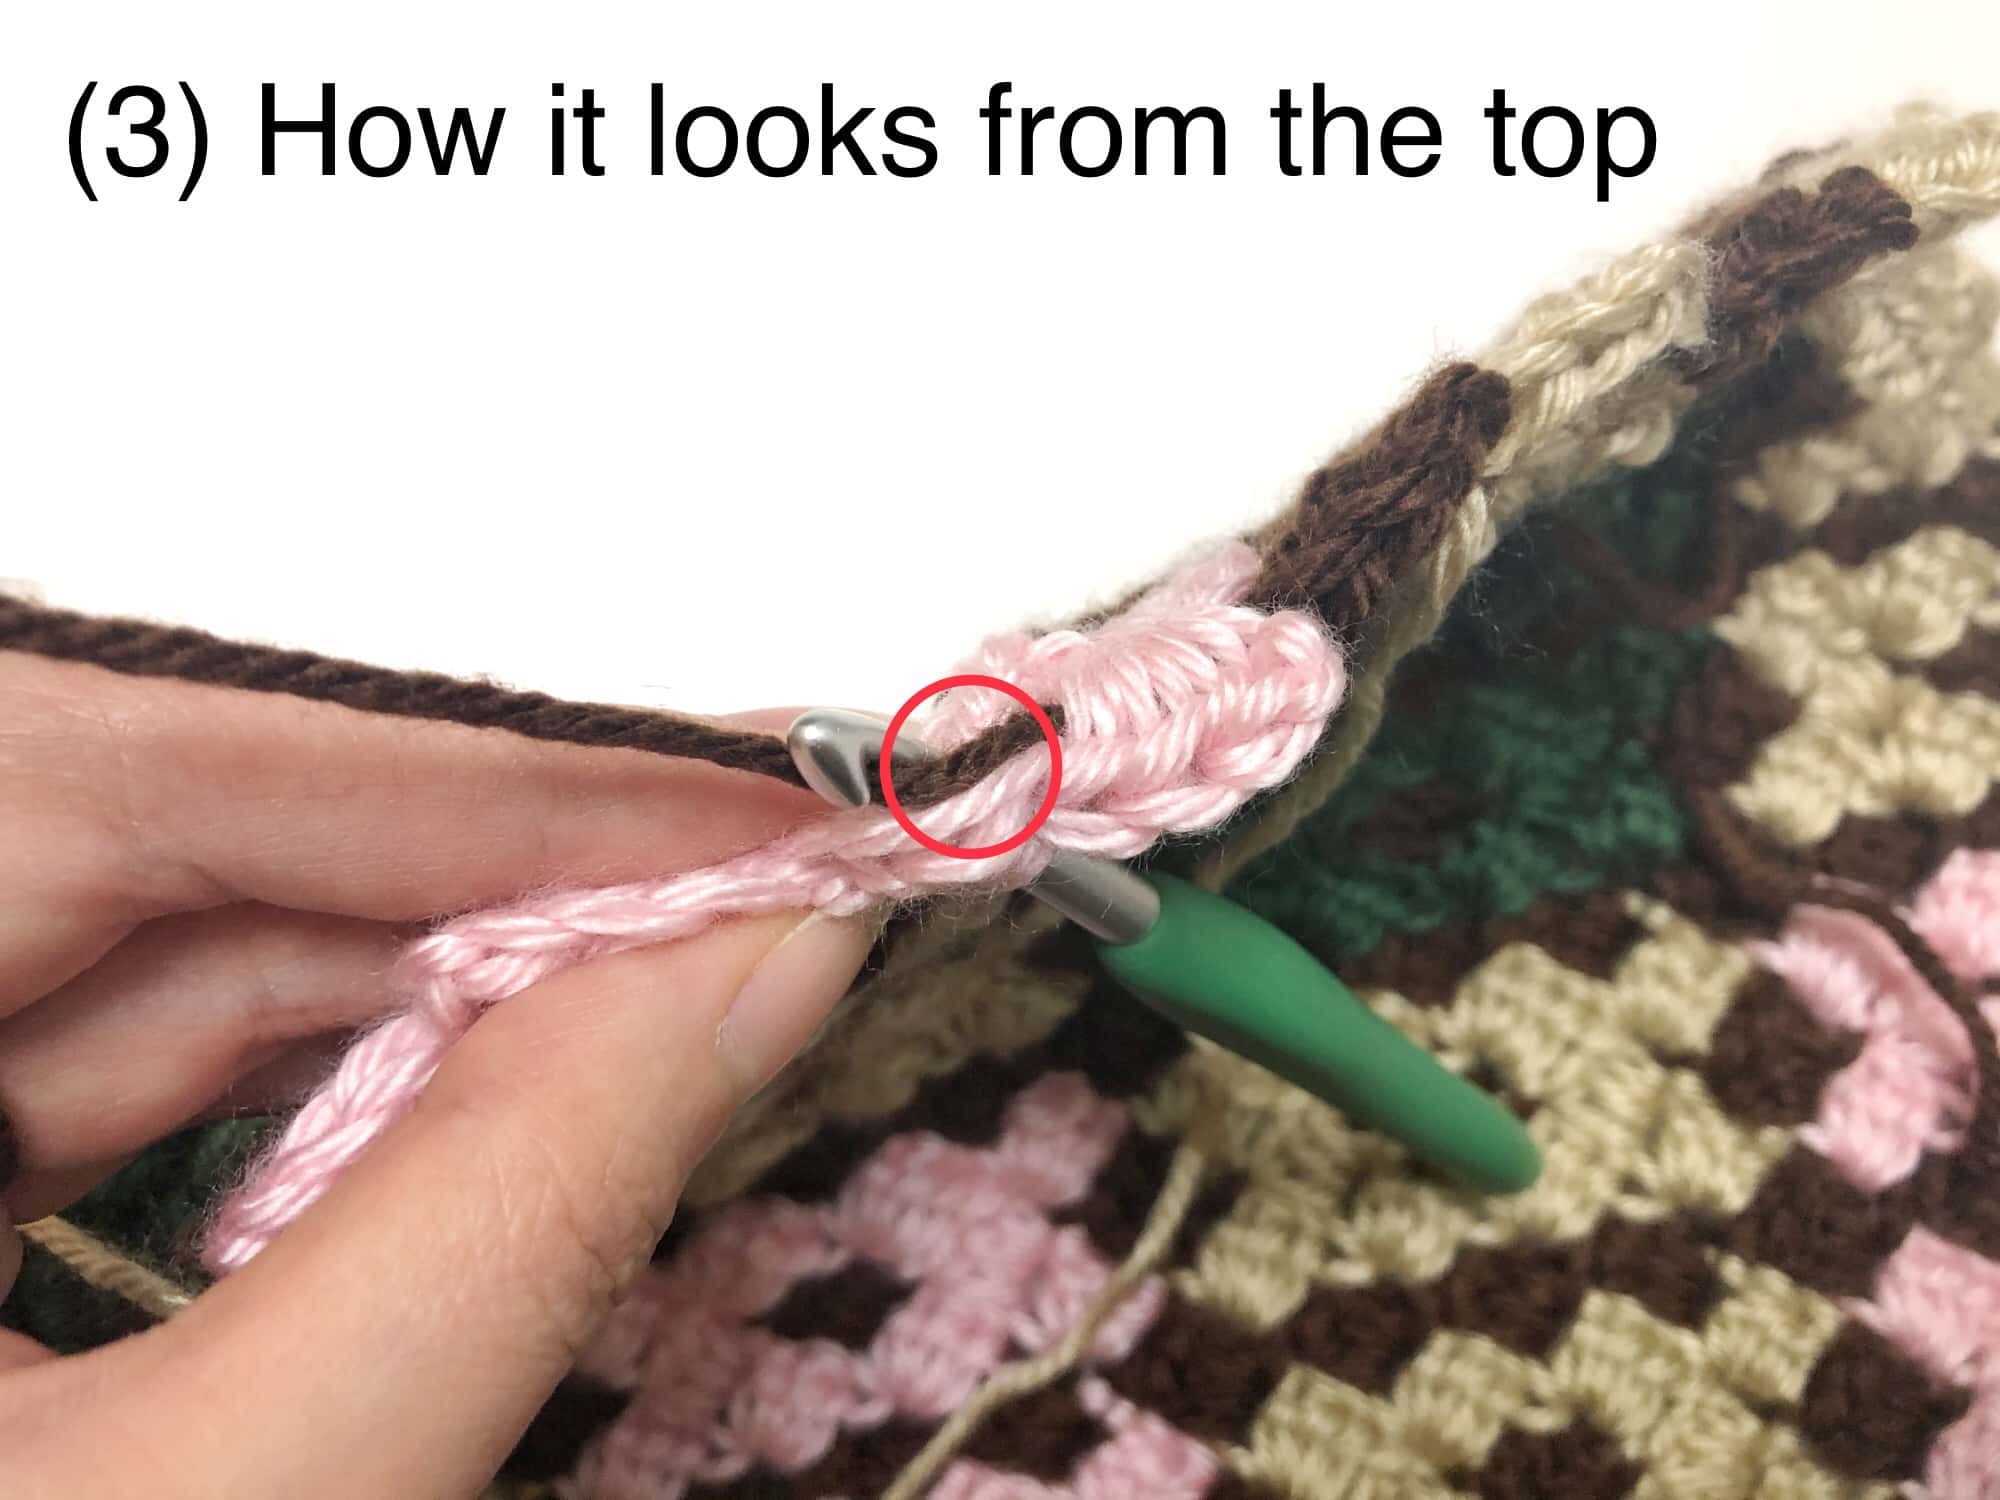
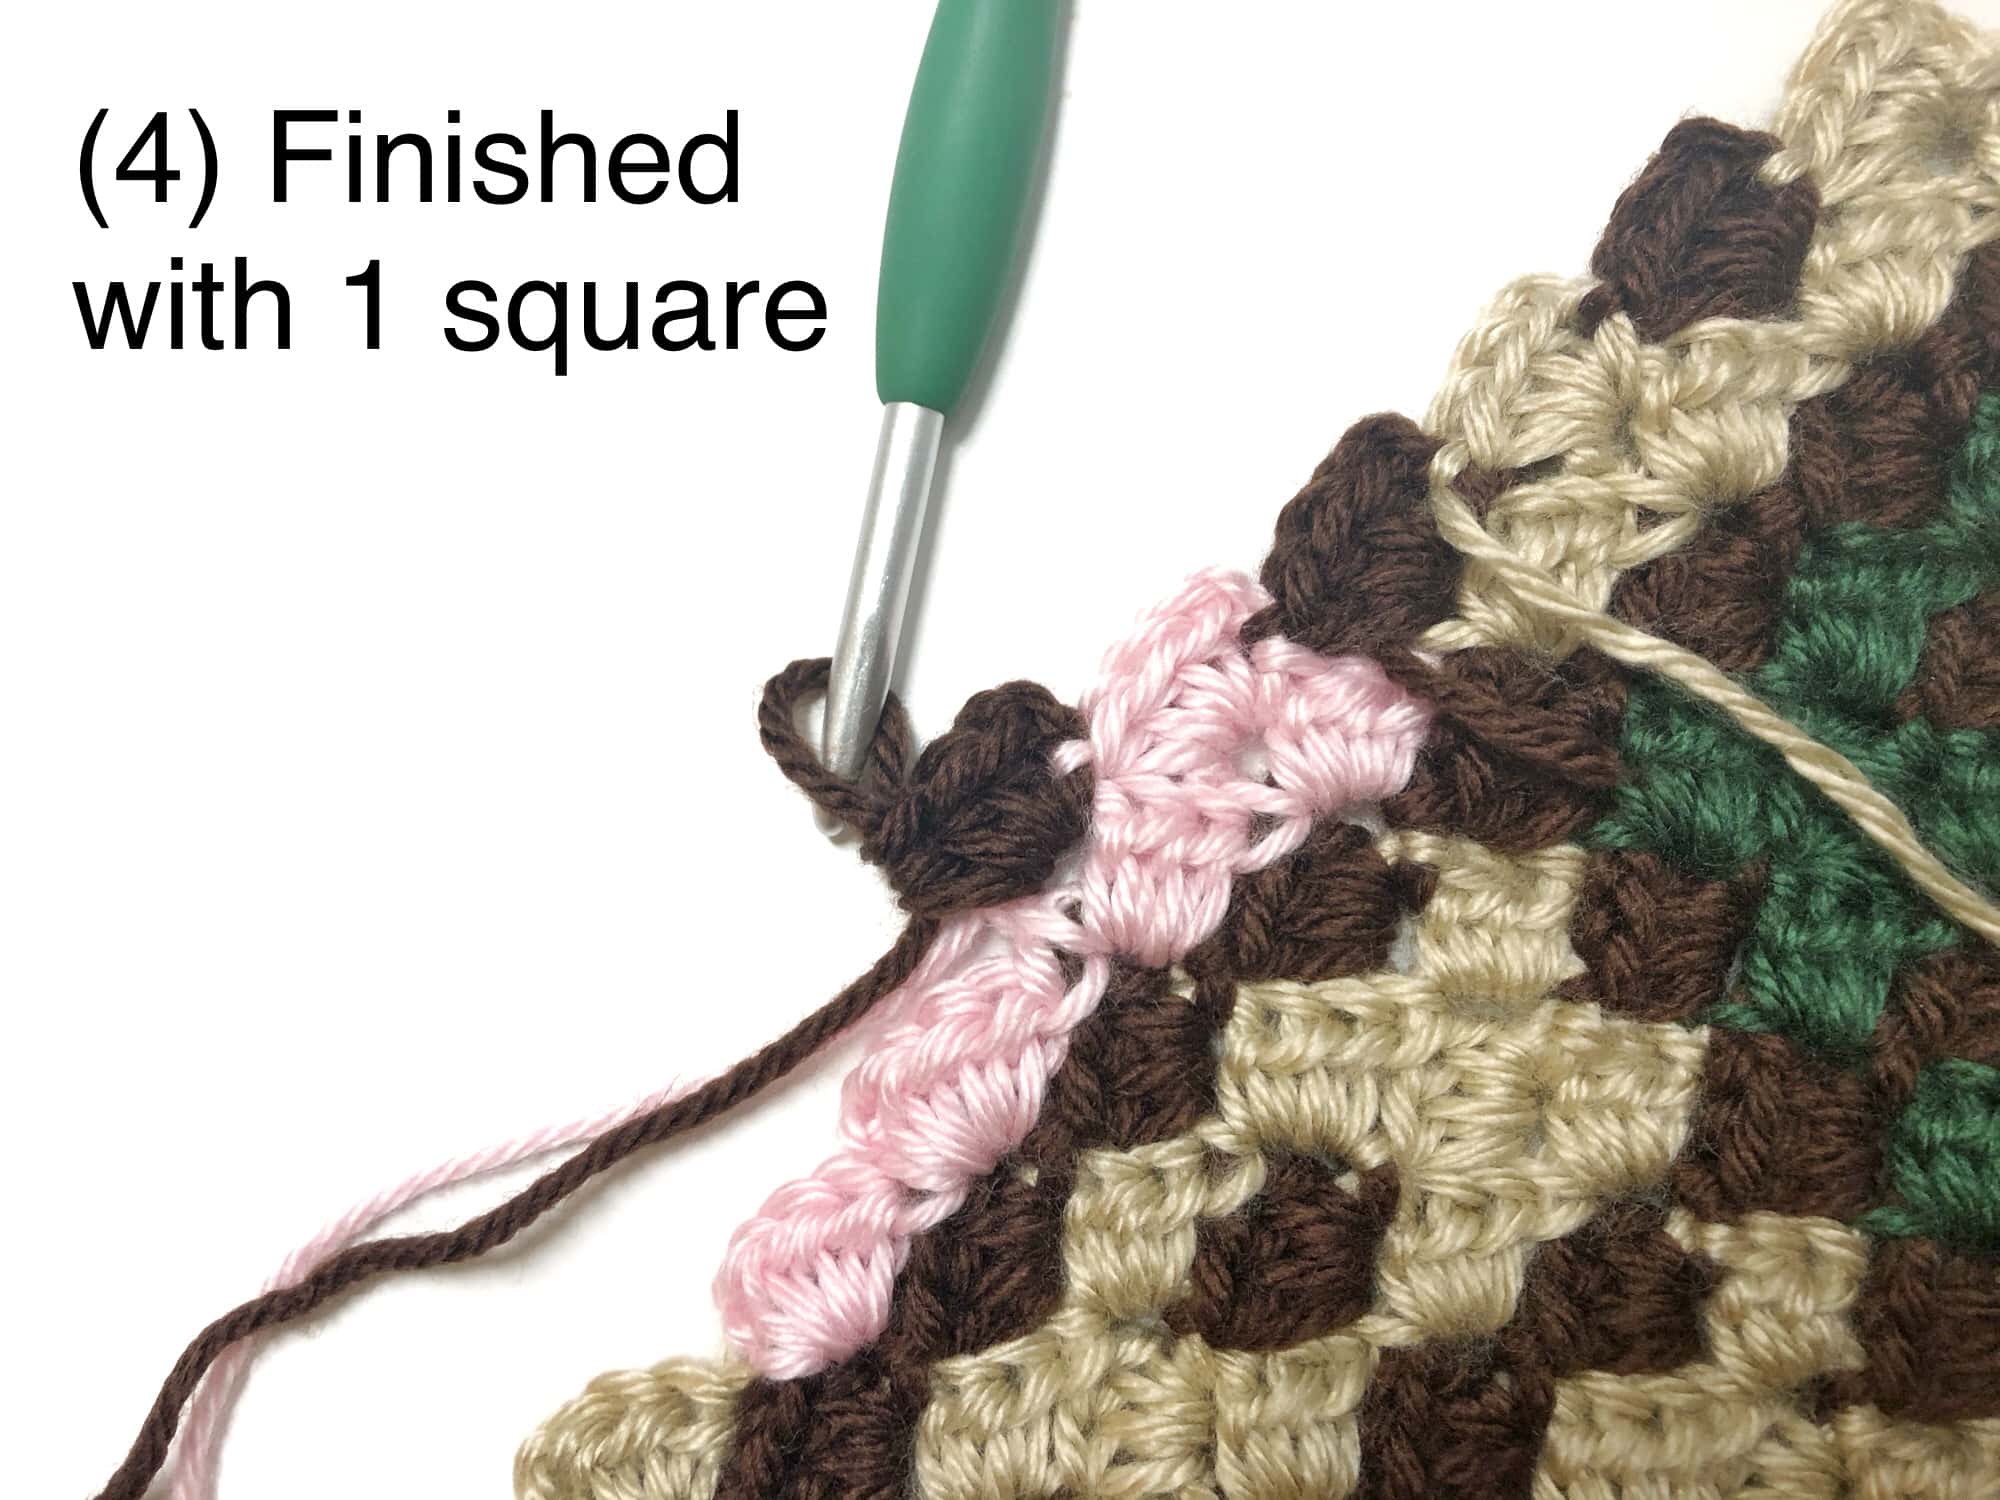
- See photo instructions for cleaner color change for Row 3 and every next 4th row (Row 7, 11, 15, ect.) You will be carrying across Color B until the end of those rows.
- Check out my post on how to C2C HERE
ABBREVIATIONS:
- CH – chain stitch
- HDC – half double crochet
- SC – single crochet
- SL ST – slip stitch
INSTRUCTIONS:
Download the graph HERE (written pattern and photo instructions for color change are included in the paid version of PDF. Purchase from Etsy, Lovecrafts, or Ravelry!)
After you finish with the C2C graph, make borders.
Round 1 – With Color B, SL ST anywhere on the edge. SC around evenly. (I did 2SC in HDC side and 3SC in CH space). For each corner, make (SC, CH 2, SC). SL ST to 1st SC. Change to Color C.
Round 2 – CH 1. SC around evenly. For CH-2 space on each corner, make (SC, CH 2, SC). SL ST to 1st SC. Change to Color D.
Round 3 – CH 1. SC around evenly. For CH-2 space on each corner, make (SC, CH 2, SC). SL ST to 1st SC. Change to Color A.
Round 4 – CH 1. SC around evenly. For CH-2 space on each corner, make (SC, CH 2, SC). SL ST to 1st SC.
Fasten off and weave in ends.
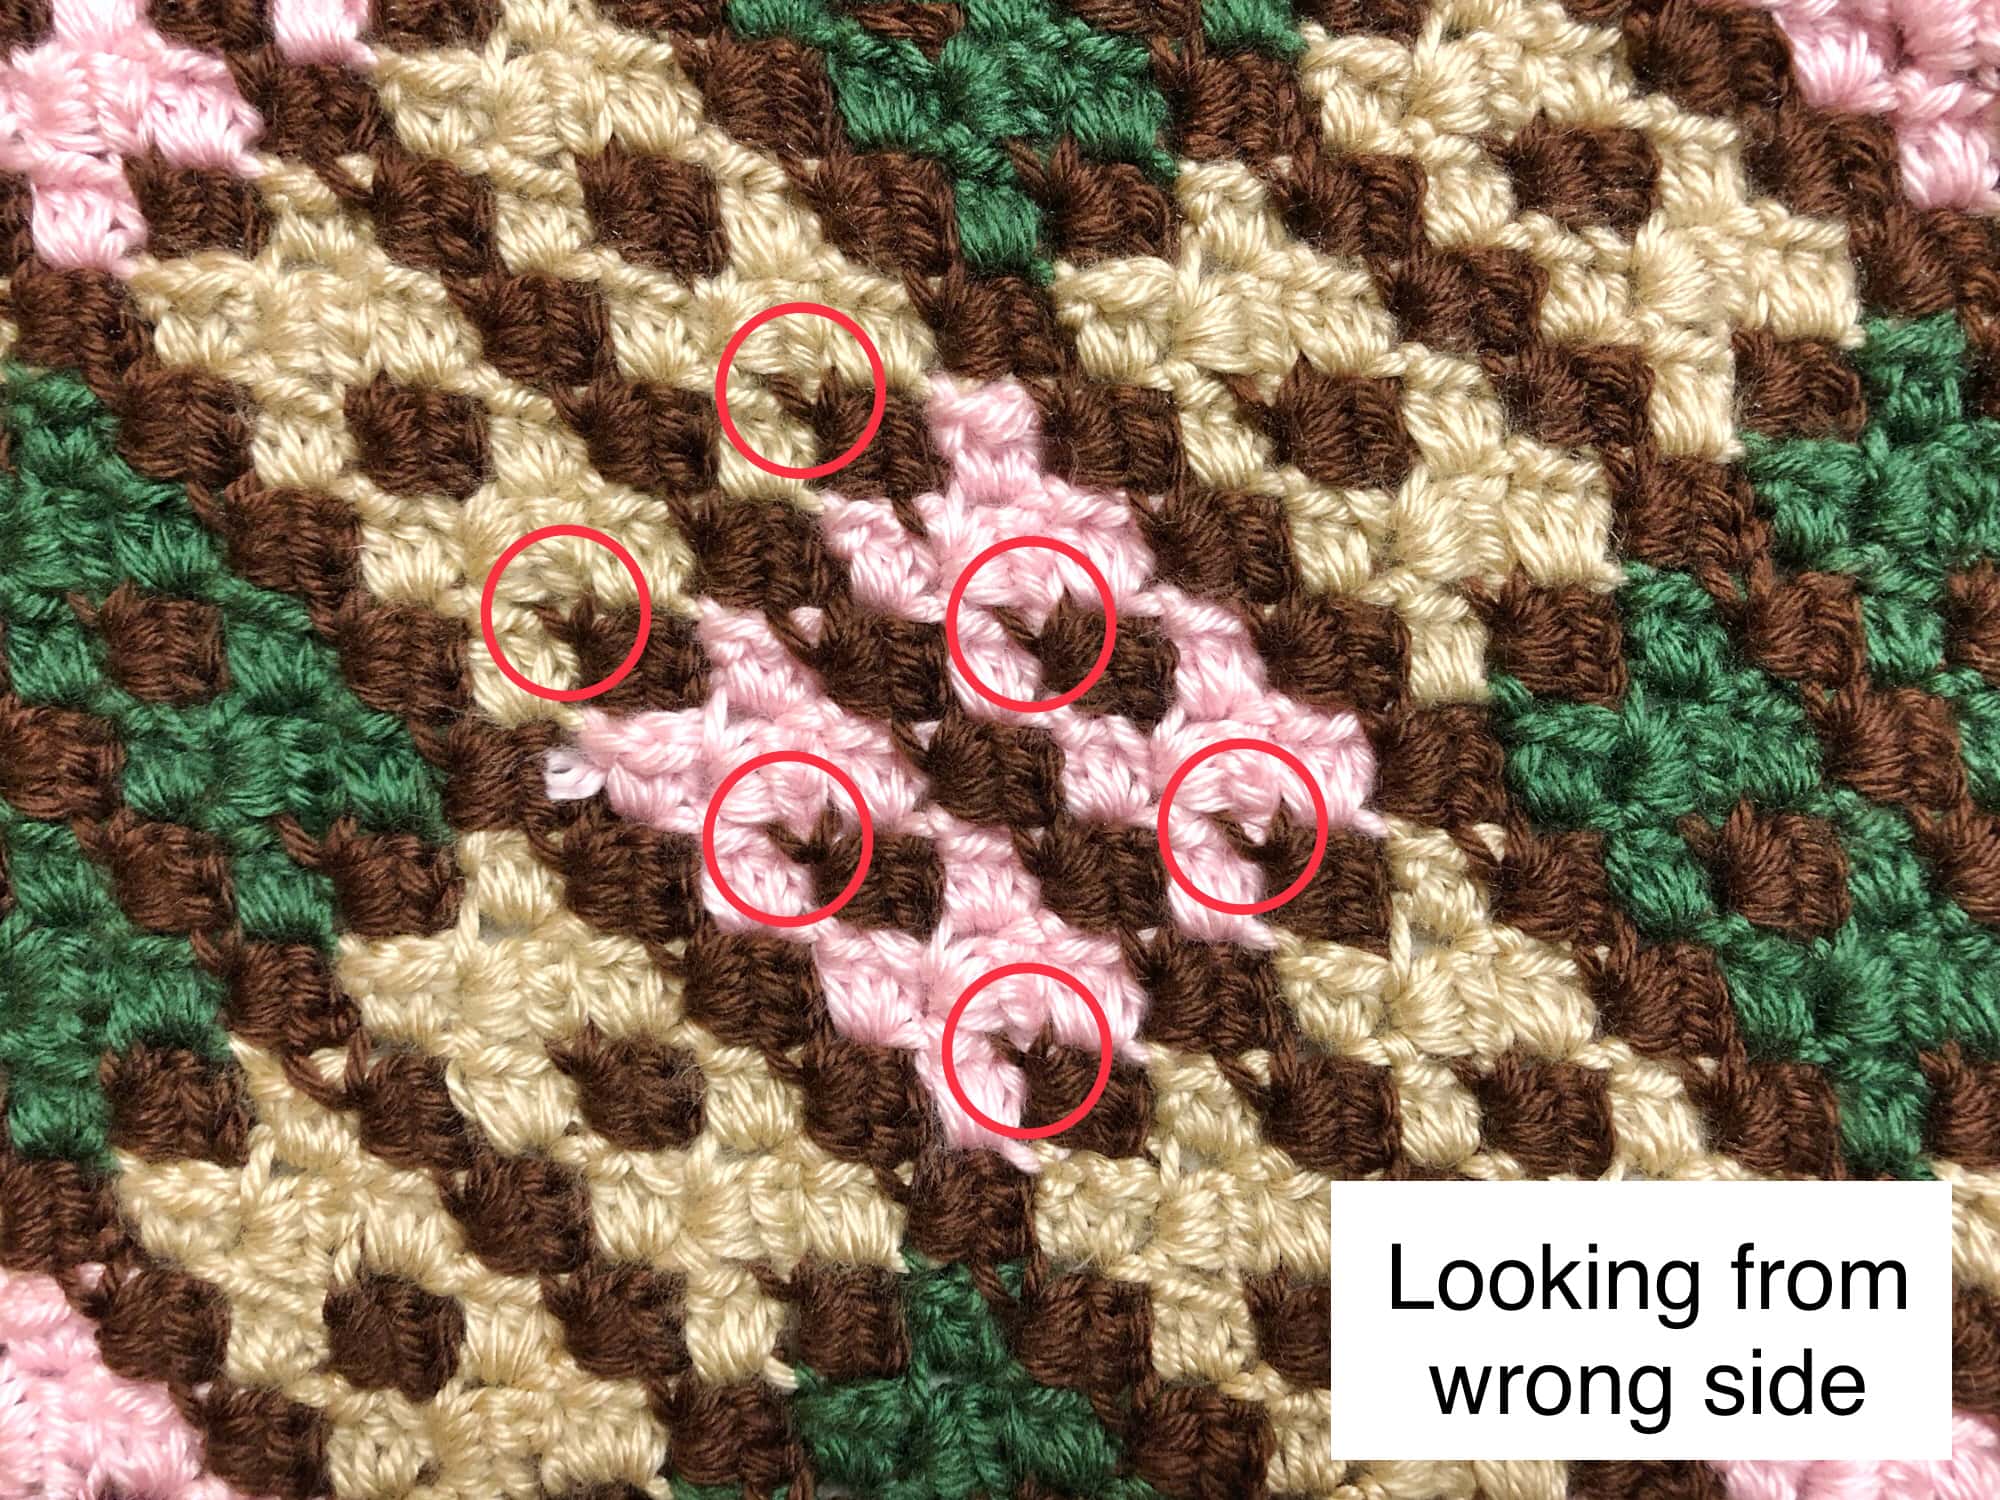
PHOTO INSTRUCTIONS:
This is one simple step you want to do for cleaner color change. It is a slight difference, but it looks much better. Since this lap throw is reversible, you want your finished piece to look as good as you can make.
WHAT TO DO

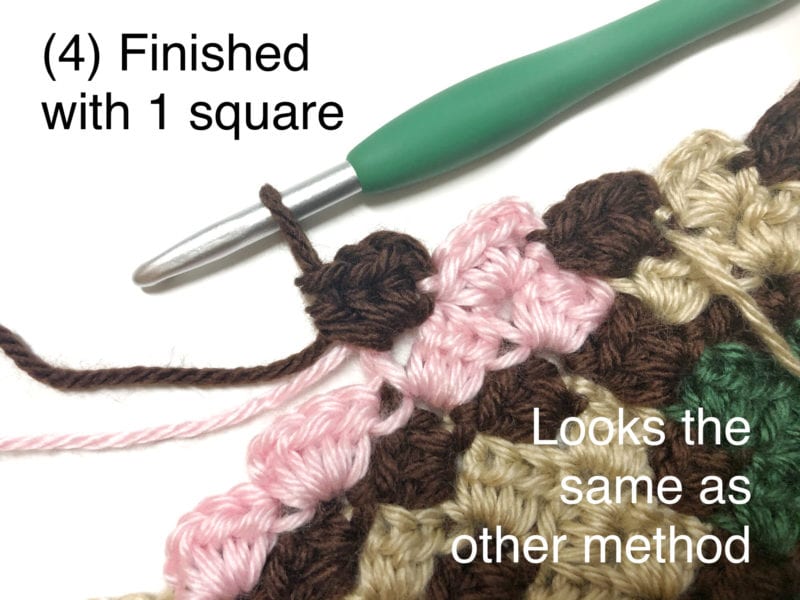

Now below is typical way of doing when changing color in C2C. I highly recommend doing ABOVE step!
WHAT NOT TO DO


I can’t wait to see all your crochet Argyle Lap Throw! Please tag me @tyinganend and use hashtag #tyinganend & #argylelapthrow on Instagram so I can see your beautiful throw!
Thank you for reading and happy crocheting!

This pattern is an original pattern by Tae of Tying An End. Please do not claim this pattern as your own. If you wish to share this pattern, please link to this pattern and do not copy and paste it on to your site. You may keep a copy for your own personal use but please do not sell the pattern or distribute it. Please see Disclosure & Terms of Use for more info.


One Comment
Pingback: